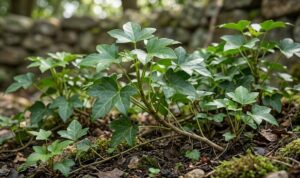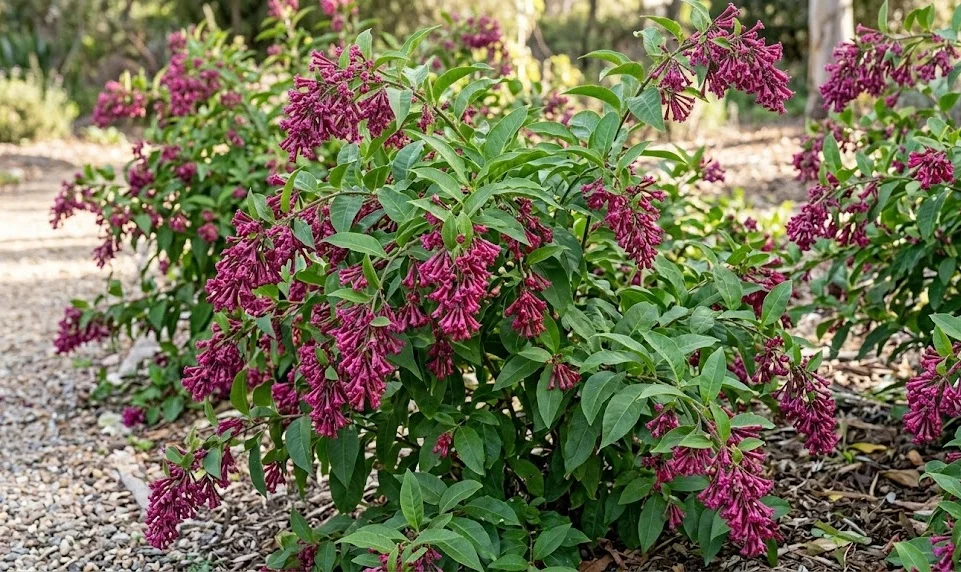
Establishing a red cestrum in your garden begins with choosing the right location and understanding the best methods for expanding your collection. This shrub is remarkably versatile, but its initial success is heavily dependent on the quality of the planting process. Whether you are starting with a nursery-bought specimen or trying to grow new plants from scratch, attention to detail is paramount. Proper technique during these early stages ensures a healthy root system and vigorous top growth for years to come.
Site selection
The first step in planting a red cestrum is identifying a spot that meets its specific biological requirements. It thrives best in a location that receives ample sunlight but is protected from the harshest midday rays in hotter climates. A spot with eastern exposure is often ideal, as it provides bright morning sun followed by cooling afternoon shade. This balance prevents leaf scorch while still providing enough energy for heavy flowering.
Soil quality and drainage should be evaluated at the potential site before any digging begins. You can perform a simple drainage test by digging a hole and filling it with water to see how quickly it disappears. If the water lingers for several hours, you will need to amend the soil or choose a different location. The site should also be protected from strong, prevailing winds that could damage the long, arching branches.
Consider the ultimate size of the shrub when choosing a permanent home for it in the landscape. It can easily reach a height and width of several feet, so it should not be crowded by buildings or other large plants. Leaving enough room for growth ensures that the plant develops a natural, elegant shape without constant heavy pruning. Thinking ahead about the space requirements will save you a lot of maintenance effort in the future.
Accessibility for maintenance is another practical consideration when selecting a site for your red cestrum. You will need to reach all sides of the plant for pruning, watering, and occasional pest inspections. Avoid planting it in deep corners or behind dense thickets where it might be forgotten or difficult to care for. A well-placed shrub is easier to monitor and more likely to receive the consistent care it needs to thrive.
More articles on this topic
Planting procedure
Once the site is selected, the actual planting process should be handled with care to minimize transplant shock. Dig a hole that is twice as wide as the root ball but no deeper than the container it is currently in. This allows the roots to spread out into loosened soil without the plant sinking too deep into the ground. A plant that is buried too deeply may suffer from stem rot and poor oxygen exchange.
Before placing the shrub in the hole, gently loosen any circling roots you find on the outside of the root ball. This encourages the roots to grow outward into the surrounding soil rather than continuing to grow in a tight circle. Position the plant in the center of the hole and ensure it is standing perfectly upright. If the plant is particularly tall or top-heavy, you may want to install a temporary stake at this stage.
Backfill the hole with a mixture of the original soil and high-quality organic compost or well-rotted manure. Press the soil down firmly with your hands to remove any large air pockets that could dry out the roots. Avoid using your feet to tamp the soil, as this can lead to excessive compaction that hinders root development. The soil surface should be level with the top of the root ball when you are finished.
Immediately after planting, provide the shrub with a deep and thorough watering to settle the soil and hydrate the roots. This initial watering is crucial for establishing good contact between the root system and the new environment. You may notice some minor wilting in the first few days, which is a normal reaction to the transition. Keeping the soil consistently moist but not soggy during the first few weeks is the key to successful establishment.
More articles on this topic
Stem cuttings
Propagating the red cestrum from stem cuttings is a highly effective way to create new plants that are identical to the parent. The best time to take cuttings is in the late spring or early summer when the plant is in a state of active growth. Select healthy, semi-hardwood stems that are free from pests or signs of disease for the best results. Each cutting should be about four to six inches long and contain several nodes.
Prepare the cuttings by removing the lower leaves and dipping the cut end into a rooting hormone powder or gel. This hormone stimulates the production of new roots and increases the success rate of the propagation attempt. Plant the cuttings in a well-draining rooting medium, such as a mix of peat moss and perlite. Ensure that at least one or two nodes are buried beneath the surface of the soil.
Maintaining high humidity around the cuttings is essential until they develop their own root systems. You can achieve this by covering the pots with a clear plastic bag or placing them in a specialized propagation tray with a dome. Keep the cuttings in a warm spot with bright, indirect light, avoiding direct sunlight which could overheat the mini-greenhouse. Mist the foliage regularly to prevent the stems from drying out before they can take up water.
After a few weeks, you can check for root development by giving the cuttings a very gentle tug. If you feel resistance, it means roots have begun to form and the plant is starting to establish itself. Gradually acclimated the new plants to lower humidity by removing the cover for increasing periods each day. Once they have a robust root system, they can be transplanted into individual pots with regular potting soil.
Seed propagation
While less common than cuttings, growing red cestrum from seeds can be a rewarding challenge for patient gardeners. The seeds are typically found within the dark berries that form after the flowering season has concluded. Collect the ripe berries and carefully extract the seeds, cleaning away any fruit pulp that might inhibit germination. It is best to sow the seeds while they are relatively fresh for the highest germination rates.
Sow the seeds in a tray filled with a light, sterile seed-starting mix and cover them with just a thin layer of soil. They require consistent warmth and moisture to break dormancy and begin the growth process. A heat mat placed under the seed tray can help maintain a steady temperature of around 70 degrees Fahrenheit. Be patient, as germination can sometimes be irregular and take several weeks to occur.
Once the seedlings emerge, they will need plenty of bright light to prevent them from becoming thin and leggy. Move the tray to a sunny windowsill or place it under grow lights for twelve to fourteen hours a day. When the seedlings have developed their second set of true leaves, they are ready to be thinned or moved to larger containers. Handle the young plants very gently, as their stems and roots are quite delicate at this stage.
As the young plants grow, they should be gradually introduced to outdoor conditions through a process called hardening off. Start by placing them in a sheltered outdoor spot for an hour or two each day, slowly increasing the duration over a week. This transition period helps the plants build the strength needed to survive the wind and fluctuating temperatures of the garden. Once they are strong enough, they can be planted in their permanent locations.