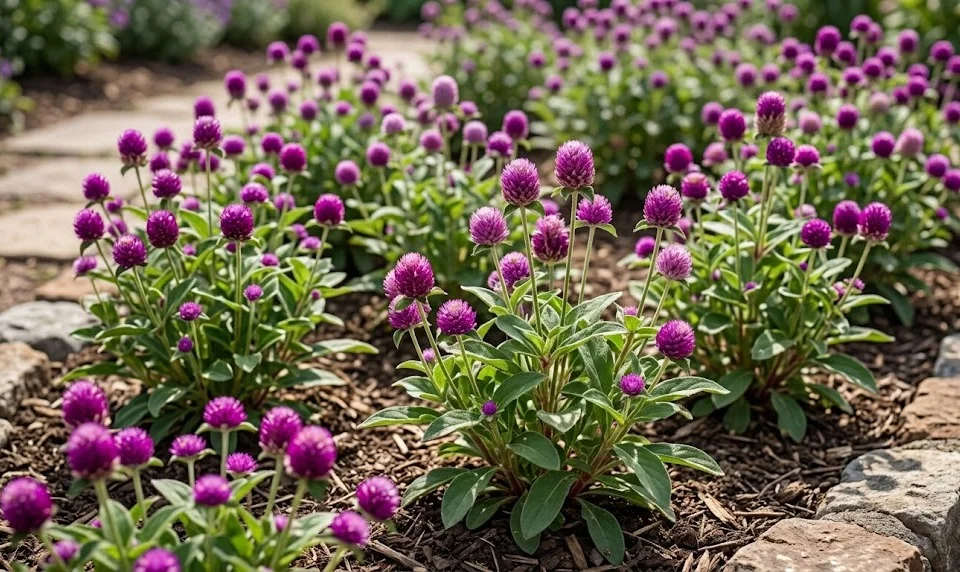
Planting and propagating the globe amaranth is a rewarding process that allows you to fill your garden with color every year. This species is primarily grown from seeds, which are relatively easy to handle and germinate under the right conditions. Whether you choose to start them indoors early or sow them directly into the soil, success is highly likely with a few professional tips. Proper timing and soil temperature are the most critical factors in ensuring a high germination rate and healthy seedlings.
Starting seeds indoors is the preferred method for those living in regions with a short growing season. You should begin the process about six to eight weeks before the last expected frost in your area. Use sterile seed-starting trays and a high-quality, fine-textured starting mix to give the tiny roots the best start. Keeping the trays in a warm spot, perhaps even using a heat mat, will significantly speed up the germination process.
Once the seeds have sprouted and developed their first true leaves, they will need plenty of bright light to stay strong. If the light is too dim, the seedlings will become leggy and weak as they reach for the sun. A sunny windowsill or a dedicated grow light system can provide the necessary intensity for robust growth. It is also important to thin the seedlings if they are crowded, ensuring that only the strongest plants continue to grow.
Hardening off the young plants is a crucial step before they move permanently into the outdoor garden. This process involves gradually exposing them to the wind, direct sun, and temperature fluctuations of the outside world. Start with just an hour or two in a sheltered spot and slowly increase the time over a week. This transition period prevents the plants from experiencing transplant shock, which can stall their growth significantly.
Sowing techniques and timing
If you prefer a more direct approach, sowing the seeds directly into the garden beds is also an option. This should only be done once the soil has warmed up completely and there is no longer a risk of frost. The seeds need a consistent soil temperature of at least seventy degrees Fahrenheit to germinate effectively. Clear the area of any weeds and rake the soil until it is fine and loose before you begin.
More articles on this topic
When sowing the seeds, press them lightly into the surface of the soil rather than burying them deeply. They require a small amount of light to trigger the germination process, so a very thin covering of soil or vermiculite is sufficient. Water the area gently with a fine mist to avoid washing the seeds away or burying them too deep. Keeping the soil consistently moist but not soggy is the key during this sensitive phase.
Spacing the seeds correctly from the start can save you a lot of thinning work later on. Aim for a distance that allows for the mature spread of the plant, usually around ten to twelve inches. If you sow more thickly to ensure a full stand, be prepared to remove the smaller plants once they are a few inches tall. This gives the remaining plants the best chance to develop a deep root system and a bushy top.
The time it takes for the seeds to germinate can vary based on the environmental conditions, but usually takes about two to three weeks. Do not be discouraged if they seem a bit slow at first; once they start, they grow quite rapidly. Marking the area where you planted the seeds will help you distinguish the young seedlings from any emerging weeds. Patience is a virtue in the early stages of propagation, and the results are well worth the wait.
Successful transplanting methods
Moving young plants into their final home requires a gentle touch and some strategic planning. The best time to transplant is on a cloudy day or in the late afternoon to minimize stress from the sun. Dig a hole that is slightly larger than the root ball of the seedling to allow for easy placement. If the plant is in a peat pot, make sure the edges are buried or trimmed so they don’t wick moisture away from the roots.
More articles on this topic
Gently loosen the roots if they have become slightly pot-bound before placing the plant in the hole. Set the seedling at the same depth it was growing in its container, as burying the stem too deep can lead to rot. Once positioned, fill in the space with soil and firm it down gently with your hands to remove any air pockets. Immediate watering after transplanting helps settle the soil and provides the roots with essential moisture.
Using a liquid seaweed or a very diluted transplant fertilizer can provide a gentle boost to the newly moved plants. This helps them recover from the move and encourages quick root establishment in the new soil. Monitor the transplants closely for the first few days, ensuring they do not wilt excessively during the heat of the day. A little extra care during this first week ensures the plants thrive for the rest of the season.
If you are planting a large area, consider working in sections to keep the roots of the unplanted seedlings moist. Keeping the trays in the shade while you work prevents them from drying out in the wind or sun. Organization is key when dealing with many small plants, and having everything ready beforehand makes the process much smoother. Successful transplanting is the foundation of a beautiful and well-structured garden display.
Alternative propagation strategies
While seeds are the most common method, some gardeners experiment with taking cuttings from established plants. This can be done in mid-summer by selecting healthy, non-flowering stems and placing them in a rooting medium. While not as traditional for this species, it can be a fun way to multiply your favorite color variations. The cuttings need high humidity and indirect light until they have formed a new root system.
If you decide to try cuttings, using a rooting hormone can increase your success rate significantly. Keep the soil around the cuttings consistently damp and watch for signs of new growth at the tips. Once the roots are a few inches long, the new plants can be moved into individual pots or directly into the garden. This method allows you to bypass the early seedling stages and get larger plants more quickly.
Collecting your own seeds at the end of the season is perhaps the most satisfying way to propagate. Wait until the flower heads have turned brown and feel completely dry and papery to the touch. You can crush the dried heads to release the seeds, which are small and tucked inside the bracts. Store them in a cool, dry place in a paper envelope until it is time to plant again next spring.
Sharing seeds with other gardeners is a great way to diversify your collection and spread the joy of growing this plant. Since it is an open-pollinated species, you might even get some interesting new color variations in the next generation. This community aspect of gardening makes the propagation of globe amaranth even more rewarding. It is a cycle of growth and sharing that connects gardeners across different regions.