Successfully establishing a vibrant stand of love-lies-bleeding depends heavily on executing precise planting techniques and choosing the optimal propagation methods. Whether starting from seed indoors or sowing directly into the warm garden soil, understanding the biological requirements of the seeds is paramount. This robust annual relies on specific thermal triggers and light conditions to achieve high germination rates and uniform seedling emergence. By mastering these early propagation steps, horticulturists can ensure a reliable supply of strong, healthy plants ready to dominate the summer landscape.
Direct sowing techniques in the open ground
Sowing seeds directly into their permanent garden location is a highly effective and efficient method favored by many professional growers. This approach eliminates the risk of transplant shock, allowing the young taproots to develop deeply and without interruption from the very beginning. The process should only begin once all danger of spring frost has passed and the soil temperature has warmed significantly. Preparing a fine, weed-free seedbed is essential to ensure excellent seed-to-soil contact, which is critical for moisture absorption.
The tiny seeds should be scattered thinly across the prepared surface and pressed gently into the soil rather than buried deeply. Because these seeds require a certain amount of ambient light to trigger germination, a very light dusting of fine compost or vermiculite is sufficient to cover them. Maintaining consistent surface moisture during the initial ten to fourteen days is vital to prevent the delicate emerging radicles from drying out. Using a fine misting nozzle helps keep the soil damp without washing away the small seeds.
Once the seedlings emerge and develop their first set of true leaves, the process of selective thinning must begin. Crowded plants will quickly become spindly and weak as they compete fiercely for light and root space. Thinning the seedlings to a final spacing of approximately two feet apart allows each remaining plant to develop its full potential. The removed seedlings do not have to go to waste, as they can be enjoyed as a nutritious addition to salads.
As the direct-sown plants establish themselves, their deep root systems make them remarkably resilient to early summer dry spells. This natural advantage often results in sturdier stalks compared to their transplanted counterparts, providing better natural support for the heavy flowers later in the season. Continuous monitoring during the first few weeks ensures that any emerging weeds are removed before they can smother the young annuals. This straightforward method delivers outstanding results when combined with patience and proper environmental timing.
More articles on this topic
Advanced indoor seed starting protocols
For gardeners wishing to secure an early summer display, starting seeds indoors several weeks before the last frost date is an excellent strategy. This controlled environment allows for precise management of temperature, humidity, and light, resulting in exceptionally high germination success. Utilizing modular cell trays filled with a sterile, well-draining seed-starting mix prevents root tangling and simplifies the eventual transplanting process. Depositing two seeds per cell ensures complete coverage, with the weaker seedling being removed later to leave one strong plant.
Maintaining a consistent bottom heat using specialized propagation mats accelerates the germination process significantly. The ideal soil temperature for triggering rapid embryo development ranges between twenty and twenty-two degrees Celsius. Once the green shoots begin to break through the surface, the trays must be moved immediately under high-intensity grow lights to prevent stretching. Providing fourteen to sixteen hours of artificial light daily ensures compact, stocky growth with strong stem development.
Air movement within the indoor propagation area is another critical factor that should never be overlooked by serious growers. Running a small oscillating fan on a low setting creates a gentle breeze that mimics natural outdoor conditions. This mechanical stress encourages the seedlings to produce thicker, more resilient stems while simultaneously reducing the risk of damping-off disease. Regular inspection of the moisture levels ensures that the growing medium remains damp but never completely saturated.
As the indoor seedlings grow and fill their individual cells, a weak solution of liquid organic fertilizer can be applied to sustain their development. This gentle nutrient boost supports the formation of a robust root system capable of handling the upcoming transition to the outdoor garden. Careful monitoring of the root bound status ensures that the plants are moved to larger containers if outdoor conditions are delayed. Mastering indoor propagation provides an invaluable head start that extends the ornamental season significantly.
More articles on this topic
Hardening off and outdoor transplantation
The transition from a protected indoor environment to the unpredictable conditions of the open garden represents a critical phase in the plant’s life. Hardening off is the essential process of gradually acclimating the tender seedlings to outdoor wind, temperature fluctuations, and direct sunlight. This procedure should take place over a period of seven to ten days to prevent severe physiological shock or foliage scorch. Neglecting this crucial step can result in stunted growth or even the complete loss of the young plants.
Begin by placing the seedling trays in a sheltered, shaded location outdoors for a few hours during the warmest part of the day. Gradually increase their exposure to direct morning sunlight and ambient wind over the subsequent days, always bringing them inside at night if temperatures drop. By the end of the week, the plants should be able to withstand full outdoor exposure continuously without showing signs of distress. This methodical preparation strengthens the outer cell walls of the leaves, making them resilient to environmental challenges.
Transplanting should ideally be performed on a cloudy, overcast day or during the late afternoon to minimize moisture loss and stress. Dig a hole for each seedling that is slightly larger than its current root ball, ensuring the plant sits at the same depth as it did in the tray. Gently firm the surrounding soil around the base to eliminate any hidden air pockets that could dry out the roots. Watering the new transplants immediately with a liquid seaweed solution helps settle the soil and stimulates rapid root re-establishment.
During the first week following transplantation, keeping a close watch on soil moisture is paramount for successful establishment. Temporary shading may be required if the weather suddenly becomes excessively hot and sunny immediately after planting. Once the roots begin to anchor into the surrounding soil, the plants will exhibit a noticeable burst of new vegetative growth. Successful transplantation transforms carefully nurtured seedlings into permanent, high-performing structural elements of the summer garden.
Alternative propagation methods and seed saving
While growing from seed is the primary method, exploring alternative approaches can broaden a horticulturist’s understanding of the species. Although less common for annuals, stem cuttings can technically be rooted under highly controlled conditions to replicate specific exceptional specimens. Selecting healthy, non-flowering side shoots during the early summer provides the best material for this experimental technique. Placing these cuttings in a sterile, moist rooting medium inside a high-humidity dome can induce adventitious root development over several weeks.
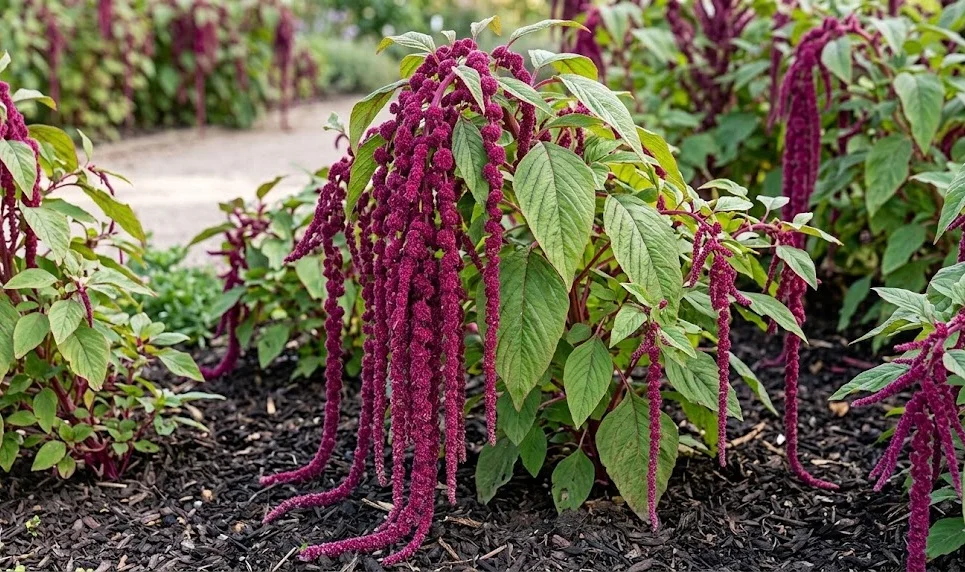
However, the absolute most reliable way to perpetuate a specific lineage of this annual remains the careful harvesting of its abundant seeds. As the hanging crimson tassels mature in the autumn, they produce thousands of tiny, shiny black or cream-colored seeds. To harvest them efficiently, place a clean bucket or a paper bag underneath the mature seed heads and gently rub them between your hands. The seeds will readily fall out along with a small amount of dry chaff, which can be easily separated later.
Cleaning the collected seeds involves a process known as winnowing, where a gentle breeze or a small fan is used to blow away the light chaff. The heavier seeds will remain at the bottom of the container, ready to be prepared for long-term storage. It is imperative that the seeds are completely dry before being placed into airtight glass jars or paper envelopes. Storing the containers in a cool, dark, and dry location preserves seed viability for several years.
Engaging in regular seed saving not only provides an endless supply of free plants but also allows you to select for traits that thrive in your specific microclimate. Over multiple generations, saving seeds from the most vigorous and brilliantly colored specimens creates a locally adapted strain. This connection to the natural life cycle of the plant enhances the overall reward of sustainable gardening practices. Sharing these harvested seeds with fellow enthusiasts further enriches the local gardening community and ensures the preservation of this spectacular variety.