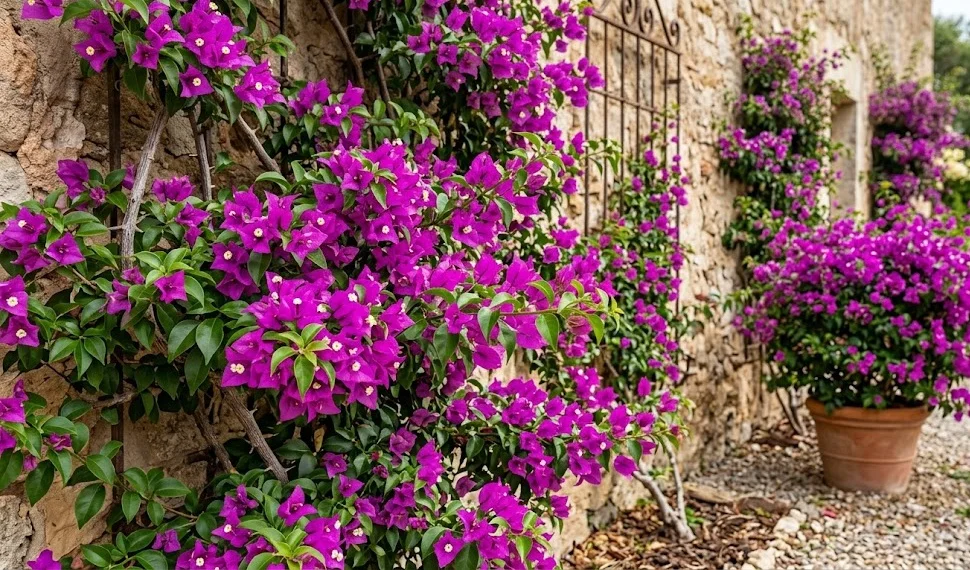

Establishing a spectacular bougainvillea starts with choosing an absolutely flawless location that fulfills the plant’s rigid environmental demands. These sun-loving tropical climbers require a spot that receives a minimum of six to eight hours of direct, unfiltered sunlight daily to maximize their blooming potential. Shady locations will invariably result in weak, leggy stems and an underwhelming display of dull green foliage without any vibrant bracts. Therefore, assessing the light patterns of your garden across the entire day is an indispensable first step before digging any holes.
The chosen site must also offer exceptional protection from strong, damaging winds that can tear the heavy vine from its supports. Bouncing winds can break tender new shoots and cause the sharp thorns to scar adjacent stems, opening pathways for pathogens. Planting against a south- or west-facing brick or stone wall is highly advantageous for this reason. The thermal mass of the wall absorbs solar heat during the bright afternoon and slowly radiates it back to the plant during chilly nights.
Subterranean conditions are just as critical as atmospheric factors when evaluating a potential home for your new specimen. The area must possess natural drainage properties that prevent water from pooling around the root zone after heavy downpours. Low-lying areas of the garden where rainwater naturally collects must be avoided at all costs. Testing the drainage capacity by digging a trial hole and filling it with water will quickly reveal whether the soil is suitable.
Finally, consider the long-term spatial requirements and proximity to existing garden structures or pathways. These vines grow rapidly once established and can quickly overwhelm nearby plants if not given enough room to expand. The sharp, rigid thorns mean the plant should not be placed directly next to narrow walkways where it could catch on clothing or skin. Giving the vine its own dedicated zone ensures it can grow freely while remaining safe and accessible for future maintenance.
Executing the planting process with precision
Once the perfect site is secured, the physical planting process must be executed with extreme care to protect the sensitive root system. The planting hole should be dug twice as wide as the current root ball but exactly the same depth to prevent settling. Deep planting can smother the base of the stem and lead to crown rot, while shallow planting exposes delicate roots to drying air. Roughing up the smooth sides of the hole ensures that expanding roots can easily penetrate the surrounding native soil.
More articles on this topic
Gently removing the plant from its nursery container requires patience, as the root ball can easily fall apart if handled roughly. Never pull the plant out by its main stem, as this can tear the fragile connection between the roots and the crown. Instead, tap the sides of the container gently and slide the root mass out while supporting it from beneath. If the plant is slightly root-bound, very gently loosen only the outermost roots to encourage them to explore their new environment.
Position the specimen in the center of the hole, ensuring the main stem stands perfectly upright or leans slightly toward its permanent support structure. Backfill the hole using the native soil mixed with a small amount of coarse sand or organic compost to improve structure. Avoid adding high-nitrogen fertilizers directly into the planting hole, as this will burn the tender root tips and delay establishment. Firm the soil down gently with your hands to eliminate large air pockets without compacting the earth too densely.
Immediately following the backfilling process, give the area a thorough, deep watering to settle the soil completely around the roots. This initial hydration bridges the gap between the root ball and the surrounding earth, ensuring continuous moisture access during the critical first weeks. Constructing a low soil berm around the perimeter of the watering zone helps direct future applications straight down to the root mass. Apply a thin layer of organic mulch around the base, keeping it a few inches away from the trunk to prevent moisture retention against the bark.
Masterful propagation via stem cuttings
Replicating your favorite varieties is most reliably achieved through semi-hardwood stem cuttings taken during the active growing season. Select healthy, vigorous stems that have recently finished flowering and exhibit a semi-mature, woody texture near the base. Avoid using completely green, succulent tips as they rot too easily, and steer clear of ancient, heavily barked wood which roots very slowly. A cutting length of six to eight inches with at least four distinct nodes is ideal for optimal success.
More articles on this topic
Using a sterilized, razor-sharp pruning tool, make a clean diagonal cut just below the lowest node to maximize the surface area for root development. Strip away all leaves from the lower half of the cutting to minimize moisture loss through transpiration while it lacks roots. Leave two or three leaves at the very top of the cutting to allow for continued photosynthesis during the propagation phase. If these remaining leaves are exceptionally large, cutting them in half horizontally reduces water stress even further.
Moisten the base of the prepared cutting and dip it into a high-quality rooting hormone powder or gel to accelerate cell differentiation. Insert the cutting carefully into a pre-moistened, sterile medium consisting of equal parts perlite and peat moss. Utilizing a pencil or small stick to create the hole prevents the rooting hormone from being wiped off during insertion. Firm the propagation medium gently around the stem to ensure direct physical contact and eliminate large voids.
Maintain a highly humid environment around the cuttings by placing them in a propagating dome or enclosing the pot in a clear plastic bag. Situate the setup in a warm location that receives bright, indirect light, but never direct sunlight which would cook the unrooted stems. Keep the medium consistently damp but never soggy, misting the interior occasionally to preserve ambient humidity levels. Root development typically occurs within four to six weeks, signaled by the appearance of fresh green growth at the tips.
Advanced propagation techniques for experienced growers
Air layering represents an excellent alternative propagation method for producing a much larger, more mature plant in a shorter time frame. This technique is performed directly on a living, established branch of an existing vine during the spring. Choose a pencil-thick, healthy branch and make two parallel circular cuts through the bark about an inch apart. Carefully peel away the ring of bark between the cuts, exposing the white cambium layer beneath, which must be scraped clean to stop nutrient flow.
Apply a generous coating of rooting hormone to the exposed wounded ring to stimulate localized root initials. Wrap the section tightly with a handful of damp, long-fibered sphagnum moss that has been soaked and squeezed free of excess water. Cover the entire moss ball with a sheet of clear plastic film, securing both ends tightly with garden twine or waterproof tape to lock in moisture. Finally, wrap aluminum foil over the plastic to shield the developing roots from light and prevent overheating from sun exposure.
Check the progress periodically by gently peeling back the foil layer to inspect for root development through the clear plastic. Within several months, a dense network of white roots should become clearly visible through the moss medium. Once the roots are well-developed, use sharp pruners to sever the branch completely just below the plastic wrapping. Carefully remove the outer plastic and pot up the newly independent, fully rooted branch into a well-draining container.
Tip layering is another simple, low-stress method that utilizes the natural flexibility of long, low-growing exterior branches. Bend a supple, healthy branch down to the ground and nick the bark slightly on the underside where it touches the soil. Bury that wounded section three inches deep into the earth, securing it with a landscape pin, while keeping the leaf tip exposed above ground. Keep the buried zone consistently moist, and by the following spring, a new root system will form, allowing you to detach the new plant.