Caring for these stunning climbers requires a blend of patience and specific horticultural knowledge to ensure they thrive year after year. Most gardeners find that the primary secret lies in keeping the root system cool while allowing the foliage to bask in the sun. Regular monitoring of growth patterns helps in identifying the unique needs of each specific variety within your collection. By following a structured maintenance routine, you can enjoy a vertical display of vibrant blooms throughout the growing season.
Establishing the perfect environment
Providing the right foundation is the most critical step in ensuring the long-term health of your climbing plants. You should select a site where the soil is rich in organic matter and offers excellent drainage to prevent root rot. It is often helpful to incorporate well-rotted compost into the planting hole to provide a steady stream of nutrients. Maintaining a neutral or slightly alkaline soil pH will further support the vigorous development of the stems.
Soil moisture management is another pillar of successful care that requires consistent attention from the gardener. You must ensure that the earth remains damp but never waterlogged, especially during the peak heat of summer months. Adding a thick layer of organic mulch around the base will help retain this moisture and suppress competing weeds. Many experts suggest placing large flat stones or low-growing perennials near the base to provide additional shade for the roots.
Proper air circulation is frequently overlooked but remains vital for preventing the onset of common fungal issues. You should avoid crowding the plant against solid walls where heat can build up and air becomes stagnant. Leaving a small gap between the trellis and the supporting structure allows for better ventilation and cooling. This simple adjustment significantly reduces the risk of leaf spot and other humidity-related problems during the rainy season.
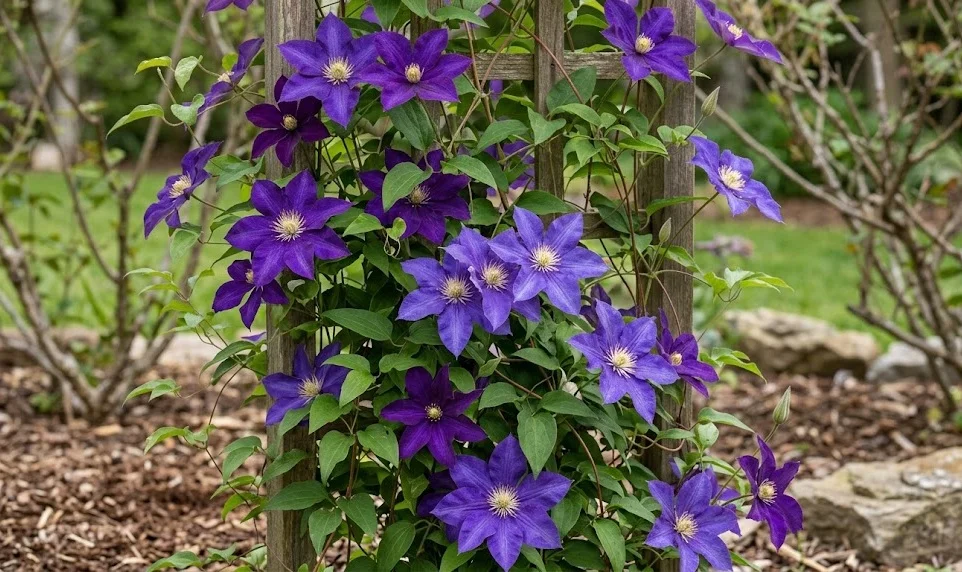
The structural integrity of the plant depends heavily on the quality of the support system you provide for climbing. Clematis use twisting leaf petioles to anchor themselves, so the support wires or mesh must be thin enough for them to grasp. You might need to gently guide new shoots toward the trellis during the early stages of spring growth. Checking the stability of these supports annually prevents damage to the delicate vines during heavy storms or high winds.
More articles on this topic
Seasonal maintenance routines
As spring arrives, the focus shifts toward encouraging new growth and preparing the plant for its first bloom cycle. You should clear away any debris or fallen leaves from the base to eliminate potential overwintering sites for pests. Applying a balanced, slow-release fertilizer at this stage provides the energy required for rapid vertical expansion. It is also the best time to inspect the stems for any winter damage that might need removal.
During the summer, the primary task is maintaining the aesthetic appeal and health of the flowering canopy. Regular deadheading of spent flowers can encourage some varieties to produce a second flush of blossoms later in the year. You should continue to monitor the hydration levels closely, as the high transpiration rates can quickly stress the plant. Observing the leaves for any signs of wilting will allow you to intervene before the damage becomes irreversible.
Autumn care involves preparing the clematis for the upcoming cold weather and ensuring the wood matures properly. You should gradually reduce the frequency of watering as the plant enters its natural dormancy phase. Removing any diseased foliage before it falls to the ground helps maintain a clean environment for the following year. This is also a good period to reinforce any loose ties or support structures that may have weakened.
Winter is a time of rest for the gardener, but the plant still requires some minimal level of protection. In colder climates, you may need to add an extra layer of mulch to insulate the crown against deep freezes. Avoiding heavy pruning during late autumn is generally recommended to prevent stimulating new growth that could be killed by frost. Taking these simple precautions ensures that the plant emerges strong and healthy when the ground thaws in spring.
More articles on this topic
Support systems and structures
The choice of a support structure can define the visual impact and the physical health of your climbing clematis. Many gardeners prefer traditional wooden trellises, but metal obelisks or wire tension systems offer more durability and modern aesthetics. You should ensure that the material is weather-resistant and capable of holding the substantial weight of a mature plant. Integrating the support into the garden design allows the flowers to become a focal point of the landscape.
Installing the support before planting is always the best practice to avoid disturbing the sensitive root system later. You should secure the structure firmly into the ground or attach it to a sturdy wall using appropriate hardware. If you are using a wall, remember to leave at least two inches of space for air to move behind the foliage. This gap is essential for keeping the temperature regulated and preventing the buildup of damaging moisture.
Training the young shoots is an ongoing process that requires a gentle touch and a bit of foresight. You should use soft garden twine or specialized clips to secure the stems without cutting into the delicate bark. As the plant grows, it will naturally find its way, but initial guidance ensures even coverage across the entire support area. Regularly checking the tension of these ties prevents them from becoming too tight as the stems thicken over time.
Innovative gardeners often use living supports, such as established shrubs or small trees, to host their clematis vines. This natural approach creates a beautiful layered effect that mimics how these plants grow in their native woodland habitats. You must choose a host plant that is strong enough to bear the weight and does not have overly aggressive roots. This technique allows for stunning color combinations that change as both the host and the climber bloom at different times.
Monitoring growth and vigor
Observing the daily progress of your plants allows you to catch potential issues long before they become serious threats. Healthy clematis should show steady vertical progress and produce deep green leaves with a firm, turgid texture. You should look for uniform growth across all the main stems and branches to ensure balanced development. Any sudden stop in growth during the active season should prompt a quick investigation of the root zone and soil.
The color and size of the foliage can tell you a great deal about the nutrient status of the surrounding soil. Pale or yellowing leaves often indicate a lack of nitrogen or a problem with the soil’s ability to transfer minerals. You might notice that the leaves become smaller or more sparse if the plant is not receiving adequate hydration or sunlight. Adjusting your care routine based on these visual cues is the hallmark of an expert gardener.
Flowering performance is the ultimate indicator of the plant’s overall health and the success of your care efforts. You should expect a prolific display of blooms that matches the specific characteristics of the variety you have chosen. If the flowers are undersized or fail to open fully, it may be time to reassess your fertilization or pruning strategies. Keeping a garden journal can help you track these patterns and make informed decisions for the next growing season.
Vigor is also reflected in the plant’s ability to recover from minor stressors or environmental changes. A strong clematis will quickly push out new growth after a period of heavy rain or a sudden heatwave. You should notice that the stems become woodier and more resilient as the plant matures through its second and third years. Encouraging this natural strength through consistent care ensures a spectacular garden feature that lasts for decades.
Benefits of mulching
Mulching serves as a protective blanket that shields the most vulnerable parts of the clematis from extreme weather. You should apply a layer that is approximately three inches thick, making sure to keep it away from the actual stems. This barrier effectively prevents the sun from baking the soil, which is essential for these cool-root-loving climbers. Using organic materials like bark chips or well-rotted leaf mold adds the benefit of slow nutrient release.
Weed suppression is another significant advantage that a well-maintained mulch layer provides to the busy gardener. Weeds compete for the same water and nutrients that your clematis needs to produce those magnificent flowers. By blocking the light from reaching weed seeds, mulch significantly reduces the time you spend on tedious manual weeding. This allows the clematis to establish a dominant presence in its designated area without constant interference.
The gradual decomposition of organic mulch improves the overall structure and fertility of the garden soil. You will find that the earth beneath the mulch stays friable and full of beneficial microbial activity and earthworms. This living soil ecosystem provides a much better environment for root respiration and nutrient uptake than compacted dirt. Replenishing the mulch every spring ensures that these benefits continue without interruption as the seasons change.
Moisture retention is perhaps the most practical benefit during the long, dry stretches of the summer months. Mulch acts as a seal that drastically reduces the amount of water lost through evaporation from the soil surface. This means you can water less frequently while still providing the consistent hydration the plant requires for peak performance. A properly mulched clematis is far more likely to survive a drought than one left with exposed soil.
Managing common mistakes
One of the most frequent errors is planting the clematis too shallowly, which leaves the crown exposed to damage. You should always aim to bury the root ball several inches deeper than it was in its original nursery pot. This practice encourages the development of dormant buds below the soil line, providing a safety net for the plant. If the top growth is damaged, these underground buds can send up fresh, healthy shoots to replace the loss.
Over-fertilizing can lead to a lush explosion of green leaves but very few of the flowers you are actually seeking. You should avoid high-nitrogen fertilizers once the plant has reached its desired height for the season. Instead, switch to a formula that is higher in potassium to support the development of strong buds and vibrant petals. Always follow the manufacturer’s instructions to prevent the buildup of salts that can burn the sensitive roots.
Neglecting the pruning requirements of a specific group is another mistake that can lead to a tangled, unproductive mess. You must identify whether your variety belongs to Group 1, 2, or 3 before taking out the garden shears. Pruning at the wrong time of year can inadvertently remove all the flower buds for the coming season. Taking a moment to research the specific needs of your plant will save you from years of disappointment.
Inconsistent watering is a major stressor that can weaken the plant’s immune system and invite various diseases. You should avoid the “feast or famine” approach where the soil dries out completely before being flooded with water. A steady, predictable supply of moisture is much better for maintaining the turgidity of the climbing stems. Setting up a simple irrigation timer can help you maintain this consistency even when you are away from home.
Long term health and rejuvenation
As a clematis ages, it may begin to lose its vigor or produce fewer flowers on the lower sections of the stems. You can rejuvenate an old, woody plant by performing a hard prune to stimulate fresh growth from the base. This process is best done in early spring before the new buds have started to swell significantly. While it may seem drastic to cut back a large plant, the resulting surge of energy usually leads to a much healthier specimen.
Refreshing the soil around the base of an established plant can provide a much-needed boost after several years of growth. You should carefully scrape away the old mulch and the top inch of soil, taking care not to damage any surface roots. Replace this with a fresh mixture of high-quality compost and a small amount of slow-release organic fertilizer. This simple act of top-dressing can revitalize the plant and improve the vibrancy of its subsequent blooms.
Dividing a large, mature clematis is another way to ensure its continued health while also expanding your garden collection. This task is best performed in early spring or late autumn when the plant is not actively flowering. You will need to dig up the entire root ball and use a sharp spade to split it into several viable sections. Each new division should have a good amount of roots and at least a few healthy stems or buds.
Maintaining a clean environment around your plants is a lifelong commitment that pays off in reduced disease pressure. You should always remove any dead wood or diseased leaves as soon as you notice them during your regular garden walks. Disinfecting your pruning tools between different plants prevents the accidental spread of pathogens across your garden. By staying proactive and attentive, you can enjoy the timeless beauty of your clematis for many years to come.

