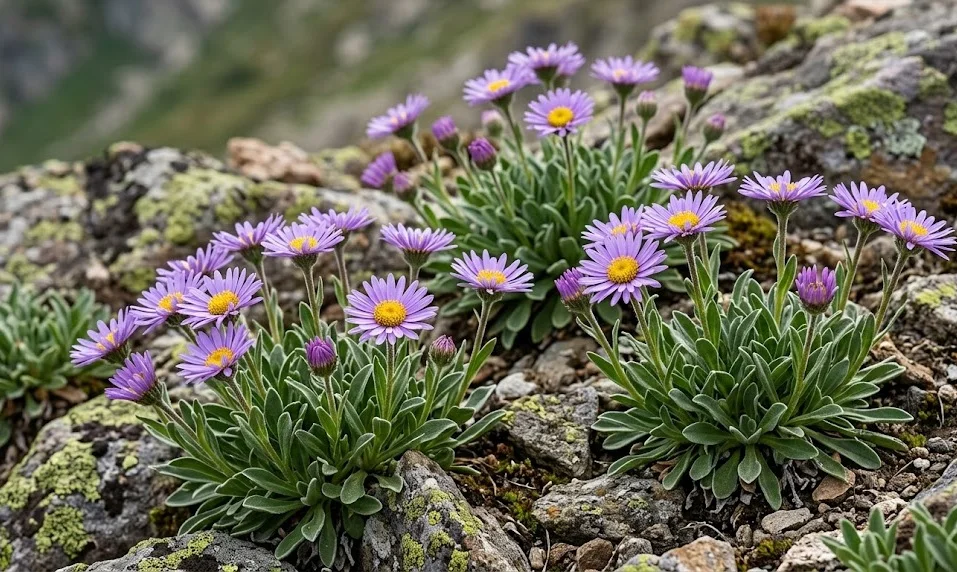
Planting alpine aster is the first step toward bringing a touch of the high mountains into your home landscape. You should choose a time in early spring or late autumn when the temperatures are mild and the soil is moist. This timing allows the root system to establish itself before the stress of summer heat or winter freezes. Successful planting begins with a clear understanding of the environmental needs of this hardy perennial.
Selecting the right location is paramount because these plants require excellent drainage and plenty of sunlight. You must avoid areas where water tends to collect after a heavy rain, as this will quickly lead to root rot. A rock garden, a raised bed, or a sloping site are often the best choices for these mountain dwellers. Ensuring that the site is free from large, competing roots from trees or shrubs will also help the aster thrive.
Preparing the soil involves more than just digging a hole; it requires creating the right texture for drainage. You should mix in a generous amount of grit or small stones to ensure that water moves away from the crown. If your soil is heavy clay, consider building a small mound or using a container to provide the necessary elevation. A lean soil that is not overly rich in organic matter will produce the most authentic and compact growth.
When you are ready to place the plant in the ground, ensure the crown is level with the soil surface. Planting too deep can cause the base of the plant to rot, while planting too shallow can expose the roots to drying out. You should firm the soil gently around the roots to remove any large air pockets without compacting the earth too much. A light watering immediately after planting will help settle the soil and reduce transplant shock.
Sowing seeds for new growth
Growing alpine aster from seed is a rewarding way to increase your collection and see natural variations in flower color. You should start the seeds in a cold frame or a protected outdoor seedbed during the late winter months. This mimics the natural cold stratification that the seeds would experience in the wild mountain environment. Cold temperatures help break the seed’s dormancy and encourage a higher germination rate when spring arrives.
More articles on this topic
The seed tray should be filled with a well-draining, gritty compost that is kept slightly moist but never soggy. You should sow the seeds thinly on the surface and cover them with a very light layer of fine grit or sand. Light can sometimes be beneficial for the germination of certain aster species, so avoid burying them too deep. Keeping the tray in a spot where it receives natural light cycles will help the seedlings develop normally.
Once the seedlings emerge, you must monitor them closely to ensure they have enough space and air circulation. If they are growing too close together, you should thin them out to prevent the spread of damping-off fungus. The young plants need plenty of light to prevent them from becoming leggy and weak. Gradually acclimating them to outdoor conditions, a process known as hardening off, is essential before final planting.
As the seedlings develop several sets of true leaves, they will be ready to be moved into individual pots or their permanent garden home. You should handle the delicate roots with care during this process to avoid any setbacks in growth. It may take a year or two for seed-grown plants to reach flowering size, but the wait is worth the effort. Growing from seed allows you to select the strongest and most beautiful individuals for your garden.
Propagation through division
Division is the most common and effective way to propagate established clumps of alpine aster while maintaining their health. You should plan to divide your plants every three to four years to prevent the center of the clump from becoming woody and unproductive. This process is best performed in the early spring just as the new growth begins to appear. Dividing at this time gives the new sections a full growing season to establish themselves.
More articles on this topic
To begin the process, you must carefully lift the entire clump out of the ground using a garden fork. Gently shake off the excess soil so you can see the structure of the roots and the individual rosettes. You should use a sharp, clean knife or your hands to pull the clump apart into smaller sections. Each new division must have a healthy portion of roots and at least one or two vigorous shoots.
Discard the old, woody center of the original plant and focus on the younger, more energetic outer sections. These outer divisions will grow much more vigorously and produce more flowers in the coming season. You should plant the new sections immediately into prepared soil to prevent the roots from drying out. Treating the divisions as you would a new plant ensures they get the best possible start in their new locations.
This method of propagation ensures that the new plants are genetically identical to the parent, preserving specific colors or growth habits. It is also an excellent way to rejuvenate an old garden bed and spread the beauty of the aster throughout your landscape. You can share these divisions with friends and neighbors, spreading the joy of alpine gardening. Regular division keeps your plants young, healthy, and flowering at their peak.
Establishing young plants
The first few months after planting or propagation are critical for the long-term survival of the alpine aster. You should provide consistent but careful watering to help the roots find their way into the surrounding soil. While the plant will eventually be drought-tolerant, it needs a reliable water source during its establishment phase. Checking the soil moisture daily during dry spells will help you avoid unnecessary plant stress.
Protection from extreme weather and hungry garden pests is also important during this vulnerable time. You might consider using a small wire cage or a cloche if you have problems with rabbits or slugs in your garden. These young plants are much more susceptible to damage than established, tougher clumps. Providing a bit of extra security allows the plant to focus its energy on building a strong root system.
Applying a thin layer of fine mineral mulch can help stabilize the soil temperature and moisture levels around the new plant. You should be careful not to pile the mulch against the crown, as this can encourage rot. The mulch also prevents soil erosion around the base of the plant during heavy rain events. This small step can make a big difference in how quickly the plant settles into its new home.
Finally, you should avoid the temptation to fertilize heavily during the first growing season. The plant needs to develop its own natural resilience and search for nutrients in the soil. Too much fertilizer can cause soft, rapid growth that is easily damaged by pests or weather. Allowing the plant to grow at its own natural pace will result in a much heartier and more long-lived specimen.