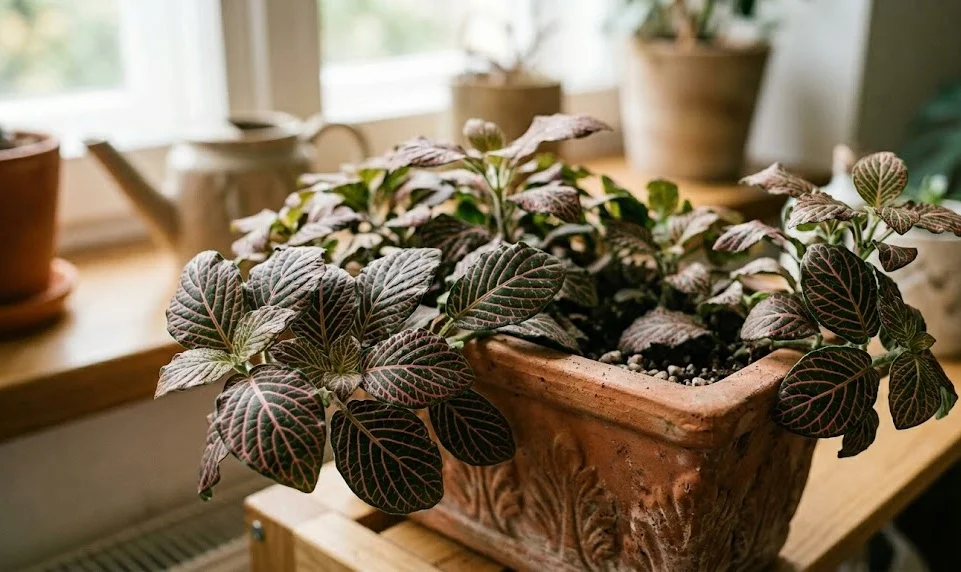
The process of establishing a new nerve plant begins with selecting the right environment and substrate to support its delicate root system. These plants are native to the tropical rainforests of South America, which means they prefer consistent warmth and high humidity from the very start. When you are ready to plant a new specimen, you must prioritize a container that offers excellent drainage to prevent any water from stagnating. A well-planned start is the most effective way to ensure that your new plant grows into a lush and healthy indoor companion.
Choosing the correct soil mixture is the next critical step in the planting process for any aspiring nerve plant owner. You should aim for a blend that is rich in organic matter but still light and airy enough to allow for proper gas exchange around the roots. Mixing standard potting soil with components like perlite or vermiculite can significantly improve the texture and drainage of the substrate. This type of airy mixture prevents the soil from becoming a heavy, suffocating mass that could lead to root rot shortly after planting.
Before you actually place the plant into its new home, it is a good idea to moisten the soil slightly so it is easier to work with. You should handle the plant with great care, as the stems and leaves can be quite brittle and prone to breaking if handled roughly. When placing the plant in the pot, ensure that the top of the root ball sits just below the surface of the new soil. Gently firming the soil around the base of the plant will provide the necessary stability without compacting the earth too tightly.
After the planting is complete, you should provide the plant with a thorough watering to help settle the soil around the fresh roots. It is best to keep the newly planted specimen in a slightly more shaded and humid spot for the first few days to reduce transplant shock. You will notice that the plant may look a bit tired for a day or two, but it should quickly regain its turgor as the roots begin to explore the new soil. Providing a stable environment during this initial recovery phase is essential for long-term success.
Propagation by stem cuttings
Propagating the nerve plant through stem cuttings is a rewarding and relatively simple way to expand your collection or share with friends. You should select a healthy, vigorous stem that has at least two or three sets of leaves for the best chance of success. Using a clean and sharp pair of scissors or a knife, make a clean cut just below a leaf node where the roots are most likely to emerge. It is important to use sterilized tools to prevent the introduction of any pathogens into the fresh cut of the parent plant.
More articles on this topic
Once you have your cutting, you should remove the bottom set of leaves to expose the nodes that will be submerged in water or soil. You can place the cutting directly into a small glass of clean water, ensuring that the remaining leaves stay above the surface. Within a week or two, you should start to see tiny white roots developing from the submerged nodes on the stem. This method allows you to visually monitor the progress of the root growth before you commit the cutting to a pot of soil.
Alternatively, you can plant the fresh cuttings directly into a moist potting mix if you prefer a more direct approach to propagation. To increase the chances of success, some growers choose to dip the end of the cutting into a rooting hormone powder before planting. You should place the pot in a warm and bright spot, perhaps covering it with a plastic bag to create a mini-greenhouse effect. This high-humidity environment prevents the cutting from drying out before it has a chance to develop its own functional root system.
Regardless of the method you choose, you should keep the young cuttings out of direct sunlight while they are trying to establish themselves. Direct sun can be too intense for a cutting without roots, causing it to wilt and die before it can recover. Once the roots are a few inches long or the cutting shows signs of new leaf growth, you can treat it as a mature plant. This process of creating new life from a simple stem cutting is one of the most satisfying aspects of indoor gardening.
Dividing mature plants for new growth
Division is another effective method of propagation that is particularly useful for older plants that have become quite dense or overgrown. You should carefully remove the entire plant from its pot and gently shake off the excess soil to reveal the root structure. Look for natural separation points where the plant has formed distinct clumps or clusters of stems with their own attached roots. Using your fingers or a clean knife, carefully separate these sections while trying to minimize damage to the delicate root threads.
More articles on this topic
Each new division must have a healthy amount of roots and at least a few healthy stems to ensure it can survive on its own. You should plant each separated section into its own small pot filled with fresh, high-quality potting soil as soon as possible. Because the roots have been disturbed, these new plants will need extra care and a very humid environment for the first few weeks. You will find that division is an excellent way to rejuvenate an older plant that may have lost some of its vigor over time.
This method is best performed during the spring or early summer when the plant is in its most active phase of growth. The warm temperatures and increasing light levels provide the ideal conditions for the divided sections to heal and start growing again. You should avoid dividing a plant that is already showing signs of stress or disease, as the process may be too much for it to handle. A healthy, well-fed parent plant will produce the strongest and most resilient new divisions for your collection.
After dividing, you should water the new plants thoroughly and keep them in a consistent environment to help them recover quickly. You might notice some of the older leaves on the divisions turning yellow or dropping off, which is a common response to the stress of being moved. Do not worry, as long as the stems remain firm and new growth starts to appear from the center of the plant. Within a few months, your new divisions will grow into full, beautiful plants that look just like the original parent.
Creating the ideal environment for young plants
The success of your planting and propagation efforts depends heavily on the consistency of the environment you provide for the young specimens. You must ensure that the temperature remains steadily warm, ideally between twenty and twenty-five degrees Celsius, to promote rapid root development. Even small fluctuations in temperature can slow down the growth process or cause the young plants to become more susceptible to pests. Providing a stable heat source, such as a seedling heat mat, can be very beneficial during the cooler months of the year.
Light is another factor that needs to be carefully managed for young and newly propagated nerve plants. While they need light to produce energy through photosynthesis, too much intensity can easily scorch their thin and delicate leaves. You should aim for bright, filtered light that mimics the dappled sunshine of a tropical forest floor. If you are using artificial lights, make sure they are not placed too close to the foliage to avoid any potential heat damage.
Maintaining high humidity is perhaps the most critical requirement for young plants that are still establishing their root systems. You can use a humidity dome or a simple clear plastic bag to trap moisture around the plants during the first few weeks. This prevents the leaves from losing water faster than the developing roots can replace it, which is the most common cause of failure in propagation. Regularly checking the moisture level under the dome will help you decide when it is time to start acclimating the plants to normal room air.
Finally, you should be patient and avoid the temptation to constantly move or disturb the young plants while they are growing. It takes time for the roots to anchor themselves into the new soil and for the plant to begin producing new leaves. You will know that your efforts have been successful when you see the first tiny, colorful leaves emerging from the center of the stems. Once the plants are established, you can begin a regular care routine and enjoy the unique beauty of your hand-propagated nerve plants.