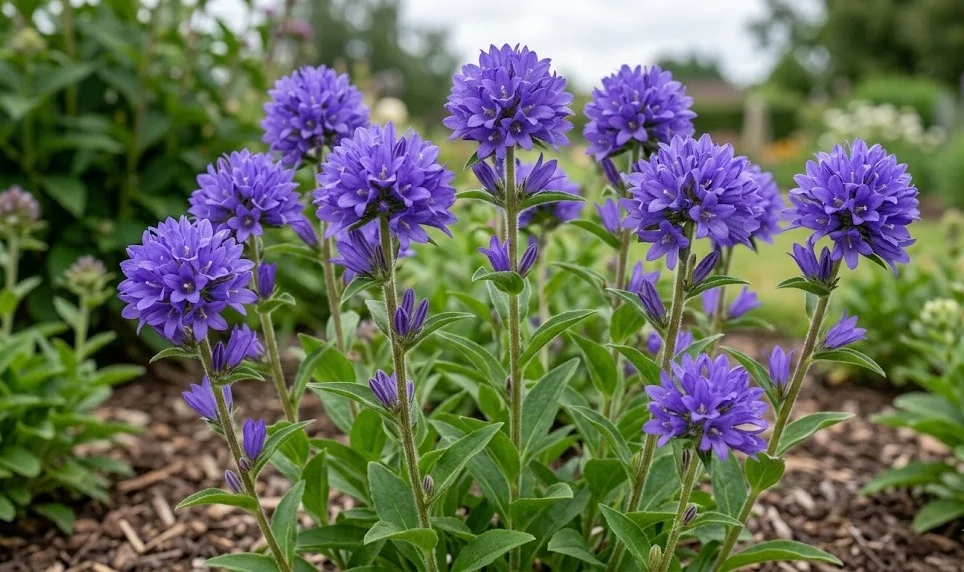
Clustered bellflower establishes best when planting and propagation are handled with attention to soil structure, spacing, and seasonal timing. It is a hardy perennial, but young plants still need a supportive start to develop strong crowns and reliable flowering stems. Proper planting reduces later problems with weak growth, poor flowering, and disease. Propagation is straightforward through division, seed, or basal shoots when each method is matched to the right conditions.
Preparing the site before planting
The planting site should be prepared before clustered bellflower is placed in the ground. Soil needs to be loosened deeply enough for roots to spread without resistance. Compacted layers should be broken up because they restrict drainage and root development. A well-prepared site helps the plant establish quickly and reduces the need for corrective care later.
Organic matter is useful when incorporated evenly into the planting area. Compost improves soil texture, increases moisture retention, and supports beneficial soil life. It should not be added in excessive quantities because overly rich soil can lead to soft stems. A balanced soil structure is more valuable than a highly fertilized planting hole.
Drainage should be checked carefully, especially in heavy soils. If water remains in the planting hole for a long time after rain, the site may need improvement. Grit, compost, and raised planting can help create a healthier root environment. Clustered bellflower tolerates cool conditions better than stagnant wet soil.
The surrounding plants should also be considered during site preparation. Aggressive perennials can crowd young clustered bellflowers before they become established. Low-growing companions and open plant spacing are usually more successful. Good planning allows the plant to develop its natural upright shape without competition.
More articles on this topic
Planting young plants in the garden
Spring and early autumn are usually the best times to plant clustered bellflower. Spring planting gives the roots a full growing season before winter arrives. Autumn planting works well when soil is still warm and moisture is naturally available. Planting during extreme heat should be avoided because young plants lose water quickly.
The planting hole should be slightly wider than the root ball and deep enough to keep the crown at the same level as it was in the pot. Planting too deeply can trap moisture around the crown and increase the risk of rot. Planting too shallowly can expose roots and make establishment slower. Firming the soil gently around the root ball removes air pockets without compacting the ground.
After planting, the soil should be watered thoroughly. This first watering settles the soil around the roots and reduces transplant stress. During the following weeks, moisture should remain steady but not excessive. Young plants need regular checking until new growth confirms that roots are active.
Spacing depends on the intended garden effect and the vigor of the cultivar. A moderate distance between plants allows each clump to mature without immediate crowding. In naturalistic plantings, slightly looser spacing gives a softer meadow-like appearance. In formal borders, consistent spacing creates a clearer rhythm and easier maintenance.
More articles on this topic
Propagation by division
Division is the most reliable way to propagate clustered bellflower while preserving the characteristics of the parent plant. It is especially useful for named cultivars because seedlings may not remain identical. Mature clumps can be lifted and separated into smaller pieces with healthy roots and visible shoots. Each division should have enough crown tissue to restart strongly.
Spring division is often preferred because new growth is easy to see and the plant has the entire season to recover. Early autumn division can also work well in mild conditions. Very hot or very dry periods should be avoided because divided plants are vulnerable to moisture stress. Calm, cool weather gives the best recovery.
The lifted clump should be handled carefully to protect the roots. Old, dead, or congested material can be removed from the center. Strong outer sections are usually the best pieces for replanting. These divisions often establish faster than tired central portions.
After division, the new plants should be replanted promptly. Roots should not be left exposed to sun or drying wind. Watering after planting is essential, even if the soil already seems moist. A light mulch can help stabilize the soil while the divisions settle.
Propagation from seed and young shoots
Seed propagation is useful when many plants are needed or when natural variation is acceptable. Seeds can be sown in trays or directly in prepared soil, depending on climate and garden practice. Fine seed should be covered lightly or pressed into the surface if germination requires light exposure. The seedbed must remain evenly moist but never waterlogged.
Seedlings should be thinned or pricked out once they are large enough to handle. Crowded seedlings become weak and are more susceptible to damping-off disease. Good air circulation and careful watering are important at this stage. Gradual acclimatization prepares young plants for outdoor conditions.
Basal shoots may also be used for propagation in spring when new growth appears around the crown. Shoots with a small heel of crown tissue can root under protected conditions. This method is more delicate than division but can produce strong young plants. It is most suitable for growers comfortable with perennial propagation techniques.
Young propagated plants should not be rushed into stressful positions. They need time to build roots before competing in a mature border. A nursery bed or sheltered growing area can help them develop strength. Once established, they can be planted into their final position with a much higher success rate.