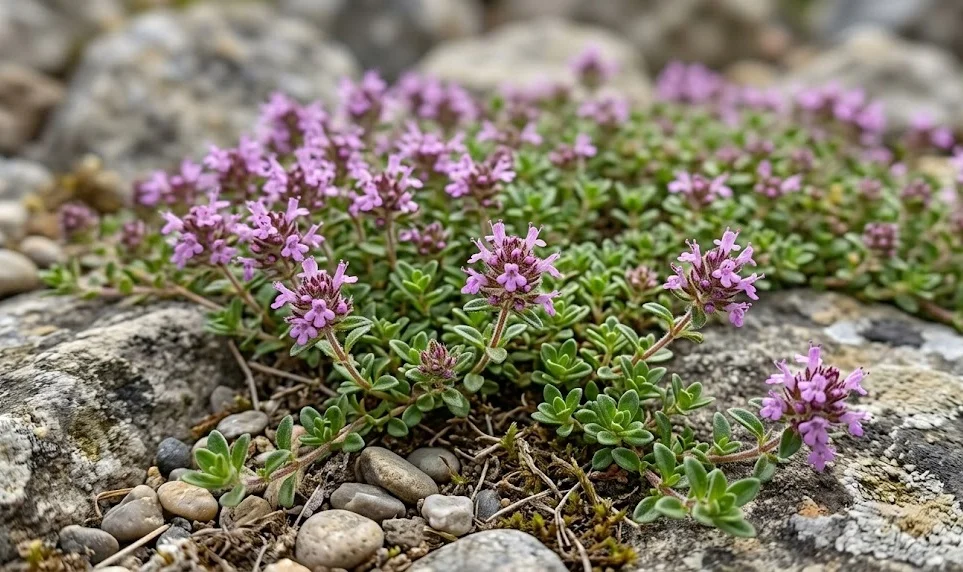
Preparing your wild thyme for the colder months is an essential part of the annual gardening cycle, ensuring its survival and vigor. While this species is naturally adapted to withstand freezing temperatures, the challenges of winter extend beyond just the cold. Wet soil, heavy snow, and the drying effects of winter winds can all take a toll on the plant’s health. A professional wintering strategy focuses on protecting the root system and managing the plant’s transition into and out of dormancy.
The most critical factor in winter survival is the state of the soil moisture during the dormant period. In many regions, the combination of cold and wet is far more dangerous to thyme than cold alone. Ensuring that your planting site has excellent drainage is the best thing you can do to prepare for the winter months. This prevents the roots from sitting in stagnant, cold water, which is a leading cause of winter kill in Mediterranean herbs.
Timing your final autumn maintenance tasks is also important for a successful wintering process. You want the plant to be as healthy and “hardened off” as possible before the first hard freeze arrives. This means avoiding late-season pruning or fertilization that could stimulate soft, vulnerable growth. By following the natural rhythms of the plant, you help it enter its resting phase with all the resources it needs for the months ahead.
Whether your thyme is growing in the open ground or in containers, there are specific steps you can take to mitigate winter risks. From choosing the right mulching materials to providing temporary windbreaks, every little bit of protection helps. A proactive approach in the autumn leads to a much easier spring recovery and a more productive growing season. The following chapters will outline the expert techniques for wintering your wild thyme collection.
Autumn preparation and hardening off
As the days grow shorter and the temperatures begin to drop, your wild thyme will naturally start to prepare for winter. You can help this process along by gradually reducing the amount of supplemental water you provide to the patch. This signals to the plant that it is time to slow down its metabolic processes and store energy in its root system. Hardening off is a biological shift that makes the plant’s tissues much more resistant to freezing.
More articles on this topic
Avoid the temptation to cut the plant back heavily in the late autumn, as the remaining foliage provides a layer of natural insulation. The old stems can help trap a protective layer of snow or air, shielding the crown from the worst of the cold. You should only remove dead or diseased material during this time, leaving the rest of the plant intact until spring. Think of the top growth as a natural winter coat for the delicate growing points near the ground.
Stop all fertilization by late summer to ensure that any new growth has plenty of time to mature before the frost. Tender, green shoots are the first things to be damaged by the cold, and their death can sometimes invite disease into the rest of the plant. A lean, slightly stressed plant is often much better at surviving a harsh winter than one that has been pampered with excess nitrogen. Resilience is built in the weeks leading up to the first freeze.
Check the area around your thyme for any debris that might trap excess moisture or provide a home for pests over the winter. Removing fallen leaves from taller trees is especially important, as they can mat down over the thyme and cause it to rot. A clean, open area allows for better air circulation and prevents the buildup of fungal spores. A little bit of tidying in October can prevent a lot of problems in March.
Mulching for winter protection
In regions with extremely cold winters or frequent freeze-thaw cycles, a light layer of mulch can be very beneficial. The goal of winter mulch is not to keep the plant warm, but to keep the soil temperature stable. This prevents the “heaving” of the soil that can occur when it freezes and thaws repeatedly, which can tear the plant’s delicate roots. A stable environment is much easier for the dormant plant to handle than constant fluctuations.
More articles on this topic
Choose a mulch material that is airy and does not hold a significant amount of moisture. Evergreen boughs, clean straw, or even a layer of coarse sand are excellent choices for protecting low-growing herbs like thyme. Avoid heavy, wet materials like shredded bark or dense compost, as these can suffocate the plant and encourage rot. The mulch should be applied only after the ground has frozen for the first time to ensure the plant is truly dormant.
If you live in an area with reliable snow cover, nature provides the best winter mulch you could ask for. Snow is a fantastic insulator that keeps the temperature around the plants near freezing, even when the air above is much colder. In such cases, your main task is to ensure that the snow doesn’t become too heavy and crush the plant structure. If a very heavy, icy crust forms, you might carefully break it up to allow some gas exchange.
In the late winter, as the temperatures begin to rise, you must be ready to remove the mulch promptly. Leaving it on too long can cause the plant to wake up too early or lead to fungal issues as the moisture levels increase. Observation of the local weather patterns and the state of the garden is the key to timing this transition perfectly. Once the threat of extreme cold has passed, let the sun reach the soil to begin the warming process.
Winter care for potted thyme
Thyme growing in containers is much more vulnerable to the cold because its roots are not protected by the large thermal mass of the earth. In a pot, the roots can experience temperatures many degrees colder than they would if they were in the ground. If you live in a cold climate, you will need to take extra steps to ensure your potted herbs survive the winter. One of the best options is to move the containers to a more sheltered location, such as an unheated garage or a cold frame.
If moving the pots is not an option, you can insulate them by wrapping them in burlap, bubble wrap, or specialized frost blankets. Grouping the pots together in a corner and filling the gaps with straw or leaves can also create a protected microclimate. Be sure that the containers are not sitting directly on cold concrete; placing them on wooden pallets or “pot feet” can provide a vital layer of insulation. Every little bit of protection for the root zone counts.
Even during dormancy, potted plants may need a very small amount of water if the winter is particularly dry and the soil is not frozen. Check the pots every few weeks and provide a tiny bit of water if the soil feels bone-dry to the touch. The goal is to keep the roots from completely desiccating, but you must be extremely careful not to overwater. A dormant plant uses very little water, so it is very easy to accidentally cause root rot.
For those in the most extreme climates, the safest way to winter potted thyme is to sink the entire container into the ground. Dig a hole in a garden bed and bury the pot up to its rim, covering it with a layer of mulch as described for ground-planted thyme. This uses the natural insulation of the earth to keep the roots safe until spring. In the early spring, you can simply lift the pot, clean it off, and return it to its usual display spot.
Early spring recovery
As the days lengthen and the soil begins to warm, your wild thyme will slowly start to emerge from its winter slumber. This is an exciting time for any gardener, but it requires a careful touch to ensure the plant recovers smoothly. The first sign of life is often a subtle shift in color as the dusty winter foliage begins to show a hint of vibrant green. Be patient and don’t be too quick to prune away what looks like dead wood, as new growth often emerges from seemingly dry stems.
Once you are certain that the danger of a hard freeze has passed, you can perform a light spring cleanup. Remove any stems that are clearly dead, brittle, and show no signs of life when scratched with a fingernail. This is also the time to clear away any remaining winter mulch and debris to let the air and light reach the crown of the plant. A gentle raking can help “fluff up” the matted foliage and encourage new growth to push through.
If the winter was particularly harsh, the plant might look a bit sparse or ragged in the early weeks of spring. Don’t worry, as wild thyme is famous for its ability to bounce back once the weather stays consistently warm. A light top-dressing of fresh compost or a very weak application of organic fertilizer can give the plant a little boost. Providing consistent, moderate moisture during this period of rapid growth will help the plant rebuild its foliage quickly.
Finally, keep an eye out for any signs of winter damage that might lead to disease issues as the humidity rises. If you see any mushy spots or mold, remove them immediately to keep the rest of the plant healthy. This is also a great time to evaluate how your wintering strategy worked and make notes for the next year. Every winter is a learning experience that helps you become a more skilled and successful gardener.