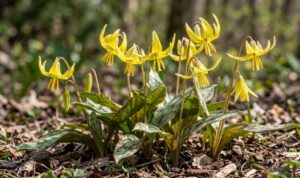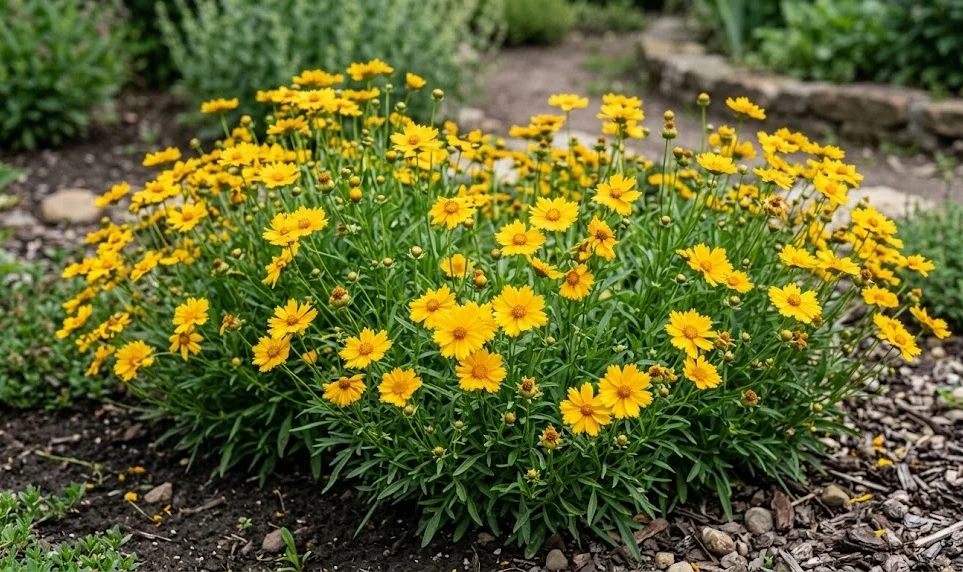
The process of planting and propagating tickseed is an essential skill for any gardener looking to expand their floral horizons. These versatile perennials offer multiple ways to increase your stock, whether you prefer starting from seeds or using vegetative methods. Mastering these techniques ensures that you can maintain a consistent presence of these cheerful blooms in your landscape without constant reinvestment. Proper timing and preparation are the cornerstones of successful establishment and long-term growth for these hardy garden favorites.
Strategic site selection and timing
Choosing the right time to plant tickseed is crucial for ensuring that the young specimens have enough time to establish their root systems. The most favorable periods are typically in the early spring, once the danger of hard frost has passed, or in the early autumn. Planting in the spring allows the flowers to settle in before the heat of summer, while autumn planting takes advantage of the cooling soil. You should always check the local weather forecast to avoid planting just before extreme temperature shifts or heavy rain.
Location is equally important, as the site must meet the specific light and drainage requirements of these particular perennials. You should look for a spot that receives at least six to eight hours of direct sunlight each day for optimal flowering. If the area is too shaded, the plants may become leggy and produce fewer blooms than expected. Professional gardeners also consider the prevailing wind patterns, as very tall varieties might need some protection from strong gusts that could snap their stems.
Soil preparation before planting can make a significant difference in how quickly your tickseed adapts to its new home. You should clear the area of any weeds or grass that might compete for nutrients and water during the establishment phase. Loosening the soil to a depth of about twelve inches ensures that the roots can penetrate deeply and find moisture during dry spells. If your soil is particularly heavy, this is the time to incorporate some grit or sand to improve the overall drainage.
Spacing your plants correctly is a common mistake that many beginners overlook during the initial planting phase. You must account for the mature width of the variety you are planting, which can range from twelve to thirty-six inches. Providing enough room for growth ensures proper air circulation and reduces the risk of fungal diseases later in the season. A well-spaced garden looks more professional and allows each individual plant to develop its natural, beautiful shape without interference.
More articles on this topic
Sowing seeds for a vibrant garden
Starting tickseed from seeds is a cost-effective way to create large drifts of color throughout your landscape. You can choose to sow the seeds directly into the garden beds or start them indoors in trays to get a head start on the season. If sowing directly, wait until the soil has warmed up and there is no longer a risk of frost damaging the delicate seedlings. Lightly raking the seeds into the surface of the soil is usually sufficient, as they require some light to germinate effectively.
Indoor seed starting offers more control over the environment and can lead to stronger plants by the time they are ready for the outdoors. You should use a high-quality seed-starting mix that is sterile and provides the right balance of moisture retention and drainage. Keep the trays in a bright, warm location and ensure the soil remains consistently moist but not waterlogged. Once the seedlings have developed their second set of true leaves, they are ready to be thinned or transplanted into larger containers.
Hardening off is a vital step that many gardeners skip when moving indoor-grown seedlings to the garden. This process involves gradually exposing the young plants to outdoor conditions over a period of about a week. You should start by placing them in a sheltered spot for a few hours a day and slowly increasing their exposure to sun and wind. This transition period prevents transplant shock and ensures that your tickseed starts its life in the garden with the best possible chance of success.
Maintenance of the young seedlings requires a delicate touch and regular monitoring during the first few weeks of growth. You must ensure they receive consistent moisture, as their small root systems cannot yet withstand extended periods of drought. Removing any competing weeds by hand will prevent the young plants from being smothered or starved of essential resources. As they grow stronger, you can gradually reduce the frequency of watering and allow them to become more self-sufficient in their environment.
More articles on this topic
Vegetative propagation through division
Division is often the preferred method for propagating existing tickseed plants because it results in mature specimens that are genetically identical to the parent. This technique is best performed every three to four years to maintain the health and vigor of older clumps. You should look for signs that the plant is becoming overcrowded, such as a dead center or a noticeable decrease in flowering. Spring is generally considered the ideal time for this task, as the plant is just beginning its active growth cycle.
The process of division begins by carefully digging around the perimeter of the plant to lift the entire root ball out of the ground. Once the plant is removed, you can use a sharp spade or a garden knife to slice the clump into smaller sections. Each new division should have a healthy portion of roots and at least a few green shoots to ensure it can survive on its own. Professional gardeners often discard the old, woody center and focus on replanting the younger, more vigorous outer sections.
Replanting your divisions immediately is important to prevent the exposed roots from drying out in the sun and air. You should prepare the new planting holes in advance and ensure they are large enough to accommodate the roots without crowding. Firm the soil gently around the new plants and water them thoroughly to settle the earth and eliminate any air pockets. With proper care, these divisions will quickly establish themselves and often bloom in their very first season after being moved.
This method of propagation not only increases your plant count but also serves as an essential maintenance task for the health of your garden. By regularly dividing your tickseed, you prevent the beds from becoming too dense and encourage a more prolific display of flowers. It is also an excellent opportunity to share plants with friends or neighbors who may be looking to add some color to their own landscapes. Professional gardeners view division as a sustainable way to manage and expand a beautiful and healthy perennial collection.
Successful establishment and aftercare
The first few weeks after planting or propagating are critical for the long-term success of your tickseed specimens. You should monitor the soil moisture closely, ensuring that it remains damp but never saturated during the initial rooting phase. Even drought-tolerant varieties need a reliable source of water while they are establishing themselves in a new location. Once you see new green growth appearing, it is a good sign that the roots have taken hold and the plant is starting to thrive.
Mulching around the base of newly planted tickseed provides several benefits that support healthy establishment. A thin layer of bark chips or compost helps to conserve soil moisture and suppresses the growth of weeds that would otherwise compete with your new plants. You should be careful not to pile the mulch directly against the stems, as this can encourage rot or provide a hiding place for pests. A properly mulched garden bed looks clean and professional while providing a protective environment for your floral investments.
Monitoring for pests and diseases is especially important for young or newly divided plants that may be more vulnerable to stress. You should check the undersides of leaves and the tender new shoots for any signs of aphids or other common garden insects. If you notice any issues, addressing them early with organic or mechanical methods can prevent the problem from spreading. Maintaining a clean garden environment by removing dead foliage and debris also goes a long way in preventing future health problems.
As your tickseed begins to mature, you can slowly transition to a more hands-off maintenance routine that reflects its natural resilience. These plants are remarkably hardy once established and will require less frequent watering and intervention as their root systems grow. Continuing to observe the plants throughout the season will help you understand their specific needs and how they respond to your local climate. With a strong start and thoughtful aftercare, your tickseed will provide a stunning display of color for many years to come.