Establishing a successful patch of wild thyme begins with a strategic approach to both planting and the various methods of propagation. This versatile herb offers multiple ways to expand your collection, ranging from simple seed starting to more advanced vegetative techniques. Understanding the timing and environmental requirements for each method is crucial for ensuring a high success rate. By mastering these skills, you can effectively cover large areas of your landscape with this beautiful, aromatic groundcover.
The initial planting phase sets the stage for the entire lifespan of the herb in your garden. Choosing the right moment to introduce the plants to their permanent home can prevent many common establishment problems. Generally, the mild temperatures of spring provide the best environment for young plants to develop strong roots. A well-planned start ensures that your thyme will be hardy enough to withstand the challenges of the coming seasons.
Propagation is not just about making more plants; it is about maintaining the genetic vigor of your garden. Using a combination of methods allows you to experiment with which approach works best for your specific local climate. Whether you are working with seeds or cuttings, the goal is always to produce robust individuals that mirror the parent plant’s best qualities. This continuous cycle of renewal keeps your garden looking fresh and productive year after year.
A professional gardener knows that patience is a virtue when it is combined with technical knowledge. While some methods offer quicker results, others provide a stronger foundation for long-term growth and resilience. Learning the nuances of each technique allows you to adapt your strategy based on the resources and time you have available. The following sections will guide you through the expert steps needed to successfully plant and propagate your wild thyme.
Starting from seeds
Growing wild thyme from seed is a cost-effective way to produce a large number of plants for groundcover projects. The seeds are quite small and require a light touch to ensure they germinate successfully and don’t get buried too deep. Using a high-quality, free-draining seed starting mix is essential for preventing damping-off diseases in the early stages. You should start the process indoors several weeks before the last expected frost to give the seedlings a head start.
More articles on this topic
Sowing the seeds on the surface of the soil is recommended because they often need light to trigger the germination process. A very light dusting of fine vermiculite can help retain moisture without blocking out the necessary light. Keep the growing medium consistently moist but never waterlogged, as the tiny seeds can easily rot or wash away. A spray bottle is often the best tool for providing a gentle mist that doesn’t disturb the soil surface.
Once the seedlings have developed their first true leaves, they will need plenty of bright light to prevent them from becoming leggy. If you are growing them on a windowsill, rotate the trays regularly to ensure even growth toward the light source. Gradually acclimating the young plants to outdoor conditions, a process known as hardening off, is a vital step before final transplanting. This prevents the shock of sudden exposure to wind, direct sun, and temperature fluctuations.
Transplanting the young seedlings into the garden should be done with great care to avoid damaging the delicate root systems. Space the plants according to your goals, keeping in mind that they will eventually spread to form a solid mat. Providing a small amount of water immediately after planting helps settle the soil around the roots and reduces transplant stress. With proper care, these tiny seedlings will soon transform into a lush and fragrant carpet of green.
Propagation by division
Division is one of the fastest and most reliable ways to increase your stock of established wild thyme plants. This method involves taking an existing, healthy clump and physically separating it into several smaller pieces. Each new section must have a good portion of the root system and some healthy top growth to survive on its own. The best time for this procedure is during the spring when the plant is entering its most active growth phase.
More articles on this topic
To begin the process, carefully lift the entire plant from the ground using a garden fork to minimize root damage. Shake off the excess soil so you can clearly see the structure of the root ball and the individual stems. You can often pull the plant apart by hand, but a sharp knife may be necessary for older, more compact clumps. Ensure that each division is handled gently and kept moist until it can be replanted in its new location.
Replanting the divisions immediately is crucial for minimizing the time the roots are exposed to the air. Dig a hole that is slightly larger than the root system and place the division at the same depth it was previously growing. Firm the soil around the base of the plant to remove air pockets and provide a stable foundation for new growth. A light watering will help the roots re-establish themselves in their new environment quickly and efficiently.
This method also serves to rejuvenate older plants that may have become sparse or woody in the center. By breaking them up, you stimulate the production of new, vigorous roots and shoots from the healthy parts of the plant. It is an excellent practice to perform every few years to keep your thyme patches looking their absolute best. Division is a cornerstone technique for any gardener looking to maintain a healthy and expanding herb collection.
Taking stem cuttings
Stem cuttings offer a way to create exact clones of your favorite plants without disturbing the original root system. This technique is best performed in the late spring or early summer when the stems are flexible but starting to mature. Look for healthy, non-flowering shoots that are about three to four inches long for the best chance of success. Using a sharp, sterilized blade to make the cuts prevents the spread of disease and ensures a clean wound.
Remove the leaves from the bottom half of the cutting to expose the nodes where new roots will eventually form. Some gardeners prefer to dip the cut end into a rooting hormone, although wild thyme often roots quite easily on its own. Insert the prepared cuttings into a pot filled with a sandy, well-draining potting mix that allows for good aeration. Space them far enough apart so that the remaining leaves are not touching, which helps prevent rot.
Keeping the environment around the cuttings humid is important while they are developing their new root systems. A simple clear plastic cover or a specialized propagation dome can help maintain the necessary moisture levels without saturating the soil. Place the pot in a bright spot out of direct sunlight, as too much heat can wilt the cuttings before they can take up water. Within a few weeks, you should start to see new growth, indicating that the rooting process has been successful.
Once the cuttings have established a strong root system, they can be potted up individually or moved directly to the garden. It is important to continue monitoring them closely for the first few weeks after transplanting to ensure they are adapting well. Cuttings allow you to multiply a specific variety of thyme that has particularly good flavor or a unique growth habit. This level of control is one of the many reasons why vegetative propagation is so popular among professional growers.
Site selection and preparation
The success of your planting and propagation efforts depends heavily on choosing the right location in the landscape. Wild thyme needs a spot that receives at least six to eight hours of direct sunlight every day to thrive. Inadequate light will result in weak, leggy plants that are more susceptible to pests and have less aromatic oil. Observation of the sun’s path throughout the day will help you identify the prime real estate for your new plants.
Preparing the site properly before you begin planting is a step that should never be skipped by an expert. Remove all existing weeds and grass from the area to eliminate competition for water and nutrients. If the soil is naturally heavy or poorly drained, this is the time to incorporate sand or gravel to improve the structure. A well-prepared bed provides the perfect environment for young plants to take hold and begin their journey toward maturity.
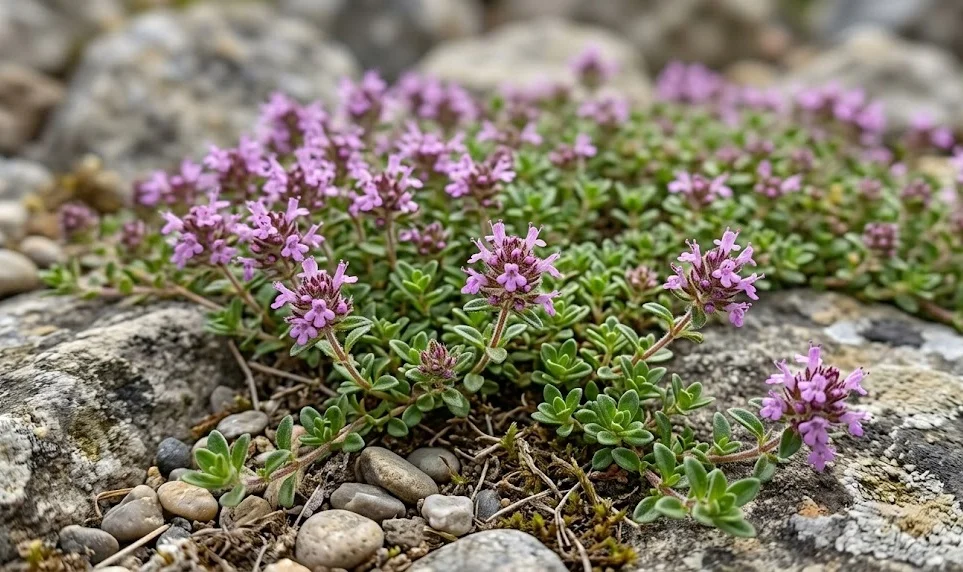
Think about the long-term layout of your garden and how the thyme will interact with other plants nearby. As a groundcover, it works beautifully around stepping stones, on rocky slopes, or at the front of a sunny border. Consider the ultimate spread of the plant to ensure you provide enough space for it to expand without overcrowding its neighbors. A thoughtful design creates a harmonious landscape where each plant has the room it needs to flourish.
Finally, consider the accessibility of the site for maintenance tasks like weeding and harvesting. You want to be able to reach your thyme patches easily without having to step on other delicate plants in the process. Placing them near paths or in raised beds can make the daily care routine much more convenient and enjoyable. A well-placed thyme garden is a source of constant beauty and utility that rewards the gardener for their careful planning.