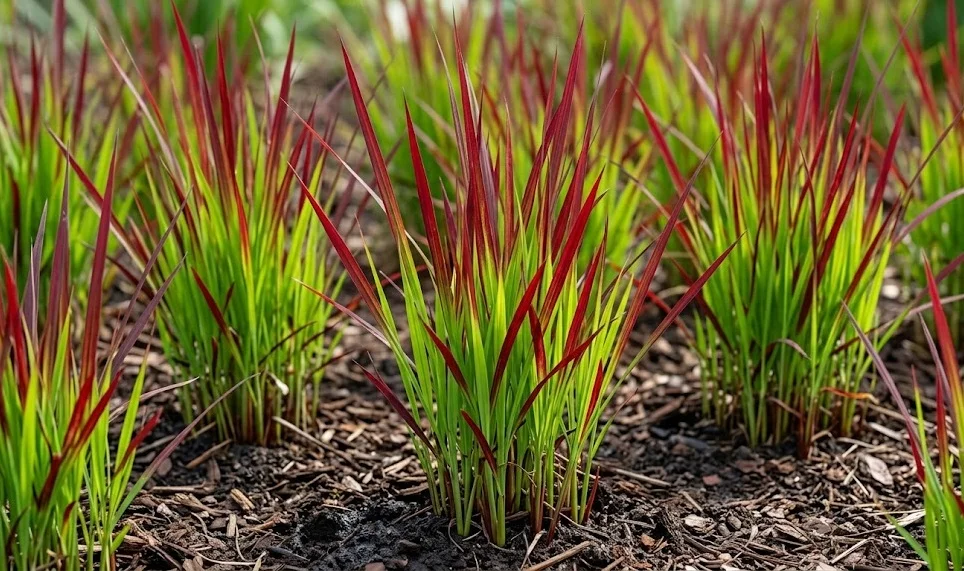

Japanese blood grass performs best when moisture and nutrition are supplied with restraint rather than excess. Its roots need reliable access to water during establishment, but they also require air and will decline in saturated soil. Fertiliser should support steady growth without producing soft, overly green leaves. A measured approach gives the plant stronger roots, better seasonal colour and a more manageable growth habit.
Understanding soil moisture needs
The ideal root zone remains lightly moist while allowing surplus water to drain after rainfall or irrigation. Japanese blood grass can tolerate short dry periods once established, but repeated severe drought causes brown tips and reduced growth. Constantly wet soil is more damaging because it deprives roots of oxygen and encourages decay. The aim is therefore consistency rather than permanent wetness.
Soil texture strongly influences watering frequency. Sandy ground drains rapidly and may need water more often during warm weather. Clay soil holds moisture for longer and should be checked carefully before irrigation. Loam enriched with moderate organic matter generally offers the most forgiving balance between drainage and water retention.
Weather conditions must be considered alongside soil type. Wind, high temperatures and low humidity increase water loss through the foliage. Cool, cloudy weather slows evaporation and may leave the root zone moist for several days. A fixed calendar cannot account for these changes, so watering decisions should be based on actual soil conditions.
Test moisture by inserting a finger or narrow trowel into the root zone. A dry surface does not always mean that deeper soil lacks water. Conversely, a recently wet surface can hide a dry root ball, especially after light sprinkling. Checking below the surface prevents both unnecessary irrigation and unnoticed drought.
More articles on this topic
Watering newly planted grasses
New plants need regular watering because their roots are still concentrated within the original nursery compost. This material may dry at a different rate from the surrounding garden soil. Water slowly enough to wet both the root ball and the nearby ground. A quick splash around the surface may leave the centre of the roots dry.
During the first few weeks, inspect moisture frequently, particularly in sunny or windy conditions. The soil should not be allowed to become powdery or pull away from the root ball. At the same time, avoid keeping the planting hole continuously saturated. Roots establish most effectively when moist periods are followed by gentle aeration as water drains away.
Deep watering encourages roots to grow downward and outward. Apply enough water to moisten the full rooting depth, then wait until the upper soil begins to dry before watering again. Frequent shallow irrigation promotes roots close to the surface, where they are more vulnerable to heat and drought. Stronger root distribution improves the plant’s long-term resilience.
Mulch can reduce moisture loss during establishment, but excessive mulch creates its own problems. A layer of organic material several centimetres deep is usually sufficient. Keep it away from the crown so that the emerging leaves remain dry and well ventilated. Renew mulch only when the previous layer has decomposed rather than adding thick layers every season.
More articles on this topic
Watering established and container-grown plants
Established plants in open ground generally require less frequent irrigation because their roots explore a larger soil volume. Water during extended dry weather, when leaves begin rolling, tips turn brown or growth slows prematurely. Do not wait until the entire clump collapses before acting. Severe wilting can damage leaf tissue even when the roots eventually recover.
A thorough soaking is more useful than daily surface watering. Direct water towards the soil rather than spraying the foliage repeatedly. Wet leaves are not automatically harmful, but prolonged moisture can encourage spotting in humid conditions. Early morning watering allows any splashed foliage to dry during the day.
Container-grown Japanese blood grass dries much faster than plants in garden beds. In hot weather, a small pot may need checking every day, although watering should still depend on moisture rather than routine. Continue watering until excess drains freely from the base. Empty decorative outer containers or saucers so that the root ball does not stand in stagnant water.
Pot size, material and exposure all affect moisture loss. Terracotta containers dry faster than glazed or plastic pots because water evaporates through their walls. Dark containers exposed to afternoon sun can become hot enough to stress fine roots. Moving the pot slightly or shading the container itself may reduce water demand without depriving the leaves of sunlight.
Fertilising for balanced growth and red foliage
Japanese blood grass is not a heavy feeder. In ordinary garden soil, a light spring application of balanced, slow-release fertiliser is often sufficient. Rich compost can provide enough nutrients without additional commercial feeding. Excess fertiliser, particularly nitrogen, encourages soft green growth at the expense of strong red pigmentation.
Before feeding, consider how the plant grew during the previous season. Healthy leaves of normal height and good colour indicate that nutrient supply is adequate. Feeding a vigorous plant simply because spring has arrived may accelerate unwanted spreading. Fertiliser should correct a genuine need rather than serve as an automatic annual treatment.
Container plants lose nutrients through repeated watering and usually require more regular feeding. Apply a diluted balanced liquid fertiliser during active growth or use a controlled-release product intended for ornamental plants. Follow the label rate conservatively rather than assuming more fertiliser will produce better colour. Stop or reduce feeding as the growing season approaches its end.
Avoid high-nitrogen lawn fertilisers around Japanese blood grass. Their nutrient balance is designed to produce rapid green leaf growth, which is the opposite of the desired ornamental effect. Fertiliser scattered onto damp foliage can also scorch the blades. Apply products to the soil and water them in according to their instructions.
Diagnosing water and nutrient problems
Brown leaf tips often point to irregular moisture, drying wind or salt accumulation. Check the root zone before increasing irrigation because damaged roots in wet soil can produce symptoms resembling drought. If the soil is saturated, improve drainage and allow it to aerate. If it is dry throughout the rooting depth, water deeply and review the normal schedule.
Pale growth may suggest nutrient deficiency, but shade and immature foliage can create a similar appearance. Examine light levels before reaching for fertiliser. A plant receiving too little sun will not develop strong red colour even in fertile soil. Moving it to a brighter location may solve the problem more effectively than feeding.
Long, floppy leaves commonly result from excessive nitrogen, excessive shade or both. Reduce fertiliser and assess whether nearby trees or shrubs have begun casting more shade than before. Avoid supporting the leaves with repeated trimming, which does not correct the underlying cause. Stronger light and leaner nutrition usually restore a firmer habit in future growth.
A white crust on the potting mixture or container rim indicates accumulated mineral salts. Flush the pot slowly with clean water, allowing a large volume to drain from the base. Repeat the process if the buildup is severe, then reduce fertiliser concentration. Regular repotting into fresh growing medium also helps prevent chronic salt stress.