The successful establishment of a garden yucca begins with a clear understanding of its planting requirements and propagation methods. While these plants are exceptionally hardy once they are established, the initial phase of their life requires careful planning and execution. Choosing the right location and soil composition will determine the growth rate and flowering potential of the specimen. This guide provides professional insights into the best practices for starting and expanding your collection of these dramatic perennials.
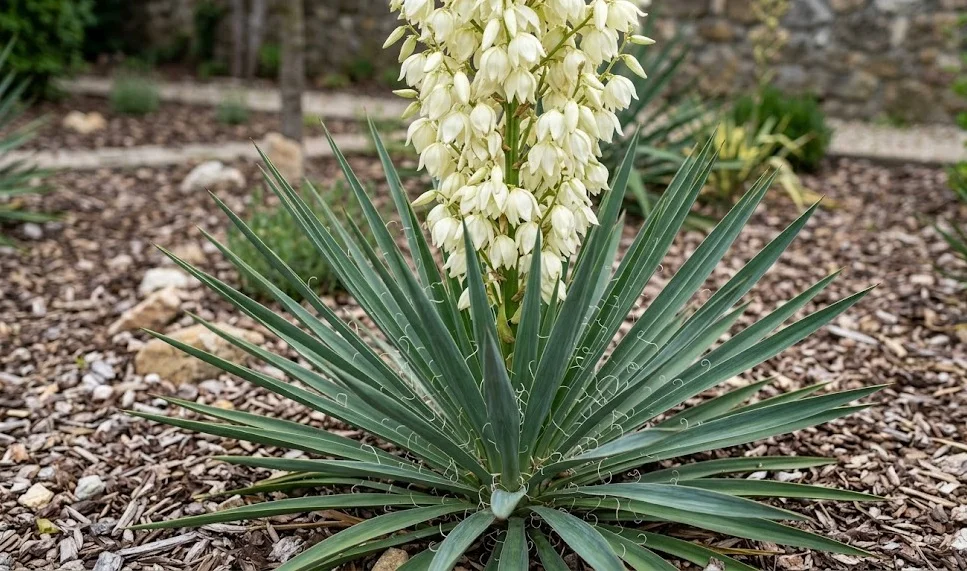
Selecting the optimal site is the most important step in the planting process. These plants crave sunlight and need a spot that receives at least six to eight hours of direct exposure every day. Without adequate light, the plant will become leggy, lose its structural integrity, and fail to produce its iconic flower stalks. When planning your garden layout, consider the future size of the plant to ensure it has enough room to expand without crowding its neighbors.
The soil must be prepared with a focus on drainage above all other factors. If the planting site consists of heavy, moisture-retentive earth, it must be amended with coarse sand, perlite, or gravel. You are looking for a soil structure that allows water to move through the root zone rapidly. A well-prepared site is the best insurance against the root rot that often plagues newly planted succulents in temperate climates.
Propagation offers a rewarding way to increase the number of plants in your landscape without additional cost. Whether you choose to divide offsets, take root cuttings, or grow from seed, each method has its own set of professional techniques. Understanding the timing and the biological needs of the plant during these processes is key. With a little patience and the right approach, you can easily turn one mature plant into a whole colony of thriving greenery.
Selecting the perfect planting site
When you are looking for the right spot, think about the long-term visibility and accessibility of the plant. Because of their sharp leaf tips, it is wise to plant them away from narrow walkways or areas where children and pets play frequently. However, their striking form makes them excellent candidates for focal points in the center of a bed or as a backdrop for lower-growing perennials. A south-facing slope is often an ideal location, as it maximizes sun exposure and naturally assists with water drainage.
More articles on this topic
The history of the planting site can also play a role in the success of your new yucca. Avoid areas where water naturally collects after a rainstorm or places where the soil remains damp for long periods. If you are planting in a container, ensure it has large drainage holes and use a specialized potting mix designed for cacti and succulents. Container planting is an excellent option for those with limited space or poorly drained garden soil.
Wind exposure is another consideration that can affect the stability of the plant, especially when it is tall and in bloom. While the leaves are tough, a very windy location might cause the heavy flower stalks to lean or even snap. If possible, provide some natural wind protection with a fence or a sturdier hedge nearby. Just make sure that the protection doesn’t cast a shadow over the plant during the peak hours of the day.
Finally, consider the soil’s nutrient profile and pH before you even dig the first hole. While these plants aren’t heavy feeders, a neutral to slightly alkaline pH will provide the best environment for root development. You can easily test your soil with a home kit to see if any adjustments are needed. Taking the time to analyze these factors beforehand will save you from having to transplant a struggling plant later on.
Professional planting techniques
The actual process of putting the plant in the ground should be done with precision. Dig a hole that is twice as wide as the current root ball but no deeper than the container it came in. This extra width allows you to backfill with amended, loose soil that the new roots can easily penetrate. If you plant the yucca too deep, the crown may rot; if it’s too shallow, the plant might become unstable as it grows.
More articles on this topic
Before placing the plant in the hole, gently loosen any circling roots if it has been growing in a pot for a long time. This encourages the roots to grow outward into the surrounding soil rather than continuing to circle the base. Position the plant so that it is perfectly vertical and sits at the same level relative to the soil surface as it did in its pot. Once you are satisfied with the placement, begin backfilling the hole with your soil mixture.
As you fill the hole, press the soil down firmly but gently with your hands to remove any large air pockets. Air pockets around the roots can cause them to dry out and die before they have a chance to establish. After the hole is filled, create a small ring of soil around the outer edge of the planting area to act as a temporary water basin. This helps direct water straight to the root ball during the first few critical weeks of growth.
Water the plant thoroughly immediately after planting to settle the soil and provide initial hydration. Even though the plant is drought-tolerant, it needs regular moisture during its first growing season to build a strong root system. Monitor the plant closely for the first month, watering only when the top few inches of soil feel dry. Once you see new growth emerging from the center, you can gradually reduce the frequency of watering.
Propagation through offsets and division
One of the easiest ways to propagate this plant is by utilizing the natural “pups” or offsets that grow at the base of a mature specimen. These are smaller versions of the parent plant that already have a partially developed root system of their own. The best time to remove these offsets is in late spring or early summer when the plant is in its most active growth phase. This timing gives the new division plenty of time to establish itself before the cold weather returns.
To remove an offset, use a sharp, clean spade to cut the underground connection between the pup and the parent plant. Be careful to include as many of the pup’s own roots as possible during this process. You may need to clear away a little soil to see exactly where the connection point is. Once separated, lift the small plant gently and prepare it for its new location.
After removing the offset, it is often beneficial to let the cut end dry for a day or two in a shaded area. This allows a callus to form over the wound, which significantly reduces the risk of fungal infections or rot once it is replanted. After the callus has formed, follow the standard planting procedures for a young yucca. Treat it with a bit more care than a mature plant, ensuring it doesn’t dry out completely while the roots are still small.
Dividing a very large, multi-crowned clump can also be done, though it requires more physical effort. You will likely need a heavy shovel or even a garden saw to separate the dense root masses. When doing a full division, ensure that each section has a healthy crown and a substantial portion of the root system. Replant these sections immediately and keep them well-monitored until they show signs of independent growth.
Root cuttings and seed propagation
Propagating from root cuttings is a fascinating and highly effective professional technique for expanding your yucca collection. This involves taking small sections of the thick, fleshy roots during the dormant season or early spring. You should aim for cuttings that are about three to four inches long and roughly the thickness of a pencil. This method allows you to produce many new plants from a single donor without damaging its overall appearance.
Place the root cuttings horizontally in a tray filled with a mixture of sand and peat moss, covering them with about an inch of the medium. Keep the tray in a warm, bright location but out of direct sunlight, and maintain a very light level of moisture. After several weeks, you should start to see small green shoots emerging from the soil as new crowns begin to form. Once these shoots are a few inches tall, they can be carefully moved into individual pots to continue growing.
Growing from seed is also possible, though it is the slowest method and requires the most patience. The seeds are usually found in the pods that form after the flowers have been pollinated. You must wait for the pods to dry and turn brown before harvesting the small, black seeds inside. Soaking the seeds in warm water for 24 hours before planting can help soften the tough outer coating and speed up germination.
Sow the seeds in a well-draining starting mix and keep them at a consistent temperature around 70 degrees Fahrenheit. Germination can be erratic, taking anywhere from a few weeks to several months, so do not give up too early. Once the seedlings have developed a couple of true leaves, they are ready to be moved into larger containers. It will take several years for a seedling to reach a blooming size, making this a project for the truly dedicated gardener.