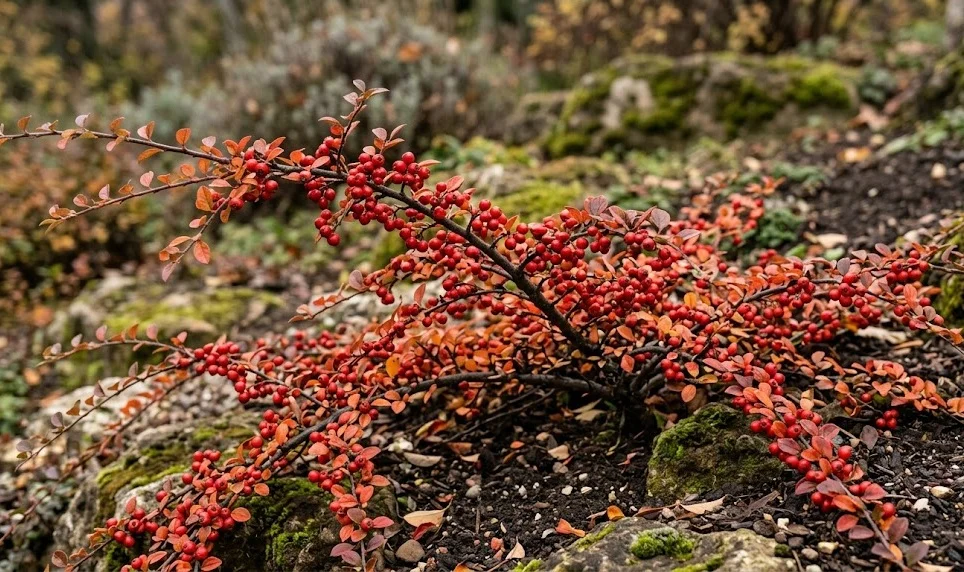
Successful establishment of any new plant in your garden begins with a well-planned planting process that respects the biological needs of the species. The wall cotoneaster is a versatile shrub that can be introduced to your landscape through various methods, including nursery-grown containers or home-grown cuttings. Taking the time to prepare the site and handle the plant with care will pay dividends in the form of rapid growth and healthy development. You should approach the planting phase as the foundation upon which all future success is built.
Timing is one of the most critical factors when you are deciding to add a new specimen to your outdoor space. The best periods for planting are generally in the early spring before new growth starts or in the mid-autumn when the soil is still warm. Planting during these windows allows the root system to settle in without the added stress of extreme summer heat or frozen winter ground. Professionals always check the local weather forecast to ensure a period of mild conditions follows the planting day.
Site preparation involves more than just digging a hole in the ground; it requires a systematic improvement of the immediate environment. You should start by clearing all existing vegetation and debris from a circular area twice the size of the root ball. Loosening the soil deeply will encourage the new roots to spread out horizontally, which is natural for this particular species. Mixing in a small amount of well-rotted compost can provide the initial nutrients needed for a strong start.
When you finally place the shrub into its new home, the depth at which it is planted is of paramount importance. The top of the root ball should be exactly level with the surrounding soil surface to prevent stem rot or root suffocation. You should gently firm the soil around the base to remove any large air pockets that could dry out the roots. Finishing the process with a deep, thorough watering will help settle the soil and provide immediate hydration to the plant.
Propagation through softwood and hardwood cuttings
Creating new plants from your existing stock is a rewarding and professional way to expand your garden collection. Softwood cuttings are typically taken in the late spring or early summer when the new shoots are still flexible but starting to mature. You should select healthy, vigorous stems that are free from any signs of pests or disease for the best results. Using a sharp, sterilized cutting tool is essential to prevent the spread of pathogens and ensure a clean wound.
More articles on this topic
Hardwood cuttings offer another reliable method and are usually taken during the dormant season in late autumn or winter. These cuttings are made from mature wood that has fully hardened and is capable of surviving colder temperatures. You should cut pieces that are approximately fifteen to twenty centimeters long and include several nodes where roots can form. Placing these cuttings in a protected area with moist, sandy soil will encourage them to develop a root system over several months.
Regardless of the type of cutting you use, maintaining high humidity around the foliage is often beneficial for root development. You can create a simple mini-greenhouse effect by covering the containers with a clear plastic dome or bag. It is important to keep these cuttings out of direct, intense sunlight to prevent them from overheating or drying out too quickly. Patience is a key virtue in propagation, as it can take several weeks or even months for a strong root system to establish.
Once the cuttings have developed a robust set of roots, they need to be gradually hardened off before being moved to their permanent locations. This process involves slowly exposing them to outdoor conditions for longer periods each day over a week or two. Hardening off prevents transplant shock and ensures that the young plants are tough enough to survive on their own. Successfully propagating your own shrubs is a mark of a truly skilled and knowledgeable gardener.
Layering techniques for easy expansion
Layering is a natural and highly effective propagation method that takes advantage of the shrub’s trailing growth habit. This technique involves encouraging a living branch to form roots while it is still attached to the parent plant. You should choose a low-growing, flexible branch that can easily reach the ground without breaking. By gently wounding the underside of the stem where it touches the soil, you can stimulate the production of new roots.
More articles on this topic
To perform professional layering, you should dig a small trench and secure the wounded section of the branch into the earth using a landscape pin or a heavy stone. Covering the pinned section with a few centimeters of moist soil and mulch will create the ideal environment for root growth. It is important to keep the tip of the branch exposed and pointing upwards to maintain its natural growth orientation. This method is often preferred because the young plant continues to receive nutrients and water from the mother plant during the entire process.
The time it takes for a successful layer to form roots can vary depending on the season and the health of the plant. You should check the progress periodically by gently tugging on the branch to see if there is any resistance from new roots. Once a strong root system has developed, you can sever the connection to the parent shrub using a clean pair of bypass pruners. It is usually best to leave the new plant in place for another few weeks to ensure it can sustain itself independently.
After the new plant is fully independent, it can be carefully dug up and moved to a new location in your garden. This method is particularly useful for filling in gaps in a hedge or extending a ground cover area without additional cost. Layering mimics the natural way these plants often spread in the wild, making it a very reliable technique for any gardener. Your ability to work with the plant’s natural tendencies will lead to a more cohesive and thriving landscape.
Managing young plants after transplanting
The first year following the planting or propagation of a new shrub is the most critical period for its long-term survival. You need to provide consistent moisture to the developing root system, especially during the first few months of active growth. Even if the species is drought-tolerant once established, young plants lack the deep roots necessary to find water during dry spells. Checking the soil moisture levels every few days is a professional habit that prevents unnecessary plant loss.
Protection from physical damage is also important as the young stems and foliage are often quite tender and susceptible to harm. You might consider using a temporary small fence or cage if you have pets or local wildlife that might disturb the new planting. Avoid using heavy fertilizers during the first growing season, as this can lead to weak, spindly growth that is easily damaged. Instead, focus on building a healthy root system through proper watering and soil management.
Light pruning may be necessary even in the early stages to encourage the desired growth form and density. You should remove any branches that are growing in the wrong direction or that appear weak and unhealthy. Encouraging a strong architectural framework from the beginning will make future maintenance tasks much easier and more effective. Professional gardeners know that early intervention is the best way to shape the future of a beautiful landscape specimen.
Monitoring for signs of stress or nutrient deficiencies will help you catch potential problems before they become serious. If you notice any yellowing of the leaves or a complete lack of new growth, reassess the environmental conditions. It is possible that the plant needs a slight adjustment in its watering schedule or a bit more protection from the wind. With a little extra care and attention during the early stages, your new cotoneaster will soon become a permanent and stunning feature of your garden.