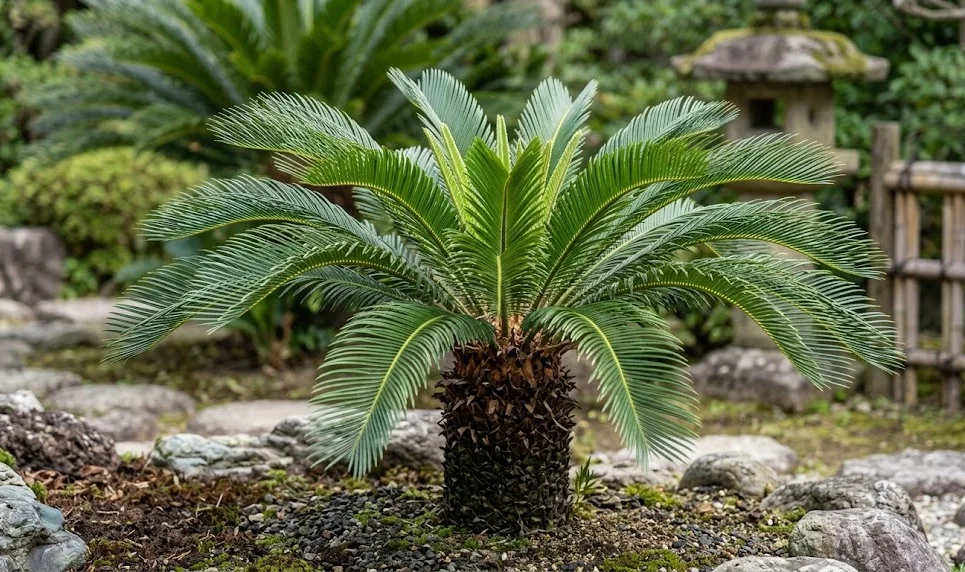
Successfully establishing a sago palm in your garden or home begins with a deep understanding of its foundational needs during the planting process. Unlike many common garden plants that grow rapidly, this species requires a more measured approach to ensure its long-term stability and health. Whether you are starting with a young nursery plant or attempting to grow a new specimen from scratch, the methods you use now will dictate the plant’s success for years to come. Planting is not just about putting a root ball in the ground; it is about creating a sustainable ecosystem for a living fossil.
Choosing the right container and environment
If you are growing your specimen in a pot, the choice of container is the first major decision that affects its future development. The container must be heavy enough to support the weight of the dense crown without tipping over during a windstorm. Ceramic, stone, or thick terra cotta are preferred materials because they offer durability and a classic aesthetic that complements the plant’s form. Ensure the pot has several large drainage holes, as any standing water at the bottom of the pot will quickly lead to root decay.
The size of the container should be proportional to the current size of the trunk and root system. A common mistake is using a pot that is too large, which holds excess moisture and increases the risk of soil-borne pathogens. Aim for a pot that provides a few inches of space around the root ball, allowing for modest growth over the next few years. As the plant is very slow-growing, you will not need to upgrade the container size very often.
Before adding soil, you can place a layer of clean gravel or broken pottery pieces at the bottom to further facilitate drainage. This simple step creates a buffer zone that keeps the roots from sitting in saturated soil after heavy watering. If the plant will be kept outdoors on a patio, consider using a saucer with feet to ensure water can flow away from the base of the pot. Proper environmental planning at this stage prevents many of the most common issues faced by domestic growers.
Positioning the container is equally important, as the plant needs a stable environment to thrive after the stress of planting. Choose a spot that receives plenty of bright, indirect light, which is essential for the photosynthesis required to establish new roots. Avoid placing the new plant in a high-traffic area where the stiff leaves might be bumped or damaged by people passing by. Once the plant is settled in its new home, try to keep it in that location to avoid the stress of frequent movement.
More articles on this topic
Soil composition and planting techniques
The soil used for planting should be specifically tailored to meet the needs of a plant that demands excellent drainage. A high-quality cactus or succulent mix can serve as a good base, but you might want to enhance it with additional perlite or coarse sand. The goal is to create a substrate that feels gritty and does not clump together when squeezed while wet. This structure allows air to circulate around the roots, which is vital for the health of the entire organism.
When you are ready to plant, prepare a hole that is slightly wider than the root ball but no deeper than the current soil level in the nursery pot. It is a common error to bury the trunk too deep, which can lead to crown rot and eventual death of the plant. The top of the trunk should sit just at or slightly above the soil line to ensure the growing point stays dry. Gently firm the soil around the roots to remove large air pockets, but do not pack it so tightly that you restrict oxygen flow.
If you are planting in the garden, take the time to amend the native soil if it is heavy with clay or retains too much moisture. Mixing in a significant amount of organic compost and sand can improve the texture and nutrient profile of the planting site. Some gardeners prefer to plant on a slight slope or create a raised bed to further ensure that water drains away from the trunk. This proactive approach to soil management is the best insurance policy for your plant’s long-term survival.
After the plant is in the ground or its new pot, water it thoroughly to help the soil settle around the roots. This initial watering should be deep enough to reach the bottom of the root system, encouraging the plant to grow roots downward. You may notice some slight settling of the soil after the first few waterings, and you can add a bit more mix to level it out if necessary. Avoid fertilizing immediately after planting, as the roots need time to adapt to their new environment before they can process nutrients.
More articles on this topic
Propagation by seeds and patient cultivation
Growing these plants from seeds is a true test of a gardener’s patience, as the process is exceptionally slow and requires specific conditions. The seeds are large, orange or red when mature, and must be handled with care because they are toxic if ingested. Before planting, it is often recommended to soak the seeds in water for twenty-four to forty-eight hours to soften the outer shell. Only seeds that sink during this soaking process are likely to be viable and have a chance of germinating.
Once soaked, the seeds should be placed on their side in a tray filled with a moist, sandy seed-starting mix. Do not bury the seeds completely; instead, press them halfway into the soil so that the top half remains visible. The tray should be kept in a warm, bright location with a consistent temperature of around 75 to 80 degrees Fahrenheit. Covering the tray with a plastic lid can help maintain the necessary humidity, but you must ventilate it regularly to prevent mold growth.
Germination can take anywhere from three to six months, and in some cases, it may take even longer before you see the first sign of life. A small, white root will usually emerge first, followed much later by a single, tiny green leaf. During this early stage, the seedling is very vulnerable and must be protected from drying out or being exposed to intense sun. It may take several years for the young plant to develop a recognizable trunk and multiple fronds.
The transition from a seedling to a stable young plant involves careful monitoring of moisture and light. You should move the seedling into a small individual pot once it has developed its first true leaf and a strong root system. Use the same well-draining soil mix that you would use for a mature plant to encourage healthy development from the start. While propagation by seed is a long journey, it is a deeply rewarding way to witness the entire life cycle of this ancient species.
Propagation by offsets or pups
A more common and faster method of propagation involves removing the small offsets, often called “pups,” that grow at the base of a mature trunk. These pups are genetically identical to the parent plant and already have the potential to grow into independent specimens. The best time to remove these offsets is during the spring or early summer when the plant is in its active growth phase. Look for pups that have reached a diameter of at least a few inches and have started to develop their own small leaves.
To remove a pup, use a sharp, sterilized knife or a small trowel to carefully detach it from the main trunk. Try to include some of the pup’s own roots if they have already begun to form, though many will successfully grow roots even if detached without them. Once the pup is removed, it is essential to let the cut surface dry and callus over for several days in a shaded area. This drying period prevents pathogens from entering the wound and causing rot once the pup is planted.
After the wound has callused, plant the pup in a small container filled with a very well-draining potting mix. Only bury the bottom half of the pup, leaving the top half and any emerging leaves above the soil line. Water the soil lightly and place the container in a warm spot with bright, indirect light. Avoid overwatering during this period, as the pup does not yet have an established root system to process large amounts of moisture.
Rooting can take several months, and you will know the process is successful when you see new growth emerging from the center of the pup. At this point, you can gradually increase the light levels and begin a very light fertilization schedule. Propagation by offsets is a great way to expand your collection or share these beautiful plants with friends and family. It bypasses the long wait times associated with seeds and produces a larger, more resilient plant much more quickly.