Establishing these beautiful annuals in your garden begins with understanding their preference for direct sowing and natural reproductive habits. They possess a delicate taproot system that resents the disturbance often associated with traditional transplanting methods. Consequently, sowing the seeds directly into their final growing positions yields the strongest and most resilient plants. Timing the sowing process correctly ensures that the seeds benefit from natural seasonal temperature shifts and moisture levels. Mastering these simple propagation techniques allows you to fill your garden beds with stunning, misty blooms effortlessly.
Selecting the right time to sow the seeds depends heavily on your local climate and specific gardening goals. For an early summer display, sowing the seeds in autumn is highly effective in regions with relatively mild winters. The seeds will overwinter in the soil and germinate promptly as soon as the earth warms up in early spring. Alternatively, successive spring sowings performed every few weeks from March to May will provide a continuous sequence of fresh blooms. This strategic approach prevents all your flowers from blooming and fading simultaneously, ensuring a long-lasting garden show.
Preparing the seedbed thoroughly is a vital step that directly influences the germination rate and subsequent seedling vigor. Begin by removing all weeds, stones, and debris from the chosen area to create a clean, unobstructed surface. Rake the soil gently to create a fine, crumbly texture that allows small seeds to make good contact with the earth. If the soil is naturally heavy or compacted, working in a light layer of compost can improve surface structure significantly. A well-prepared bed provides the perfect environment for delicate seeds to awaken and establish strong root networks.
The depth at which seeds are sown plays a critical role in their ability to germinate successfully and emerge. These seeds require light to trigger germination, meaning they should only be covered with a very thin layer of soil or vermiculite. Gently pressing the seeds into the raked soil surface using a flat board or the back of a rake is sufficient. Alternatively, drawing shallow furrows about a quarter of an inch deep allows for organized, row-based planting designs. Proper depth management ensures that emerging seedlings do not exhaust their energy reserves before reaching the life-giving sunlight.
Managing seedling development and thinning
Once germination occurs, which typically takes between two and three weeks, careful management of the young seedlings is essential. The initial leaves that appear are smooth and simple, followed quickly by the characteristic feathery, deeply divided true leaves. Keeping the soil consistently moist but never waterlogged during this delicate stage supports steady, uninterrupted growth. Protecting the vulnerable seedlings from harsh environmental elements like driving rain or intense noon sun prevents early losses. Monitoring the patch daily allows you to address any emerging issues before they threaten the entire crop.
More articles on this topic
Thinning the seedlings is a necessary task that many gardeners find difficult but must perform for the health of the patch. When seedlings grow too closely together, they compete fiercely for light, nutrients, and moisture, resulting in weak, spindly plants. Gently removing the weaker individuals allows the remaining seedlings to develop a robust, stocky structure capable of supporting large blooms. Use a sharp pair of garden scissors to snip the unwanted seedlings at ground level to avoid disturbing the roots of adjacent plants. This clean method preserves the integrity of the soil structure and protects the remaining root systems perfectly.
The ideal final spacing for mature plants ranges from eight to twelve inches apart, depending on the desired visual effect. A closer spacing creates a dense, interwoven mass of flowers and foliage that looks wonderful in casual cottage borders. Wider spacing allows individual plants to express their natural symmetrical shape and promotes maximum branch and flower development. Experimenting with different distances can help you determine what works best within the specific microclimate of your garden. Thoughtful spacing is the key to balancing individual plant health with overall visual impact in the landscape.
Hardening off seedlings is only necessary if you have chosen to start seeds indoors against the general recommendation. If you use biodegradable peat or paper pots to minimize root disturbance, the transition must be managed very carefully. Gradually expose the indoor-grown seedlings to outdoor conditions over a period of seven to ten days to prevent transplant shock. Start by placing them in a sheltered, shady spot for a few hours each day before increasing sun exposure. This gradual acclimation process strengthens the plant tissues and prepares them for the realities of garden life.
Natural self-seeding and collection techniques
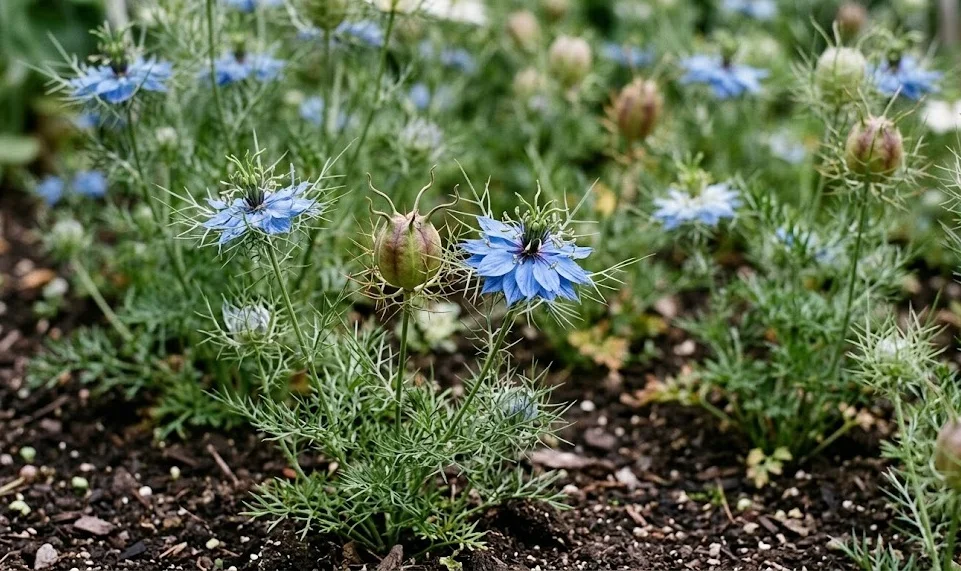
One of the most delightful characteristics of this species is its exceptional ability to self-seed naturally year after year. Once established in a garden, the mature seed pods will automatically split open to scatter their dark, angular seeds across the surrounding soil. This natural process creates a perpetual cycle of beautiful blooms with virtually no additional effort from the gardener. The resulting seedlings often appear in unexpected but visually pleasing combinations with other garden plants, enhancing the natural charm. Managing this self-seeding habit allows you to maintain a dynamic, evolving flower display over multiple growing seasons.
More articles on this topic
If you wish to control the spread or collect seeds for deliberate planting elsewhere, timing the harvest is absolutely critical. Watch the decorative seed capsules closely as summer transitions into autumn and the vibrant colors begin to fade into papery brown. The capsules are fully mature when they become dry and crisp, and small openings appear at the very top of the structure. Inverting the dried pods over a clean paper bag or container allows the mature seeds to spill out easily. Collecting seeds manually gives you complete control over where this beautiful plant appears in your future landscape designs.
Processing and storing the collected seeds correctly ensures they remain viable for planting during the next scheduled sowing season. Separate the seeds from any remaining chaff or dried pod fragments by gently blowing over them or using a fine sieve. Allow the cleaned seeds to air-dry completely on a sheet of parchment paper in a well-ventilated room for several days. Store the dry seeds in labeled paper envelopes or airtight glass jars kept in a cool, dark, and dry location. Proper storage preservation protects the genetic potential of the seeds and ensures high germination rates when spring returns.
Embracing the erratic nature of self-sown seedlings can lead to stunning, accidental design triumphs in informal garden spaces. These plants excel at finding tiny pockets of soil between paving stones, along gravel paths, or at the edges of stone walls. If a seedling appears in an inconvenient location, it can easily be hoed out or removed while still young and tender. Allowing some plants to naturalize creates a sense of age and permanence that deeply enriches the atmosphere of any garden. Balancing control with natural freedom is the secret to creating an authentic, living cottage garden ecosystem.
Advanced propagation methods and experimentation
While direct sowing remains the gold standard, advanced gardeners often enjoy experimenting with alternative propagation methods to push boundaries. Trying different sowing mediums, such as custom blends of coco coir, perlite, and organic compost, can yield interesting growth responses. Greenhouses and cold frames offer controlled environments that allow for much earlier sowing dates than would be possible in the open garden. These structures protect young plants from unpredictable late-winter freezes and heavy spring downpours, giving them a significant head start. Exploring advanced techniques deepens your understanding of plant physiology and refines your practical horticultural skills.
Conducting controlled germination tests is a fantastic way to assess the viability of older or home-collected seed lots before planting. Place a sample of ten seeds between layers of damp paper towel inside a sealed plastic bag kept in a warm room. Inspect the bag every few days to monitor the appearance of tiny white roots indicating successful germination. Counting the number of sprouted seeds gives you an accurate percentage that helps determine how thickly to sow in the garden. This scientific approach eliminates guesswork and ensures you achieve the perfect plant density in your ornamental beds.
Hybridization experiments represent another exciting avenue for enthusiastic horticulturists wishing to develop unique variations in flower color or form. By carefully transferring pollen between different colored varieties using a fine artist’s brush, you can create custom seed crosses. Bagging the pollinated flowers prevents bees from introducing unwanted pollen and disrupting your controlled breeding experiment. Labeling each cross clearly and saving the resulting seeds separately allows you to track the inheritance of interesting traits. Developing your own unique garden strains brings an immense sense of pride and personal accomplishment to your hobby.
Understanding the genetic diversity present within this single plant species helps you appreciate its historical and modern garden variations. Traditional varieties feature intense sky-blue blossoms, but modern breeding has introduced soft pinks, deep purples, and pure whites into the palette. Some selections boast double rows of petals, creating a much fuller, more substantial flower appearance nestled within the green bracts. Saving seeds from the most exceptional plants in your garden preserves those desirable characteristics for future generations to enjoy. Progressive propagation turns gardening from a simple maintenance routine into a creative, lifetime artistic pursuit.