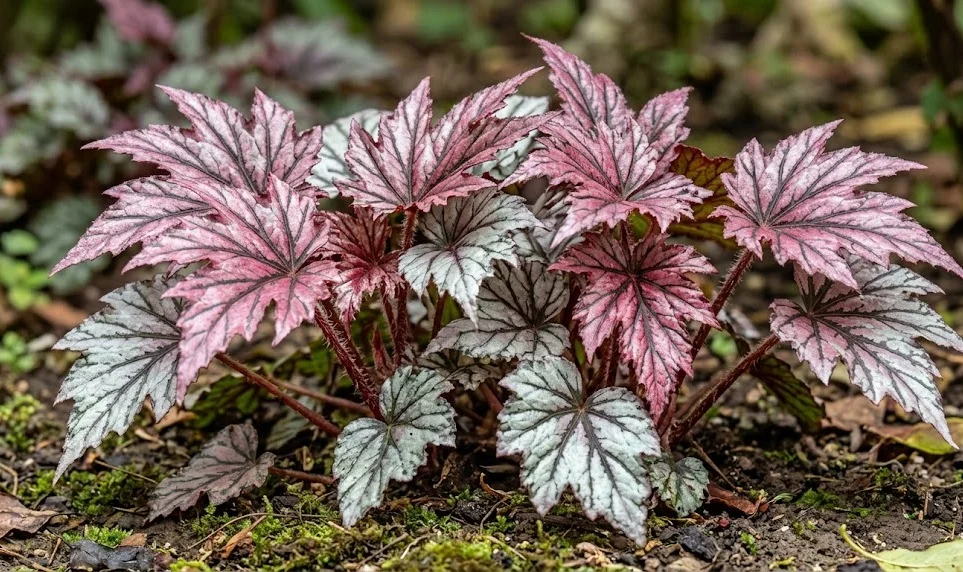
The process of planting and propagating the king begonia is an essential skill for any enthusiast looking to expand their collection. This particular variety is known for its ability to regenerate from small sections of leaves or rhizomes, making it a favorite for experimentation. Successful propagation requires a controlled environment with high humidity and stable temperatures to encourage new growth. By following the correct procedures, you can turn a single healthy plant into a flourishing indoor garden.
When you first bring a king begonia home, or when it outgrows its current container, proper planting becomes your primary focus. Selecting a pot that is only slightly larger than the current root system is a crucial rule for preventing overwatering issues. A container that is too large will hold excess moisture, which can lead to the rapid decline of the sensitive root hairs. Always ensure that you use a fresh, high-quality potting mix specifically designed for houseplants that prefer slightly acidic conditions.
The physical act of planting should be done with extreme care to avoid damaging the brittle stems and delicate leaves. Gently loosen the roots of the plant if they have become pot-bound, but be careful not to tear them unnecessarily. Place the plant at the same depth it was previously growing, as burying the crown too deep can cause it to rot. Once the plant is situated, lightly firm the soil around it and provide a thorough watering to settle the roots into their new home.
Timing is everything when it comes to both planting and propagation of this stunning hybrid species. The best time to undertake these tasks is during the early spring when the plant is entering its natural growth phase. During this period, the plant has the highest energy levels and the greatest capacity for recovery and new root development. If you propagate during the winter, the success rate will be significantly lower due to the plant’s dormant state.
Preparing the propagation environment
Before you begin taking cuttings, it is vital to set up a dedicated space where the young plants can thrive. A small propagation tray with a clear plastic dome is one of the most effective tools for maintaining high humidity levels. The environment inside the dome should remain consistently moist but not dripping with condensation, as too much water can lead to decay. Placing the tray in a warm spot with bright, indirect light will provide the energy needed for cell division and growth.
More articles on this topic
The choice of substrate for propagation is different from the soil used for mature plants. Many growers prefer a mix of perlite and peat moss or even pure vermiculite for starting new cuttings. These materials provide a sterile environment and excellent aeration, which are critical for the development of fragile new roots. Ensuring that the substrate is evenly moist before inserting the cuttings will help them stay hydrated from the very beginning.
Sterilization of your tools is a professional step that should never be skipped during the propagation process. Pathogens can easily be transferred from one plant to another through dirty scissors or knives, potentially ruining your efforts. Use rubbing alcohol or a mild bleach solution to clean your blades before making any cuts on the parent plant. This simple precaution significantly increases the likelihood of a successful and disease-free propagation outcome.
Temperature control within the propagation area must be monitored closely to ensure the best possible results. A consistent bottom heat, provided by a specialized seedling heat mat, can dramatically speed up the rooting process. The ideal temperature for rooting begonia cuttings is usually around 21 to 24 degrees Celsius. Avoid placing the propagation tray in a location where it might experience cold drafts or direct sunlight, which can cause extreme temperature swings.
Leaf cutting techniques
One of the most fascinating ways to multiply your king begonia is through the use of leaf cuttings. This method involves taking a healthy, mature leaf and cutting it into several smaller sections or using the entire leaf blade. Each section must contain a portion of a major vein, as this is where the new plantlets will eventually emerge. This technique allows you to produce many new plants from just a single leaf of the parent specimen.
More articles on this topic
If you choose to use the whole leaf method, you can lay the leaf flat on the surface of the moist substrate. Small incisions should be made across the main veins on the underside of the leaf to encourage root formation at those points. Pin the leaf down using small U-shaped wires to ensure it stays in constant contact with the growing medium. Within a few weeks, you should start to see tiny roots and eventually small leaves sprouting from the cut areas.
Another popular variation is the wedge cutting method, where the leaf is sliced into triangular pieces. Each triangle should have a piece of the main vein at its narrowest point, which is then inserted vertically into the substrate. Ensure that the vein is buried just deep enough to stay stable but not so deep that the leaf tissue begins to rot. This method is often more space-efficient and can result in a high number of new plants in a small area.
Once the new plantlets have developed their own root systems and a few leaves, they can be carefully separated from the original leaf tissue. This process requires a steady hand and a small tool to avoid damaging the tiny and fragile new growth. Move the young begonias into small individual pots with a standard begonia potting mix to continue their development. Gradually acclimating them to lower humidity levels will help them transition into the general household environment.
Dividing the rhizomes
Rhizome division is a more direct way to propagate king begonias and is best performed during the repotting process. The rhizome is the thick, horizontal stem that grows along the surface of the soil and from which the leaves emerge. A healthy, mature plant will often have a rhizome that can be divided into several sections, each with its own roots and leaves. This method results in larger, more established plants much faster than starting from leaf cuttings.
To divide the plant, carefully remove it from its pot and shake off the excess soil to reveal the structure of the rhizomes. Identify natural breaking points where the rhizome has branched or where there are clear sections with their own root clusters. Using a sharp, sterilized knife, cut the rhizome into pieces that are at least two to three inches long. Each section must have at least one or two healthy leaves attached to ensure it can continue to produce energy.
After making the cuts, it is often beneficial to let the wounded ends of the rhizomes callow over for a few hours before replanting. This simple step helps prevent soil-borne pathogens from entering the plant through the fresh cuts. When replanting the divisions, place the rhizome horizontally on the soil surface and press it down gently. Do not bury the entire rhizome; instead, leave the top half exposed to the air to prevent rot and encourage new leaf growth.
Water the new divisions sparingly at first, as they need time for their roots to settle and for the cuts to fully heal. Overwatering at this stage is a common mistake that can lead to the loss of the newly divided plants. Keep the divisions in a warm, humid environment with indirect light until you see signs of active new growth. Once the plants are established, you can treat them as mature specimens and move them to their permanent locations.