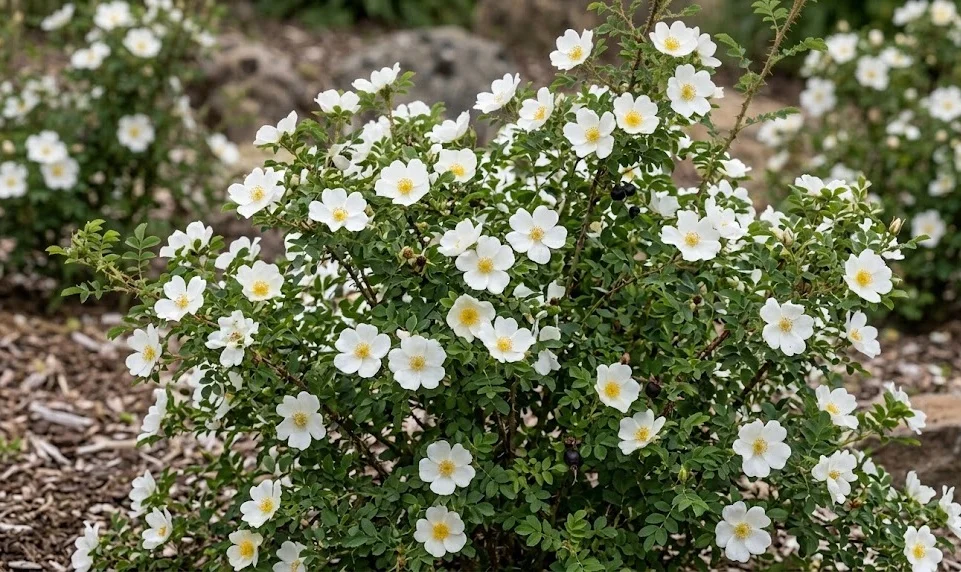
Successful cultivation of the burnet rose begins with a deep understanding of the planting process and the various methods of propagation. This species is known for its hardiness, but its initial stages of growth are critical for long-term survival in the landscape. Whether you are starting from a young nursery plant or attempting to grow new individuals from scratch, precision is required. By following professional guidelines, any gardener can master the techniques needed to expand their collection of these beautiful shrubs.
Selecting the site
Finding the perfect location is the first and most important step in the planting process for any rose. This species thrives in open, sunny areas where it can receive at least six hours of direct sunlight each day. Proper light exposure ensures that the plant develops a compact shape and produces a high density of flowers. Avoiding low-lying areas where cold air or water can collect is essential for preventing root rot and frost damage.
The soil composition at the chosen site must be assessed to ensure it meets the requirements of the burnet rose. While it is adaptable to various soil types, it performs best in well-drained, sandy, or light loamy earth. If the soil is too heavy, adding grit or organic matter can significantly improve the drainage capacity. A site with a neutral or slightly acidic pH will provide the best environment for nutrient absorption and overall growth.
Air circulation is another factor that should not be overlooked when selecting a spot in the garden. Plants that are crowded too closely together are more prone to fungal diseases due to trapped moisture. Choosing a site that allows for natural breezes will help keep the foliage dry and healthy. However, in extremely windy locations, some level of protection may be necessary to prevent physical damage to the stems.
Finally, consider the long-term spread of the shrub when deciding on its placement. The burnet rose has a tendency to sucker and can cover a significant area if left unchecked. Ensure there is enough space for it to reach its full mature size without encroaching on paths or other sensitive plants. Planning for the future growth of the rose will save time and effort in maintenance later on.
More articles on this topic
Proper planting techniques
The best time to plant a new burnet rose is during the dormant season, typically in late autumn or early spring. This allows the root system to establish itself before the heat of summer or the deep freeze of winter. When preparing the hole, it should be twice as wide as the root ball but no deeper than the original container. This ensures that the roots have plenty of loose soil to grow into while keeping the crown at the correct level.
Before placing the plant in the ground, it is beneficial to soak the roots in a bucket of water for a few hours. This hydrates the plant and makes the roots more flexible and easier to spread out in the planting hole. Any damaged or excessively long roots should be trimmed with sharp, clean shears to encourage new growth. Taking the time to properly handle the roots will pay off in the form of a faster establishment period.
Once the rose is positioned in the hole, fill it with a mixture of native soil and high-quality compost. Gently firm the soil with your hands to remove any large air pockets that could cause the roots to dry out. Be careful not to pack the soil too tightly, as this can impede water penetration and root expansion. The final soil level should be even with the surrounding ground to prevent water from pooling around the stem.
Immediately after planting, give the shrub a thorough watering to help settle the soil and provide immediate hydration. Applying a thin layer of mulch around the base will help retain this moisture and regulate the temperature. It is important to keep the mulch a few inches away from the main stem to prevent rot and pest issues. Consistent monitoring during the first few weeks will ensure that the new plant is adapting well to its new home.
More articles on this topic
Sexual reproduction via seeds
Growing burnet roses from seeds is a fascinating process that allows for genetic variation among the new plants. The seeds are contained within the bright hips that form after the flowers have faded in the late summer. These hips should be harvested when they are fully ripe and have turned a deep red or purple color. Extracting the seeds requires carefully opening the hips and cleaning away the surrounding pulp and fine hairs.
Rose seeds often require a period of cold stratification to break their natural dormancy. This mimics the conditions of winter and signals to the seed that it is time to germinate when temperatures rise. You can achieve this by placing the cleaned seeds in a moist medium like peat moss and storing them in a refrigerator for several months. Without this cold treatment, the germination rate will be significantly lower and much slower.
Sowing the seeds should take place in early spring using a well-draining seed starting mix. Place the seeds just below the surface of the soil and keep the medium consistently moist but not waterlogged. Germination can be erratic, with some seeds sprouting in a few weeks while others may take much longer. Patience is key during this stage, as the young seedlings are delicate and require careful monitoring.
Once the seedlings have developed their second set of true leaves, they can be transplanted into individual pots. Providing them with bright, indirect light and a balanced liquid fertilizer will support their early development. It will take several years for a seed-grown burnet rose to reach a size where it can be planted out in the garden. This method is slow but offers the satisfaction of seeing a plant grow from its very beginning.
Vegetative propagation methods
Propagation through cuttings is a popular and effective way to create clones of a particularly desirable burnet rose. Softwood cuttings taken in early summer are often the most successful because the wood is still flexible and active. Each cutting should be about four to six inches long and contain several leaf nodes. Removing the lower leaves and dipping the cut end into a rooting hormone can significantly increase the chances of success.
The cuttings should be placed in a sterile, moist rooting medium and kept in a high-humidity environment. Covering the container with a plastic bag or placing it in a greenhouse helps to prevent the cuttings from drying out before they develop roots. It usually takes several weeks for roots to form, at which point the plants can be gradually hardened off. This method allows gardeners to quickly increase their stock of plants that are identical to the parent.
Another common method for this species is propagation by division or by removing suckers. Since the burnet rose naturally spreads through underground runners, new plants often pop up around the main shrub. These can be carefully dug up in the early spring, ensuring that a good portion of the root system is attached. These divisions can be replanted immediately in a new location or grown in pots until they are more established.
Hardwood cuttings taken during the dormant winter months are also an option for patient gardeners. These cuttings are more resilient than softwood ones but may take longer to produce a viable root system. They can be planted directly into a sheltered outdoor nursery bed where they will slowly root over the following year. Vegetative propagation ensures that the unique characteristics of the parent plant, such as flower color and growth habit, are preserved.