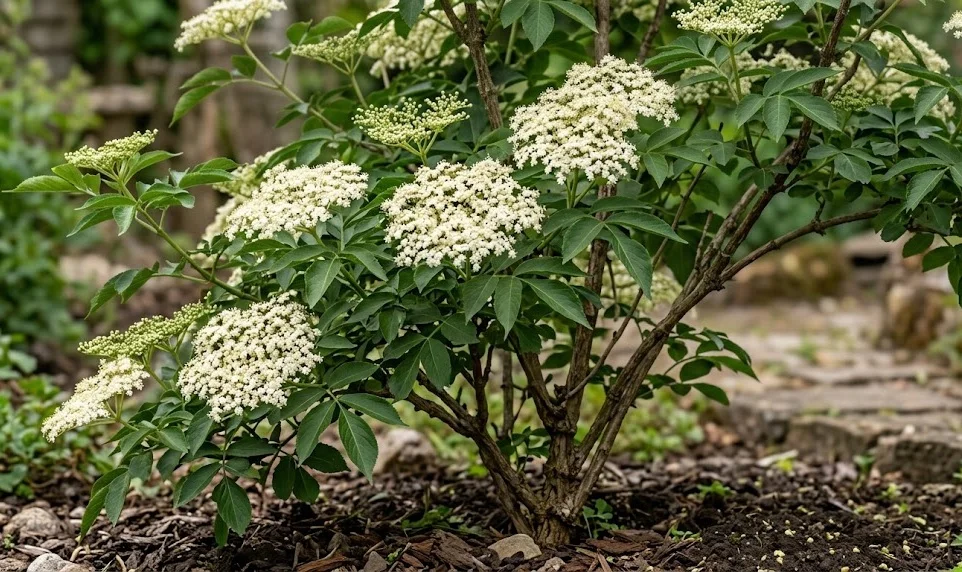
Selecting the right location is the most important step when you decide to bring the black elderberry into your garden landscape. These shrubs are quite adaptable, but they truly flourish in spots that offer a balance of moisture and excellent drainage for their roots. You should look for a place with deep, fertile soil that is rich in organic matter and free from the competition of large trees. Planning the layout of your planting site today will prevent many maintenance headaches in the years to come.
The timing of your planting efforts will significantly influence the survival rate and the initial growth speed of your new elderberry shrubs. Early spring is generally considered the best time to plant, just as the soil begins to warm up but before the plant breaks dormancy. This allows the roots to establish themselves in their new environment before they have to support a full canopy of leaves. Fall planting is also an option in milder climates, provided the shrubs have enough time to settle before the ground freezes solid.
Before you dig your first hole, it is essential to prepare the soil by removing any perennial weeds and incorporating some high-quality compost. Dig a hole that is at least twice as wide as the root ball to encourage the young roots to spread out into the loose surrounding soil. You want the plant to be at the same depth in the ground as it was in its original nursery container or pot. Proper depth ensures that the stem is protected while the roots have immediate access to the nutrients they need to grow.
Spacing is another critical factor that you must consider to allow for the impressive mature size of a healthy black elderberry bush. Most varieties require at least two to three meters of space between individual plants to ensure adequate air circulation and light penetration. If you are planting them as a hedge, you can place them slightly closer together to create a dense and beautiful screen. Giving each plant enough room to breathe will significantly reduce the risk of fungal diseases as the canopy fills out over time.
Site selection and soil preparation
When choosing a site, consider the proximity to a reliable water source, as young elderberries require consistent hydration to thrive. Avoid low-lying areas where water tends to pool after a rain, as standing water can quickly lead to root suffocation and rot. A gentle slope or a raised bed can provide the perfect solution if your garden suffers from poor drainage issues in certain areas. Observing how water moves through your landscape during a storm will give you the best clues for the perfect planting spot.
More articles on this topic
The history of the planting site can also impact the success of your elderberry, especially if other woody shrubs were grown there previously. It is often a good idea to rotate your crops and avoid planting elderberries where other members of the same family have recently lived. This practice helps break the life cycles of soil-borne pests and diseases that might be lingering in the earth. Starting with a fresh and clean site gives your young plants the best possible chance at a long and healthy life.
Integrating the elderberry into a wider garden plan requires a bit of foresight regarding the shadow it will cast as it grows taller. While they enjoy the sun, these shrubs can become quite large and might shade out smaller sun-loving plants nearby. Consider placing them on the northern side of your garden beds so they do not block the light for your vegetables or flowers. A well-placed elderberry can serve as a magnificent focal point or a productive backdrop for your entire outdoor living space.
Soil preparation should involve a deep digging process to break up any hardpan layers that might exist beneath the surface of your garden. You can use a garden fork to loosen the soil down to a depth of thirty or forty centimeters without turning the layers over. Mix in some bone meal or a slow-release organic fertilizer to provide a steady supply of phosphorus for early root development. Taking the time to build a high-quality soil structure now will pay dividends in the form of rapid growth and heavy fruit production.
Planting techniques and initial care
Once the hole is prepared, gently remove the elderberry from its pot and loosen any circling roots with your fingers. Place the shrub in the center of the hole and begin backfilling with a mixture of the original soil and some finished compost. Firm the soil down gently with your hands to remove any large air pockets that could cause the roots to dry out. Be careful not to pack the earth too tightly, as the roots still need access to oxygen to breathe and grow effectively.
More articles on this topic
Immediately after planting, give your new elderberry a deep and thorough watering to settle the soil around the root system. This initial soaking helps establish good soil-to-root contact and reduces the shock of the transplanting process for the plant. You should continue to water the young shrub regularly, perhaps two or three times a week, during its first growing season in the garden. Monitoring the moisture levels closely during this critical period is the best way to ensure the long-term survival of your investment.
Applying a thick layer of organic mulch around the base of the newly planted shrub is a professional technique that yields great results. Use wood chips, bark, or straw to create a circle of protection that is about five to ten centimeters deep. Keep the mulch a few centimeters away from the actual stem of the plant to prevent moisture buildup against the bark, which can cause rot. This mulch layer will keep the soil moist and cool while also preventing weeds from stealing the nutrients intended for your elderberry.
During the first few months, you should resist the urge to prune your new plant too heavily, as it needs all its leaves to produce energy. Only remove branches that are clearly broken or dead to keep the plant tidy and prevent any potential disease entry points. Allow the elderberry to focus all its resources on building a strong and expansive root system during its first year of life. A patient approach to initial care will result in a much stronger and more resilient bush by the time the second season arrives.
Propagation by cuttings
Hardwood cuttings are one of the simplest and most effective ways to multiply your black elderberry collection without spending any extra money. You should take these cuttings in the late winter or very early spring while the plant is still completely dormant. Select healthy, one-year-old stems that are about the thickness of a pencil and cut them into sections roughly twenty centimeters long. Ensure that each section has at least two or three nodes, which are the small bumps where leaves and branches will eventually emerge.
To plant your hardwood cuttings, simply push them into a pot filled with a well-draining potting mix or directly into a prepared nursery bed. Leave only the top node exposed above the soil line and keep the medium consistently moist but never waterlogged or soggy. By the time spring arrives and the weather warms up, you should see small green leaves beginning to sprout from the exposed buds. This is a sign that roots are forming underground and the propagation process is succeeding as planned.
Softwood cuttings are taken during the active growing season, usually in the early summer when the new shoots are still flexible. These cuttings require a bit more attention than hardwood ones, as they are prone to wilting quickly if they lose too much moisture. Place them in a humid environment, perhaps under a plastic dome or in a dedicated misting system, to keep the leaves hydrated while roots develop. With proper care, softwood cuttings can develop a robust root system in as little as four to six weeks of time.
Using a rooting hormone can increase your success rate, although elderberries are naturally quite good at producing roots on their own. Simply dip the bottom end of your cutting into the hormone powder or liquid before inserting it into the planting medium. This provides a chemical signal to the plant to prioritize root growth over leaf production in the short term. Whether you use hormones or not, keeping the environment stable and moist is the most important factor for successful propagation by cuttings.
Seed starting and grafting
Growing black elderberry from seed is a fascinating process, although it requires a significant amount of patience and a bit of cold treatment. The seeds need a period of cold stratification to mimic the winter conditions they would experience in the wild before they can germinate. You can achieve this by placing the cleaned seeds in a bag of damp sand and keeping them in the refrigerator for several months. Once the seeds have been properly chilled, they can be sown in trays and kept in a warm, bright location to begin growing.
Keep in mind that elderberries grown from seed may not be identical to their parent plant due to the genetic mixing that occurs during pollination. This variability can be an advantage if you are looking for new and unique traits, but it can be a drawback if you want a specific variety. For home gardeners who want guaranteed fruit quality, propagation by cuttings or purchasing named cultivars is usually the preferred method. However, seed starting remains a valuable tool for breeders and those who enjoy the surprises of nature in their garden.
Grafting is a more advanced technique that is sometimes used to combine the hardy rootstock of one variety with the superior fruit of another. While not common for the average home gardener, professional orchardists use grafting to ensure consistent yields and better disease resistance in their crops. The process involves joining a small piece of a desired variety, called the scion, onto the established root system of a compatible plant. This requires a sharp knife, a steady hand, and a good understanding of the plant’s vascular system to be successful.
Regardless of the method you choose, propagation allows you to share the joy of growing black elderberries with your community and friends. There is something deeply satisfying about watching a tiny cutting or seed grow into a massive, fruit-bearing shrub over the course of a few years. By mastering these techniques, you become a more self-reliant gardener who can expand your landscape and preserve your favorite varieties for the future. The black elderberry is a generous plant that responds well to the careful and knowledgeable touch of a dedicated propagator.