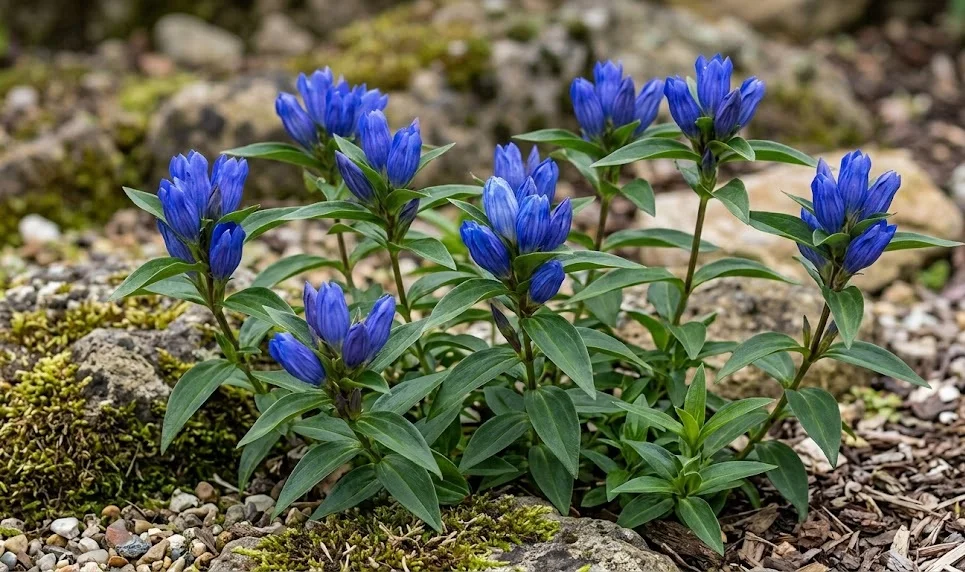
Finding the perfect location for your makino gentian is the most critical step in ensuring its long-term survival and beauty. This plant requires a spot that offers a very specific balance of sunlight and moisture to mimic its native environment. A site with dappled shade or morning sun followed by afternoon protection is usually the most successful choice. Rushing this decision can lead to poor growth or even the loss of the plant within its first year.
The soil in your chosen spot must be evaluated carefully before any digging begins to ensure it meets the plant’s needs. It should be deep enough to accommodate the long roots and rich enough to provide sustained nutrition. Poorly drained areas where water pools after a heavy rain should be avoided at all costs. If your garden has heavy clay, you might consider creating a raised bed or a berm to improve drainage.
Air circulation is an often overlooked factor when selecting a planting site for this particular mountain species. While the plant needs protection from harsh winds, it also needs a steady flow of fresh air to prevent fungal issues. Tucking it into a stagnant corner where the air never moves can lead to problems with mildew or rot. A site that feels fresh and open, yet sheltered, will provide the best environment for healthy foliage.
Proximity to other plants should also be considered to prevent the gentian from being overshadowed or outcompeted for resources. It needs its own space where it can spread its roots and leaves without constant interference from aggressive neighbors. Selecting companions that have similar water and light requirements will make your overall garden maintenance much easier. A well-planned site is the foundation upon which all future gardening success is built.
Proper planting techniques and timing
The best time to plant the makino gentian is typically in the early spring or the early autumn when temperatures are mild. Planting during these windows allows the root system to establish itself without the stress of extreme heat or cold. If you choose to plant in the spring, ensure that the danger of hard frost has passed for the season. Autumn planting should be done early enough to give the roots several weeks to settle before the ground freezes.
More articles on this topic
When you are ready to plant, dig a hole that is twice as wide as the current root ball but no deeper. This encourages the roots to spread horizontally into the surrounding soil, which provides better stability and nutrient access. You can mix some organic compost into the bottom of the hole to give the plant a gentle boost. Be careful not to bury the crown of the plant too deeply, as this is a common cause of rot.
Gently remove the plant from its container and loosen any circling roots with your fingers to encourage outward growth. Place the plant in the center of the hole and fill in the gaps with the prepared soil mixture. Firm the soil down gently with your hands to remove any large air pockets that could dry out the roots. Avoid stepping on the soil with your full weight, as this can cause harmful compaction around the delicate root zone.
Immediately after planting, give the gentian a thorough watering to help settle the soil and hydrate the roots. This initial watering is crucial for reducing transplant shock and helping the plant bond with its new environment. You might also apply a thin layer of mulch around the base, keeping it away from the central stems. Monitoring the plant daily for the first two weeks will help you catch any signs of stress early.
Growing from seeds and germination
Propagating the makino gentian from seed is a process that requires patience and a bit of specialized knowledge. The seeds often have a built-in dormancy mechanism that requires a period of cold to trigger germination. This process, known as stratification, mimics the natural winter the seeds would experience in the wild. Many successful growers start this process in the refrigerator during the late winter months.
More articles on this topic
Seeds should be sown on the surface of a fine, well-draining seed-starting mix and barely covered with a thin layer of grit. They require light to germinate, so burying them too deeply will result in failure. Keep the soil consistently moist but never soggy during the entire germination period. Covering the seed tray with a clear plastic lid can help maintain the necessary humidity levels for the young seedlings.
Germination can be erratic and may take several weeks or even months depending on the conditions provided. It is important not to give up too early if you don’t see green shoots right away. Once the seedlings appear, provide them with plenty of bright, indirect light to prevent them from becoming leggy. As they grow their first true leaves, you can begin to introduce a very weak liquid fertilizer to support their development.
Transplanting the young seedlings into individual pots is the next step in their journey toward the garden. This should be done very carefully to avoid damaging the fragile roots that are still forming. Allow the young plants to grow in a protected environment for their first full season before moving them to their permanent spot. Growing from seed is a slow process, but it is the most rewarding way to increase your collection.
Vegetative propagation and division
Division is a faster way to propagate established makino gentians and is best performed every three to four years. This process not only provides you with new plants but also helps rejuvenate the original clump. The best time for division is in the early spring just as the first signs of new growth appear. Working with the plant while it is still relatively dormant reduces the stress on the root system.
Gently lift the entire clump from the ground using a garden fork to minimize root damage during the process. Once the plant is out of the soil, you can usually see the natural points where the clump can be separated. Use a sharp, clean knife or your hands to divide the plant into several smaller sections. Each new division must have a healthy portion of roots and at least one or two growing points.
Replant the new divisions immediately into prepared soil or containers to prevent the roots from drying out. Treat these new plants with the same care as a freshly purchased specimen, ensuring they stay well-hydrated. It is often helpful to trim back some of the foliage to help the plant focus its energy on root recovery. Within a few weeks, you should see new growth indicating that the division was successful.
Taking basal cuttings is another vegetative method that can be used during the late spring or early summer. Select young, non-flowering shoots from the base of the plant and remove them with a small piece of the heel. Dip the ends in rooting hormone and place them in a mixture of peat and sand in a humid environment. This method requires more precision but can produce many new plants without disturbing the main clump.