Successful establishment of these woodland treasures begins with selecting the appropriate site and preparing the soil to meet their specific biological requirements. Because they are adapted to the forest floor, they thrive in environments that offer consistent moisture and high levels of organic matter throughout the spring. Planting should ideally take place during the autumn months when the tubers are dormant, allowing them to settle before the spring growth begins. With the right approach, these perennials will become a permanent and enchanting feature of your shaded garden areas.
Site selection and soil preparation
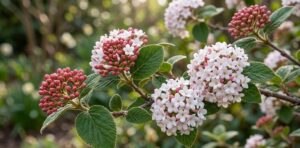
Choosing the right location is the most critical step in the planting process for these unique woodland species. They require a spot that receives dappled shade or partial shade, preferably under the canopy of deciduous trees or large shrubs. This positioning ensures they get the bright light they need in early spring but are protected from the harsh summer sun. Avoid areas that are prone to standing water, as the tubers are highly susceptible to rotting in anaerobic conditions.
Soil preparation should focus on replicating the rich, humus-filled environment of a natural forest floor. Begin by clearing the area of aggressive weeds and incorporating a large amount of well-rotted leaf mold or organic compost. This material improves the soil’s ability to hold moisture while ensuring that the structure remains loose and well-aerated. If your soil is naturally heavy, you might consider mixing in some sharp sand or fine grit to facilitate better drainage around the planting zone.
It is also beneficial to check the nutrient levels of the soil, although these plants are not particularly heavy feeders. A soil that is naturally rich in decomposed organic matter will usually provide all the necessary minerals for healthy growth. If the soil is very poor, a small amount of balanced, slow-release organic fertilizer can be mixed in during the initial preparation phase. However, excessive nitrogen should be avoided as it can promote lush foliage at the expense of the flower and fruit.
Consider the surrounding plants when selecting the site to ensure there is enough space for the colony to expand over time. These perennials look best when planted in small groups or drifts, mimicking how they naturally occur in the wild. They pair beautifully with other shade-lovers like hellebores, wood anemones, and various species of ferns. Thinking about the visual composition of the garden at this stage will lead to a more professional and harmonious result in the future.
More articles on this topic
Tuber planting depth and orientation
When planting the tubers, the depth at which they are placed is vital for their long-term survival and ability to withstand winter temperatures. Generally, the tubers should be planted about ten to fifteen centimeters deep, measured from the top of the tuber to the soil surface. This depth provides a stable environment where the temperature remains relatively constant and the moisture levels are consistent. Planting too shallow can expose the tuber to frost damage or cause it to dry out during a warm spring.
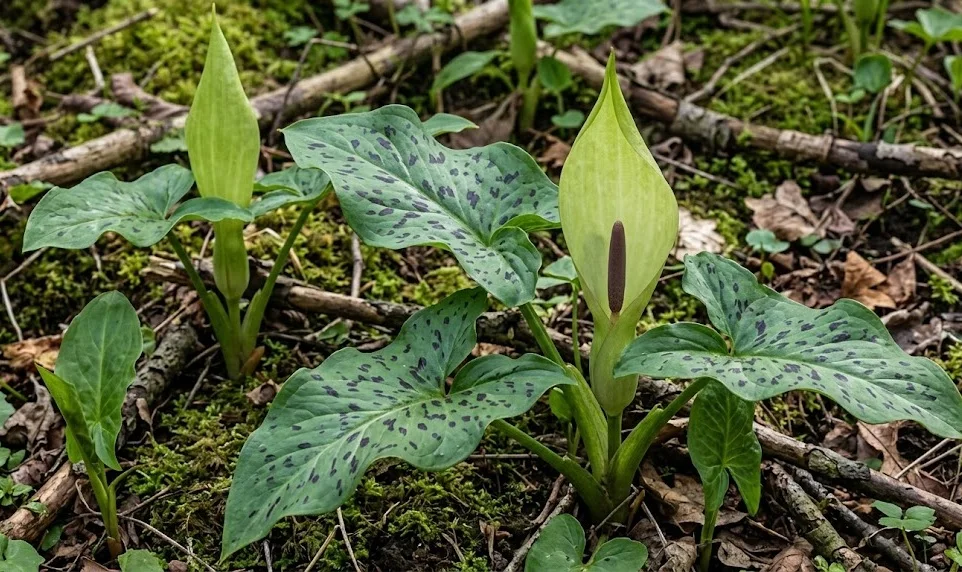
Orientation of the tuber is another detail that gardeners must pay attention to during the planting process. The tuber often has a slightly pointed end or visible growth buds that should be directed upwards towards the soil surface. If it is difficult to determine which way is up, planting the tuber on its side is a safe alternative that allows the plant to find its own way. Ensure that the soil is firmed down gently over the tuber to remove any large air pockets that could trap water or harbor pests.
Space the tubers approximately twenty to thirty centimeters apart to give each plant enough room to develop its large leaves. This spacing also allows for good air circulation between the plants, which is important for preventing fungal issues in the spring. If you are planting in a naturalistic drift, vary the spacing slightly to avoid a rigid, artificial appearance. Marking the planting spots with small wooden markers can help you remember where they are during the months when nothing is visible above ground.
After planting, water the area thoroughly to help the soil settle around the tubers and initiate the root-growing process. A layer of organic mulch, such as shredded leaves or bark, should be applied over the top of the planting site. This mulch acts as an insulating blanket and helps to suppress any weed seeds that might compete with the emerging plants in the spring. Proper planting technique during the autumn sets the stage for a spectacular display when the weather begins to warm.
More articles on this topic
Propagation via seed collection and sowing
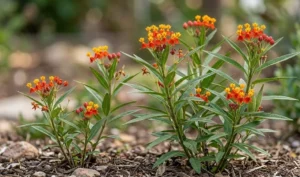
Propagating these plants from seed is a rewarding but slow process that requires a fair amount of patience from the gardener. The seeds are found within the bright red berries that appear on the central stalk during the late summer months. To harvest them, wait until the berries are fully ripe and starting to soften, ensuring you wear gloves to protect your skin from the toxic sap. The seeds must be extracted from the pulp and washed thoroughly before they can be sown.
Sowing should happen as soon as possible after harvesting, as the seeds lose their viability if they are allowed to dry out completely. Use a seed tray filled with a mixture of leaf mold and sharp sand to provide a growing medium that is both moist and free-draining. Place the seeds on the surface and cover them with a thin layer of grit or compost, then leave the tray in a cold frame or a sheltered spot outdoors. They require a period of cold stratification over the winter to trigger germination in the spring.
Germination can be erratic and may take several months, so do not be discouraged if you don’t see immediate results. Once the seedlings appear, they will produce a single, small leaf that looks very different from the mature foliage. At this stage, they are quite delicate and must be kept moist and shaded to prevent them from withering. It usually takes three to five years of growth before a seed-grown plant is mature enough to produce its first flower.
Because of the long timeframe, many professionals prefer to sow the seeds directly into a dedicated “nursery” patch of soil in a shaded corner of the garden. This method allows the seedlings to develop in natural conditions without the need for frequent repotting or handling. Once they have reached a manageable size, they can be carefully transplanted to their final locations during the dormant season. Seed propagation is an excellent way to increase your stock if you are not in a hurry for immediate results.
Propagation by tuber division
Division is the most common and fastest method for propagating established colonies of these woodland perennials. This process is best carried out in the late summer or early autumn when the foliage has died back and the berries have fallen. At this time, the plant is dormant, and the risk of transplant shock is significantly reduced for the underground organs. Using a garden fork, carefully lift the entire clump from the soil, being mindful not to bruise the fleshy tubers.
Once the clump is lifted, you will see that the original tuber has produced several smaller “offsets” or daughter tubers. These can be gently teased apart by hand or separated using a clean, sharp knife if they are firmly attached. Each new section must have at least one viable growth bud and a portion of the tuberous body to be successful. If you use a knife, it is a good idea to let the cut surfaces dry for an hour or two before replanting to prevent infection.
Replant the divided tubers immediately into freshly prepared soil at the same depth they were growing previously. This immediate replanting ensures that the roots do not dry out and the plant can begin establishing itself before the ground freezes. Division not only provides you with new plants but also helps to rejuvenate old, congested clumps that may have stopped flowering. It is generally recommended to divide the colony every four to five years to maintain maximum vigor.
After replanting the divisions, water them in well and apply a fresh layer of mulch to protect the disturbed soil. You can expect the new divisions to produce healthy leaves in the following spring, although they may not flower in their first year. This method allows you to quickly expand your woodland garden or share these interesting plants with fellow enthusiasts. Division is a straightforward technique that ensures the genetic continuity of your favorite garden specimens.