The successful establishment of a clematis depends heavily on the initial planting technique and the subsequent care provided during its first year. These plants are known for their longevity, but they require a very specific start to ensure they develop a robust and resilient root system. Propagating your own specimens can also be a rewarding way to fill your garden with vertical color without a significant financial investment. Whether you are starting with a nursery-bought plant or a cutting, the process requires attention to detail and a bit of horticultural finesse.
Choosing the right location
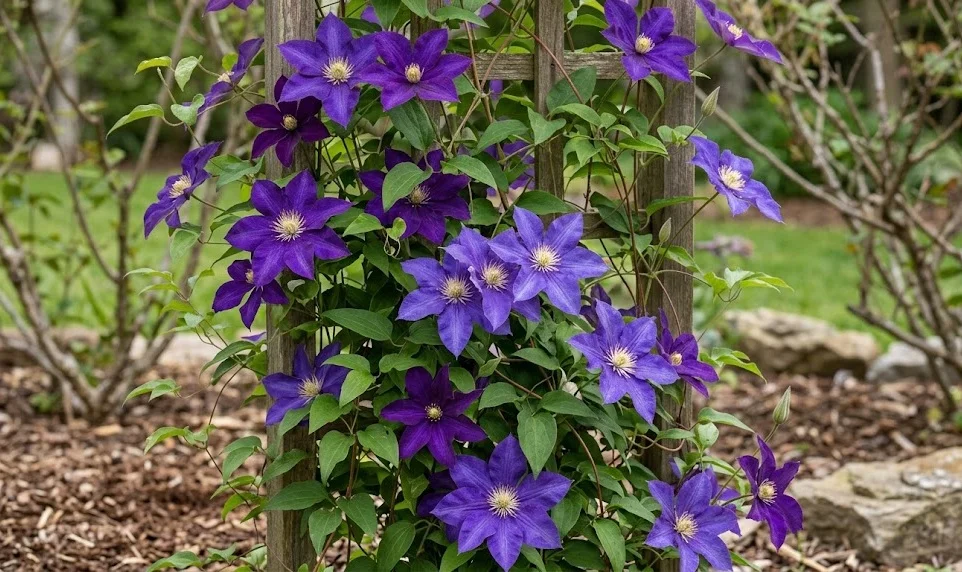
The first step in a successful planting project is identifying a spot that meets the complex needs of these climbing beauties. You must find a location that receives at least six hours of bright sunlight daily to ensure a prolific flowering display. However, it is equally important that the base of the plant remains shaded and cool to protect the sensitive roots. Many gardeners achieve this balance by planting low-growing shrubs or perennials directly in front of the clematis.
Soil quality is a non-negotiable factor that will determine the speed and health of the plant’s initial development. You should look for a spot with deep, fertile soil that has been enriched with plenty of organic matter over the years. Avoid areas where water tends to pool after a heavy rain, as constant saturation will quickly lead to root rot. If your garden has heavy clay, consider creating a raised bed or a large mound to improve the drainage capacity.
Proximity to a sturdy support structure is essential for a plant that naturally wants to reach for the sky. You should place the planting hole about twelve inches away from the wall or trellis to allow for adequate air circulation. This distance also ensures that the root system has plenty of room to expand without being constricted by foundations or footings. Planning the layout in advance prevents the need to move the plant once it has begun to wind its way upward.
Consider the ultimate size of the variety you have chosen to ensure it doesn’t overwhelm its neighbors or the structure. You should research the growth habits of your specific clematis to provide enough vertical and horizontal space for it to mature. Some varieties are compact and perfect for containers, while others can easily cover an entire garage or a large tree. Matching the plant to the scale of its environment is a hallmark of thoughtful garden design and planning.
More articles on this topic
Planting techniques and depth
When you are ready to put the plant in the ground, start by digging a hole that is twice as wide and twice as deep as the original pot. This extra space allows you to backfill with a mixture of native soil and high-quality compost or aged manure. You should also consider adding a handful of bone meal to the bottom of the hole to encourage strong root development. Preparing the site thoroughly ensures that the young plant has immediate access to the nutrients it needs to thrive.
One of the most unique aspects of planting clematis is the requirement to set them deeper than they were in the nursery container. You should position the plant so that the first two inches of the stems are buried beneath the soil surface. This technique encourages the development of dormant buds underground, which can provide a backup if the top of the plant is damaged. It is a simple but effective insurance policy against pests, diseases, and accidental mechanical damage.
Before placing the plant in the hole, gently loosen the roots if they have become pot-bound or are circling the container. You should spread them out horizontally to encourage them to grow away from the center of the plant into the enriched soil. Handle the stems with extreme care, as they are notoriously brittle and can snap easily during the transition. If a stem does break, do not worry too much, as the deep planting technique will soon produce new growth.
Once the plant is in position, fill the hole with your soil mixture and firm it down gently with your hands to remove air pockets. You should water the area thoroughly immediately after planting to help settle the soil around the delicate roots. Apply a generous layer of mulch to help retain moisture and keep the ground temperature stable during the critical first few weeks. Provide a temporary stake to guide the young stems toward their permanent support structure as they begin to climb.
More articles on this topic
Propagation via cuttings
Taking stem cuttings is one of the most reliable ways to create new clematis plants that are genetically identical to the parent. You should select healthy, non-flowering shoots in the early to mid-summer when the growth is semi-ripe. Each cutting should be about four to six inches long and include at least one set of healthy leaves. Using a sharp, sterilized knife or shears is essential to make clean cuts that heal quickly and resist infection.
Prepare the cuttings by removing the lower set of leaves to expose the nodes where the new roots will eventually form. You might want to dip the cut end into a rooting hormone powder to increase the chances of successful establishment. Place the cuttings into a pot filled with a well-draining mixture of peat moss and perlite or coarse sand. Ensuring that the soil stays consistently moist but not soggy is the key to preventing the cuttings from rotting.
To maintain high humidity, you can cover the pot with a clear plastic bag or place it in a specialized propagation dome. You should keep the cuttings in a bright location but away from direct sunlight, which could overheat and kill the tender tissues. Regularly misting the leaves will help keep them hydrated while they are still unable to draw water through roots. Be patient, as it can take several weeks or even a couple of months for a strong root system to develop.
Once you see new growth appearing on the stems, it is a good sign that the roots have successfully established themselves. You should gradually acclimate the young plants to the outside environment by hardening them off over a period of two weeks. Transplant them into larger pots to continue their development before finally placing them in their permanent spots in the garden. This method allows you to cost-effectively expand your collection or share your favorite varieties with friends.
Layering and division methods
Layering is a simple and low-stress propagation method that utilizes the plant’s natural tendency to grow roots from its stems. You should choose a long, flexible stem that can be easily bent down to reach the surface of the soil. Gently wound a small section of the stem near a node and bury it a few inches deep in the ground. Secure it in place with a U-shaped wire or a heavy stone to ensure it remains in constant contact with the earth.
Throughout the growing season, keep the buried section of the stem moist to encourage the formation of new roots at the wound site. You will find that this method is very successful because the “baby” plant remains attached to the parent for nourishment. By the following spring, the new root system should be strong enough to support the shoot on its own. You can then sever the connection to the parent plant and transplant the new clematis to its new home.
Division is another option, though it is generally reserved for mature, multi-stemmed plants that have become overly large. You should perform this task in early spring while the plant is still dormant to minimize the shock to the system. Dig up the entire root mass and use a sharp spade to divide it into two or three large sections. Ensure that each section has a healthy portion of the crown and several strong, well-developed roots.
Immediately replant the divisions at the correct depth and provide them with plenty of water and mulch to help them recover. You should expect the divided plants to take a year or two to return to their full flowering potential as they re-establish their roots. This method is an excellent way to rejuvenate an old plant that has stopped producing flowers in its center. Always monitor the newly divided sections closely for signs of stress during their first summer in the garden.