The process of establishing garden spurge begins with a careful approach to planting and the selection of the right propagation techniques. Whether you are starting with a nursery-bought specimen or trying to multiply your existing collection, success depends on timing and soil preparation. This species is remarkably rewarding to propagate once you understand the specific requirements for root development. By focusing on the details of the initial planting phase, you provide your garden spurge with the best possible start for a long and healthy life.
Site selection and soil preparation
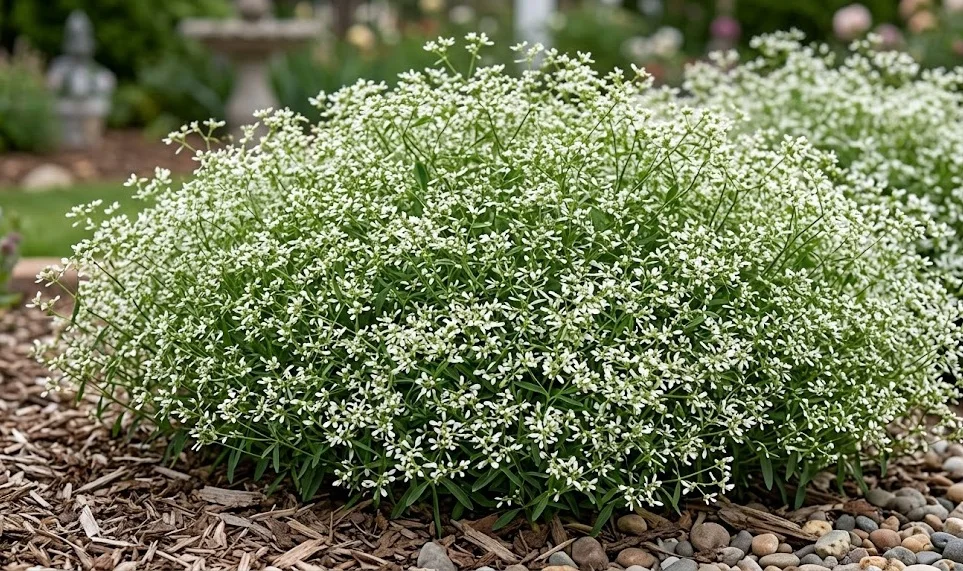
Choosing the perfect spot for your garden spurge is the first critical decision in the planting process. You should look for a location that offers excellent drainage and the appropriate amount of sunlight for the specific variety. Avoid low-lying areas where water tends to collect after heavy rain, as this will lead to root rot. A site with slightly elevated ground or a natural slope is often the best choice for ensuring long-term health.
Before digging the hole, you should spend time improving the soil structure to meet the plant’s needs. You can incorporate coarse sand or fine gravel into the soil to ensure that water moves away from the roots quickly. While the plant is not overly demanding, a bit of well-rotted compost can provide the necessary foundation for early growth. The goal is to create a medium that is loose enough for roots to spread but firm enough to provide stability.
The size of the planting hole should be significantly wider than the root ball to allow for easy lateral expansion. You should avoid planting the spurge too deep, as the crown needs to sit at or slightly above the soil surface. Filling the hole with a mixture of native soil and amendments ensures a smooth transition for the young plant. Pressing the soil down gently with your hands helps remove large air pockets without compacting the earth too tightly.
Spacing is another important consideration during the planting phase to prevent future overcrowding. You should research the expected mature width of your garden spurge and leave enough room for it to breathe. Airflow between plants is essential for preventing the buildup of humidity and the spread of foliar diseases. A well-spaced garden not only looks more professional but also functions much better as a living ecosystem.
More articles on this topic
Propagation through stem cuttings
Taking stem cuttings is one of the most effective ways to create new copies of your favorite garden spurge. You should perform this task in late spring or early summer when the plant is in a phase of active, vigorous growth. Select healthy, non-flowering shoots that appear strong and free from any signs of pests or disease. Using a sharp, sterilized knife is essential to ensure a clean cut that will heal quickly on both the parent and the cutting.
Immediately after taking the cutting, you will notice the characteristic white sap beginning to leak from the wound. You should dip the end of the cutting in cold water or use a bit of charcoal dust to stop the flow of latex. Allowing the cutting to dry and “callous” for a day or two in a shaded area is a crucial step before planting. This protective layer helps prevent rot once the cutting is placed into the rooting medium.
The rooting medium should be very light and porous, often a mix of perlite and peat or a dedicated seed-starting soil. You should insert the calloused end into the medium and keep it in a bright spot out of direct, scorching sunlight. Keeping the medium slightly moist but never soggy is the secret to encouraging the first delicate roots to emerge. You can use a clear cover to maintain humidity, but be sure to provide regular ventilation to prevent mold growth.
Once you see new growth appearing on the cutting, it is a sign that a functional root system has finally developed. You should wait until the roots are well-established before attempting to transplant the new plant into a larger container or the garden. Gradually acclimating the young spurge to outdoor conditions will prevent shock and ensure a successful transition. This method is a cost-effective and satisfying way to expand your garden’s collection of these beautiful perennials.
More articles on this topic
Division of established clumps
Dividing older plants is another reliable method for propagation that also helps rejuvenate the parent specimen. You should consider dividing your garden spurge every few years if it begins to look hollow in the center or overly crowded. The best time for this procedure is in the early spring just as the first signs of new growth appear. This timing allows the newly separated sections an entire growing season to establish themselves before winter.
The process begins by carefully digging around the entire perimeter of the plant to lift the root ball as a whole. You should try to keep as much soil attached to the roots as possible to minimize the stress of the move. Using a sharp spade or a garden knife, you can then slice the clump into smaller sections, ensuring each piece has healthy roots and shoots. Smaller divisions often establish themselves more quickly than very large, woody chunks.
Replanting the new divisions immediately is important to prevent the roots from drying out in the air. You should follow the same soil preparation steps as you would for a brand-new plant from a nursery. Water each division thoroughly after planting to help settle the soil around the exposed roots and eliminate air gaps. It is normal for the plant to look a bit wilted for a few days as it recovers from the operation.
Monitoring the new divisions closely for the first few weeks is essential for their long-term survival. You should ensure they receive consistent moisture without being overwatered while their roots are still sensitive. Providing a bit of temporary shade during the hottest part of the day can also help reduce the physical stress of the transition. Division not only gives you more plants but also keeps your original spurge looking youthful and vigorous.
Growing from seeds
While many gardeners prefer cuttings or division, growing garden spurge from seeds can be an interesting and rewarding challenge. You should collect the seeds once the pods have turned brown and are just beginning to split open naturally. Be aware that some varieties may not grow “true” to the parent if they are hybrids, resulting in surprising variations. Sowing the seeds while they are fresh often yields the highest germination rates compared to older, stored seeds.
The seeds usually require a period of cold stratification or a specific light cycle to trigger the germination process. You should surface-sow the seeds on a fine, well-draining starting mix, as many species need light to wake up. Press them gently into the surface without burying them deep under the soil, which can lead to failure. Keeping the seed tray in a consistently warm and bright environment will help speed up the emergence of the first tiny leaves.
Germination can be irregular, so you should be patient and maintain consistent care for several weeks. Once the seedlings have developed a few sets of true leaves, they are ready to be moved into individual small pots. You must handle the young plants very gently, as their stems are fragile and can easily be damaged during the move. Continue to provide bright, indirect light and careful watering as they grow into sturdy little specimens.
Hardening off the seedlings is the final step before they can be introduced to the permanent garden bed. You should take them outside for a few hours each day, gradually increasing their exposure to wind and direct sun. This process builds up the plant’s structural strength and prepares it for the realities of the outdoor environment. Growing from seed allows you to observe the entire lifecycle of the garden spurge, from a tiny speck to a mature garden staple.