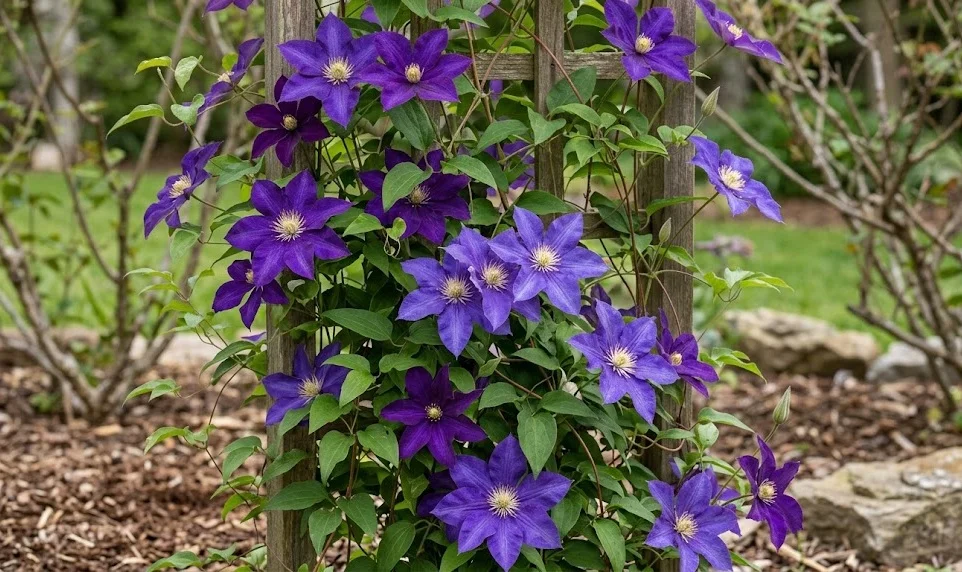
Preparing your clematis for the cold winter months is essential for ensuring it survives the freeze and returns with vigor in the spring. While many varieties are quite hardy, the combination of wet soil and extreme temperature fluctuations can still pose a significant threat to their health. The goal of wintering is to protect the crown and the root system while managing the dormant stems appropriately. By taking a few simple steps in the late autumn, you can safeguard your investment and look forward to a beautiful display next year.
Protecting the root zone
The most important part of winterizing your clematis is ensuring that the root system remains insulated against deep frost. You should apply a fresh, thick layer of organic mulch, such as shredded bark or compost, around the base of the plant. Aim for a depth of at least four to six inches, but be careful not to pile the material directly against the stems to prevent rot. This layer acts as a thermal blanket, keeping the soil temperature more stable throughout the winter.
Good drainage becomes even more critical during the winter when the plant is dormant and unable to use much water. You must ensure that the site does not become a puddle of freezing slush, which can lead to ice damage and root death. If your soil is naturally heavy or low-lying, you might want to divert excess water away from the base of the climber. Keeping the roots “moist but not wet” is the delicate balance you need to maintain during the cold season.
In areas with exceptionally harsh winters, you can provide extra protection by using a layer of evergreen boughs or straw over the mulch. These materials trap air and provide additional insulation without compacting the soil or trapping too much moisture. You should wait until the ground has frozen slightly before adding this extra layer to avoid attracting rodents that might nest there. This “double-blanket” approach is particularly useful for younger plants that haven’t yet established a deep root system.
Avoid the temptation to fertilize the plant in the late autumn, as this can stimulate new growth that is too soft to survive the frost. You want the plant to focus its energy on strengthening its cell walls and preparing for dormancy rather than producing green shoots. Any new growth that appears in November is likely to be killed by the first hard freeze, which wastes the plant’s valuable resources. Patience is a virtue in the winter garden, and the best time to feed is always in the spring.
More articles on this topic
Stem protection for tender varieties
Some of the more exotic or large-flowered clematis varieties are less hardy than their smaller-flowered cousins. If you are growing a variety that is on the edge of its hardiness zone, you should consider protecting the main stems. You can wrap the lower two or three feet of the vine in burlap or specialized garden fleece to shield it from drying winds. This protection helps prevent the bark from splitting during the rapid freeze-thaw cycles that are common in late winter.
If you have a variety that blooms on “old wood” from the previous year, protecting the stems is even more important for a good flower show. You should ensure that the stems are securely tied to their support so they don’t whip around and break in high winter winds. Sudden mechanical damage in January can mean the loss of all your May and June blossoms. A little bit of twine and some protective fabric can go a long way in ensuring a successful spring.
For very sensitive plants, some gardeners choose to carefully detach the vines from the trellis and lay them on the ground. You can then cover the entire plant with a layer of dry leaves or straw and a piece of breathable garden fabric. This method keeps the stems at a more constant temperature and protects them from the worst of the sub-zero air. While it is a bit more work, it can be the difference between a thriving plant and one that dies back to the ground every year.
Always remove these protective coverings as soon as the danger of extreme cold has passed and the buds begin to swell. Leaving the wraps on for too long can lead to overheating and the premature growth of weak, pale shoots that might be hit by late spring frosts. Timing the removal is just as important as timing the application to ensure a smooth transition into the growing season. Watch the local weather forecasts closely during the month of March to make the best decision for your plants.
More articles on this topic
Container grown plant care
Clematis grown in pots and containers are much more vulnerable to the cold because their roots are more exposed to the air. You should move your containers to a sheltered spot, such as against a south-facing wall or into an unheated garage or shed. If the pots must stay outside, you should wrap the entire container in bubble wrap, burlap, or specialized pot insulators. This prevents the root ball from freezing solid and thawing repeatedly, which is often fatal for the plant.
The type of container you use also plays a role in how well the clematis will survive the winter months. Terracotta pots are prone to cracking in freezing weather, so you should consider using frost-proof ceramic, plastic, or wooden planters. If you are worried about your favorite pot, you can “double-pot” it by placing it inside a larger container and filling the gap with insulating material. This extra layer provides a buffer against the cold and helps keep the moisture levels more consistent.
Watering remains necessary for container plants during the winter, though at a much-reduced frequency compared to the summer. You should check the soil every few weeks and provide a small amount of water if it feels completely dry. The goal is to keep the roots hydrated without allowing the pot to become a block of ice. Avoid watering on days when a hard freeze is predicted to prevent unnecessary stress on the container and the plant.
In the early spring, as temperatures begin to rise, you should move the containers back to their sunny locations gradually. This is also a good time to check if the plant needs a larger pot or a fresh top-dressing of new compost. Refreshing the nutrients and providing more space for the roots will give your container clematis a great head start for the new season. Growing clematis in pots is a wonderful way to enjoy them, provided you give them that little bit of extra winter care.
Early spring recovery steps
As the snow melts and the ground begins to warm, your first task is to carefully remove the winter mulch and any protective wraps. You should do this gradually to avoid shocking the plant with a sudden change in temperature and light levels. Inspect the stems for any signs of winter kill, which will appear as brittle, brown wood that snaps easily. Removing this dead material early on helps the plant focus its energy on the healthy, living buds that are ready to burst.
Check the stability of the support structure and make any necessary repairs before the new growth starts to wind around it. You might need to tighten wires or replace old wooden stakes that have rotted over the winter months. It is much easier to fix the trellis now than it is once the plant is covered in delicate leaves and heavy flower buds. Ensuring a solid foundation is a key part of a successful spring start for any climbing plant.
Applying a balanced, slow-release fertilizer in early spring provides the nutrients needed for the upcoming surge of growth. You should also consider adding a fresh layer of compost to replace the mulch you removed during your initial spring cleanup. This replenishment of organic matter improves the soil structure and provides a steady stream of food for the developing roots. A well-fed clematis will reward you with much more vigorous growth and a more prolific display of blooms.
Be prepared to protect the tender new shoots from any late-season frosts that might occur in April or May. You should keep a piece of garden fleece or some old sheets handy to throw over the plant if a sudden cold snap is predicted. These early shoots are the most sensitive part of the plant and can be easily damaged by even a light frost. Taking this final precaution ensures that all your hard work over the winter pays off in a spectacular summer show.