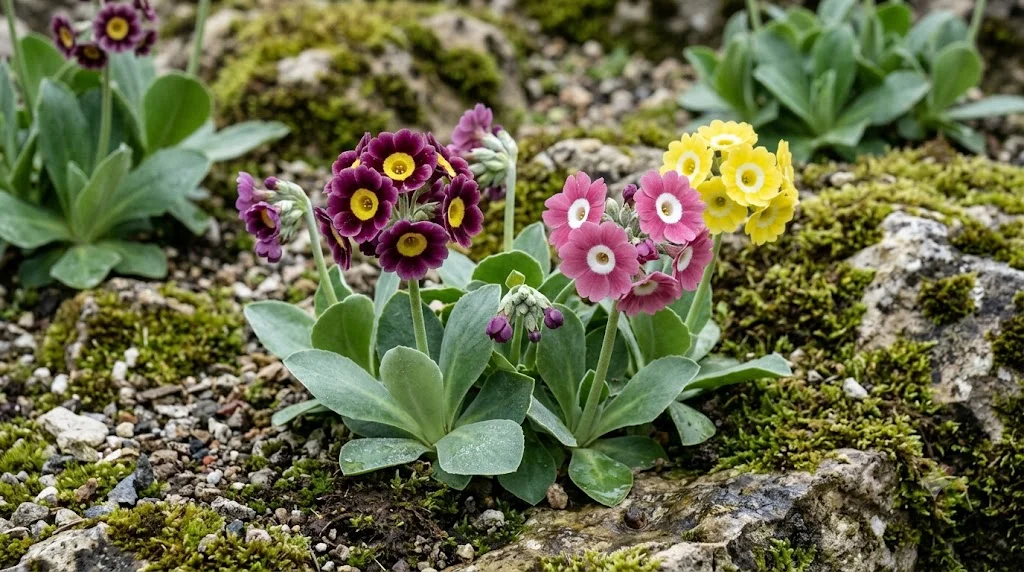

Planting auricula primrose successfully begins with careful attention to drainage, crown depth, and seasonal timing. The plant is hardy enough for many temperate gardens, but its fleshy roots and compact rosette are vulnerable to stagnant moisture. Whether it is placed in a border, trough, or individual pot, the roots should be surrounded by an airy growing medium. Correct planting gives the plant a stable foundation from which it can establish, flower, and produce healthy offsets.
Propagation is commonly carried out by division, offsets, or seed. Division and offsets preserve the characteristics of a named cultivar, making them the preferred methods for maintaining valuable plants. Seed propagation produces greater variation and is useful for breeding or creating a diverse garden population. Each method succeeds best when clean materials and moderate growing conditions are used.
Timing has a strong influence on recovery after planting or propagation. The period immediately after flowering is convenient because plants are entering active vegetative growth. Early autumn can also be suitable, provided new roots have time to develop before severe frost. Hot midsummer weather and saturated winter conditions are less favourable for disturbing the root system.
Newly planted specimens should be monitored closely until fresh growth confirms establishment. They need moisture around the roots, but they should never sit in waterlogged compost. Strong fertiliser is unnecessary during the first stage because damaged roots cannot use concentrated nutrients efficiently. Gentle care produces better results than attempting to force rapid growth.
Preparing the planting site and containers
A garden site should be free draining, bright, and protected from the hottest afternoon sun. Raised beds and sloping borders allow surplus rainwater to move away from the crown. Heavy soil should be opened with coarse grit and well-decomposed organic material before planting. The improved area should extend beyond the immediate planting hole so water does not collect around the amended section.
More articles on this topic
Rock gardens and alpine troughs provide particularly suitable conditions when their drainage layers remain functional. Auriculas look attractive beside low-growing saxifrages, small bulbs, and other compact plants with similar moisture requirements. Vigorous neighbours should be avoided because they can shade the rosettes and compete for root space. Enough room should be left around each plant for airflow and future offset development.
For container culture, select a pot that accommodates the roots without leaving a large volume of unused wet compost. A diameter slightly wider than the leaf rosette is usually sufficient for a young plant. The container must have unobstructed drainage holes and should stand where water can escape freely. Clean pots reduce the risk of transferring root pests, algae, or fungal material.
Prepare the compost before removing the plant from its old container. A loam-based mixture with coarse grit and a small amount of leaf mould provides both stability and aeration. The ingredients should be evenly combined so that fine compost does not settle into a dense lower layer. Slightly moist compost is easier to work around delicate roots than material that is either dusty dry or saturated.
Planting established auriculas correctly
Water a dry plant lightly several hours before planting so the root ball is flexible but not muddy. Remove the plant by supporting the crown and easing the pot away rather than pulling the leaves. Loosen tightly circling roots with your fingers and inspect them for damage. Healthy roots are generally firm, while dead roots may appear dark, hollow, or brittle.
More articles on this topic
Position the plant so the base of the rosette remains at or just above the final soil level. Burying the crown encourages moisture to accumulate around the leaf bases and can lead to rot. Spread the roots naturally rather than folding them into a shallow hole. Add compost gradually and firm it gently enough to remove large air pockets without compressing the mixture.
After planting, water around the roots to settle the compost. Allow all surplus water to drain before returning the pot to its display position. A thin surface layer of grit helps stabilise the crown, reduces splashing, and discourages algae. Keep grit away from the central growing point so emerging leaves are not obstructed.
Place the newly planted auricula in bright shade for several days while it adjusts. Strong sunlight can cause unnecessary water loss before the roots have resumed normal activity. Check moisture with a finger rather than following a rigid watering schedule. Once firm new leaves appear, the plant can gradually return to its usual position.
Propagating by offsets and division
Mature auriculas often produce small rosettes around the base of the parent plant. These offsets may develop their own roots while still attached, making them straightforward to separate. The best candidates are firm, healthy, and large enough to handle without damaging the growing point. Very small offsets can remain attached for another season if they lack sufficient roots.
Remove the parent plant from its pot and clear away enough compost to reveal the connections between rosettes. Tease rooted offsets apart gently, using a clean knife only when natural separation is difficult. Each division should retain part of the root system and an intact crown. Damaged or decaying tissue must be removed before the divisions are replanted.
Pot each division into a small container filled with open, free-draining compost. Large pots should be avoided because a small root system cannot quickly use moisture held in excess compost. Set the crown above the surface and water lightly to settle the roots. Keep the divisions in cool, bright shade while they recover.
Unrooted offsets can sometimes be treated like short cuttings. Remove them cleanly, trim damaged lower leaves, and insert the base into moist gritty compost. High humidity may help prevent rapid dehydration, but enclosed conditions should still receive regular ventilation. Rooting can take several weeks, and the compost should remain barely moist rather than constantly wet.
Growing auricula primrose from seed
Seed propagation introduces genetic variation, so seedlings from named hybrids may differ considerably from their parents. This variability can produce unusual colours, flower forms, and foliage characteristics. It is valuable for gardeners who enjoy selection and breeding, but it is unsuitable when an exact cultivar copy is required. Named plants should therefore be preserved through vegetative propagation.
Fresh seed may germinate more reliably than seed stored for long periods. Sow it on the surface of a fine, free-draining seed compost and cover it only lightly with grit or vermiculite. The container should be labelled immediately with the parentage and sowing date. Water from below or with a very gentle spray to avoid displacing the small seeds.
Many auricula seeds benefit from a cool period before germination. Pots sown in autumn can remain outdoors in a sheltered position where they experience natural winter temperatures. Alternatively, controlled cold treatment can be used when seasonal conditions are unsuitable. Germination may be irregular, so the compost should not be discarded too quickly.
Seedlings should receive bright light and cool temperatures once they emerge. Crowded plants are vulnerable to damping-off and should be ventilated carefully. When each seedling is large enough to handle, transplant it into an individual small pot without burying the crown. Flowering may take several seasons, but the first display reveals which plants are worth retaining.