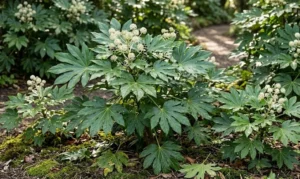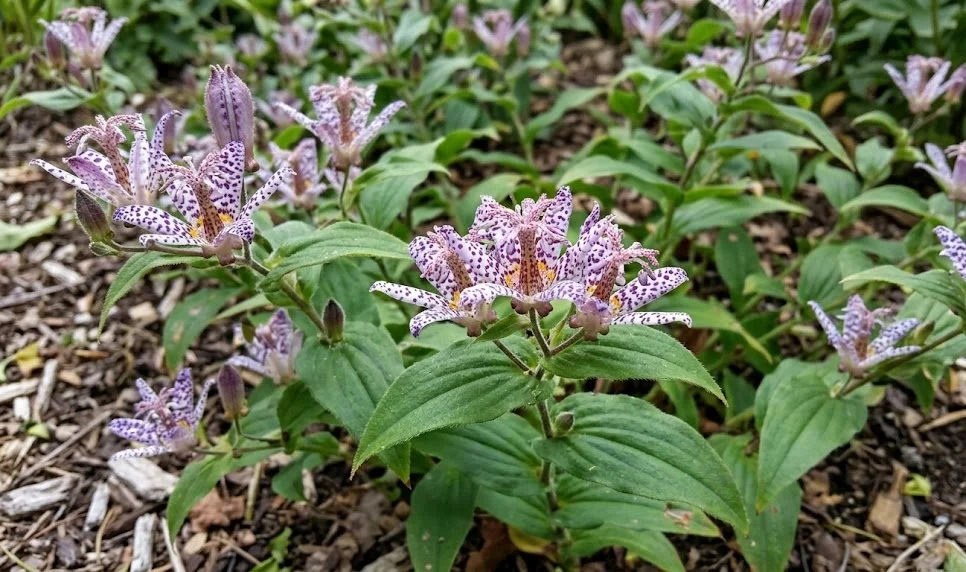
As the vibrant colors of summer fade, preparing your toad lilies for the upcoming winter is vital for their survival. These cold-hardy perennials handle freezing temperatures well, but they require proper autumn care to transition smoothly into dormancy. Neglecting late-season maintenance can leave the plants vulnerable to severe root damage and rot during the wet winter months. Taking proactive steps in autumn ensures a vigorous and beautiful return when spring warmth arrives.
The preparation process begins by gradually reducing watering frequency as daylengths shorten and temperatures begin to drop. This natural environmental shift signals to the plant that it is time to slow down active vegetative growth and conserve energy. The leaves will naturally begin to yellow and wither, which is a normal part of entering winter dormancy. Allow this process to occur naturally without attempting to force continued growth through late fertilization.
Cleanliness around the base of the plant is critical during late autumn to eliminate overwintering sites for pests and pathogens. Clear away fallen leaves from surrounding trees that might accumulate and mat down over your perennials, trapping excessive moisture. This trapped moisture can cause the crown to rot before winter even sets in fully. Maintaining a clean, tidy garden bed reduces disease pressure significantly for the following growing season.
Inspect the overall structure of the plant and check for any late-season pest damage before freezing temperatures arrive. If you notice any signs of disease on the dying foliage, remove those stems immediately to prevent spores from entering the soil. This careful inspection helps ensure that only healthy, clean root systems go into the winter dormancy phase. Proper autumn preparation lays the foundation for a successful winter survival strategy.
Mulching techniques for deep winter insulation
Insulating the root zone with a thick layer of organic mulch is the most effective way to protect against deep winter freezes. While the tops of the plants die back completely, the subterranean root network remains alive and sensitive to extreme temperature swings. Mulch acts like a protective blanket, maintaining stable soil temperatures and preventing the destructive cycle of freezing and thawing. This simple gardening task provides peace of mind throughout the coldest months of the year.
More articles on this topic
The ideal time to apply winter mulch is right after the first hard frost has completely killed back the top foliage. Applying it too early can trap warmth in the soil, delaying dormancy and attracting rodents looking for a cozy winter nesting site. Wait until the ground has begun to chill, then apply a layer that is three to four inches deep over the entire root zone. This timing aligns perfectly with the plant’s natural physiological transition into deep sleep.
Select loose, breathable organic materials for winter mulching, such as shredded bark, pine needles, or clean straw. Avoid using heavy, dense materials like un-shredded leaves, which can mat together and block air exchange, leading to crown rot. The mulch should cover the center of the plant completely, providing a thick barrier against biting winter winds and frost penetration. This careful material selection ensures protection without compromising the plant’s health.
In regions that experience extreme winter conditions with little snow cover, a heavier layer of mulch may be necessary for safety. Snow actually acts as an excellent natural insulator, so a lack of snow exposure increases the risk of deep soil freezing. Check the mulch layer periodically during winter thaws to ensure it hasn’t washed away or been displaced by birds. Maintaining a consistent protective barrier ensures your plants survive even the harshest winter weather unscathed.
Managing container-grown plants during frost
Container-grown specimens require significantly more protection during winter than those planted directly in the garden soil. Because pots are elevated, the roots are exposed to ambient air temperatures, making them far more vulnerable to freezing damage. A pot can freeze completely through within hours during a severe cold snap, destroying the fibrous root system. Understanding how to manage container plants during winter is crucial for their long-term survival and health.
More articles on this topic
The simplest strategy is to move the containers into an unheated garage, shed, or basement before the first hard freeze occurs. These sheltered environments protect the plants from freezing winds and extreme temperature fluctuations while keeping them cold enough to remain dormant. The plants do not require light during dormancy, so a dark space is perfectly acceptable for winter storage. This simple relocation eliminates the risk of frost damage entirely.
If moving the pots indoors is not an option, you can insulate them outdoors by burying the containers directly into the ground. Dig a hole large enough to accommodate the pot and pack soil firmly around the sides to mimic natural ground insulation. Alternatively, cluster the pots together against a warm foundation wall and wrap them securely in burlap or bubble wrap. Fill the spaces between the pots with packed straw or leaves to create a thick barrier against the cold.
Monitoring moisture levels in winter containers is critical, as dormant plants still require a very small amount of water to keep roots alive. Check the soil once a month; if it feels completely dry, add a tiny amount of water during a warm day when temperatures are above freezing. Avoid overwatering, as saturated soil in a cold pot will freeze into a solid block of ice, killing the roots instantly. Balanced care during winter storage ensures container plants wake up healthy in spring.
Spring awakening and post-winter assessment
As spring approaches and temperatures begin to rise steadily, it is time to prepare for your plants’ natural awakening. Gradually remove the heavy winter mulch layers to allow the sun to warm the soil surface and stimulate new growth. Do this carefully by hand to avoid snapping any tender new shoots that may already be emerging beneath the surface. Exposing the soil gradually helps the plant transition smoothly out of its winter dormancy.
Perform a thorough post-winter assessment of the planting site to check for any signs of damage or soil shifting. Look closely for frost heaving, a phenomenon where freezing and thawing cycles push the plant’s crown out of the ground. If you discover exposed roots or crowns, gently press them back into place and cover them with fresh soil immediately. Addressing frost heaving quickly prevents the delicate tissues from drying out and dying in the spring air.
Clean away any remaining dead stems from the previous year that were left for winter protection, using sharp pruning shears. Clear the surrounding area of accumulated debris to allow maximum light and air circulation around the new emerging shoots. This cleanup task reduces the risk of early-season fungal infections and makes it easier to spot emerging pests like slugs. A clean start provides the best environment for robust spring development.
Once the new growth is well established and the danger of hard frost has passed, apply a fresh, lighter layer of summer mulch. This transition marks the official end of winter care and the beginning of the active growing season. Keep a close eye on weather forecasts, as a sudden late frost may require you to temporarily cover new shoots with a cloth. With proper winter care concluded, your perennials are ready to embark on another spectacular year of growth.