The process of pruning and cutting back these small bulbs is less about shaping and more about managing their energy and hygiene. You must understand the specific timing for each intervention to ensure you don’t accidentally harm the plant’s future growth. Proper removal of spent material prevents the spread of disease and allows the bulb to focus its resources where they are most needed. A professional approach to maintenance keeps your tulip colony looking tidy while maximizing its biological potential.
Deadheading, or the removal of faded flowers, is the first task you will encounter as the blooming season ends. You should perform this task as soon as the petals begin to drop and the seed pod starts to swell at the top of the stem. By removing this developing pod, you prevent the plant from wasting energy on seed production that could be better used for bulb growth. This simple act of pruning is one of the easiest ways to ensure a strong return the following year.
Managing the foliage as it ages is a more delicate matter that requires patience and a “hands-off” approach initially. You should never cut back the green leaves, regardless of how messy they may start to look in your garden beds. The leaves are the primary engine for the bulb’s recovery, and removing them too early is the fastest way to kill a tulip colony. A professional gardener hides the maturing foliage with companion plants rather than reaching for the shears.
The final cleanup should only occur once the leaves have completely lost their green color and have become dry and papery. At this stage, the connection between the foliage and the bulb has naturally withered, and the nutrients have been fully retracted. You should find that the dead leaves can be easily pulled away by hand or snipped off at the soil surface. Keeping the garden clean after dormancy helps to reduce the overwintering population of pests and pathogens.
Deadheading for energy conservation
The primary goal of deadheading is to redirect the plant’s biological focus from reproduction to storage. You should use a sharp pair of clean scissors or snips to remove the flower head and the very top of the stem. Avoid pulling on the stem, as this can accidentally dislodge the entire bulb if the soil is loose. This professional precision ensures that the plant remains undisturbed while its energy is redirected.
More articles on this topic
If you are growing these tulips for naturalization and want them to spread via seed, you might choose to skip deadheading on a few select plants. However, you should be aware that the bulbs of those specific plants will likely be smaller and may not flower as well the next year. Most professionals prefer to control the spread of the colony through bulb division rather than seeding. This choice allows for a more predictable and vigorous garden display over time.
While deadheading, you should also take the opportunity to inspect the health of the remaining foliage. Look for any signs of disease or pest damage that might need your attention before the plant goes dormant. Removing any dead or diseased tissue at this stage is a good hygiene practice that benefits the entire garden. A proactive gardener uses every maintenance task as a chance to monitor the overall health of their plants.
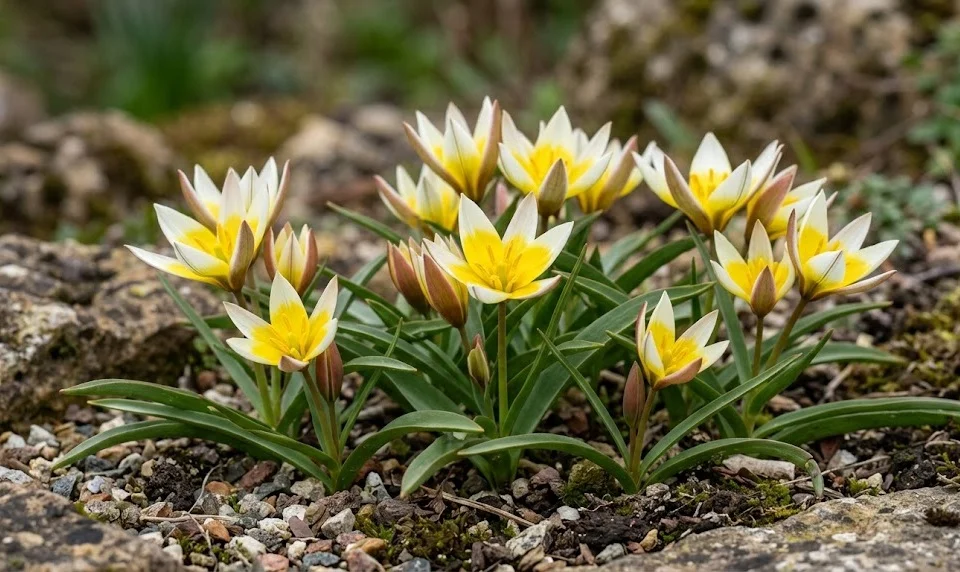
The stems of this species are relatively short, so deadheading is a quick and easy task that can be done in just a few minutes. You should dispose of the spent flower heads in your compost pile, provided they are free of any significant fungal infections. Keeping the area clean and free of decaying organic matter helps to maintain a professional look in your spring borders. This small effort pays off in the long-term health and vigor of your tulip collection.
Managing yellowing foliage
As the spring turns to summer, the vibrant green leaves will naturally start to turn yellow and eventually brown. You should resist the urge to trim these leaves back to make the garden look “neat” prematurely. This yellowing phase is the visible sign of the plant’s internal transition as it moves nutrients from the leaves to the bulb. Interrupting this process is like turning off a battery charger before the battery is full.
More articles on this topic
If the sight of the dying foliage bothers you, you can use the professional trick of “interplanting.” You should place summer-blooming perennials or annuals nearby that will grow up and cover the fading tulip leaves. Daylilies, hardy geraniums, or ornamental grasses are excellent for this purpose, as their foliage expands just as the tulips are declining. This clever design strategy keeps the garden looking beautiful without compromising the health of the bulbs.
You should avoid the old-fashioned practice of braiding or tying the tulip leaves together with rubber bands. While this might look more organized, it significantly reduces the surface area available for photosynthesis and can trap moisture, leading to rot. The leaves need to be spread out and exposed to the light to do their job effectively. A professional approach is to let the plant follow its natural form until it is truly finished for the season.
During this transition period, you should reduce watering in the area to allow the foliage to dry out naturally. High humidity and wet soil can encourage mold to grow on the maturing leaves, which can then spread to the bulb. Keeping the area well-ventilated and relatively dry is the best way to manage this phase of the plant’s life. Patience is a virtue that every successful bulb gardener must cultivate.
Timing the final cleanup
The final cleanup of the tulip bed is a satisfying task that marks the end of the spring cycle. You should wait until the leaves are so dry that they break easily when touched or pull away from the soil with no resistance. Typically, this occurs in early to mid-summer, depending on your local climate and the amount of sun the site receives. Once the foliage is gone, the area can be raked smooth to prepare for the next phase of the garden’s life.
If the leaves are difficult to pull away, it means the connection to the bulb is still active and you should wait a few more days. Forcing the removal can create a wound at the top of the bulb that acts as an entry point for diseases. Using a sharp pair of garden shears to cut the dead material at ground level is the safest professional method. This ensures a clean break and minimizes any risk to the dormant bulb beneath the surface.
After the cleanup, you should mark the location of the bulbs if you haven’t already done so. It is very easy to forget exactly where they are buried once all the surface growth has disappeared. You might use small, discreet markers or a specific mulch to identify the spot. This prevents you from accidentally digging into the bulbs when you are planting new additions to the garden later in the season.
The collected dead foliage should be removed from the site and can usually be composted if it appears healthy. However, if there were any signs of viral or fungal disease during the growing season, you should dispose of the material in the trash instead. Maintaining a high level of hygiene during the final cleanup is your last task before the bulbs enter their deep summer rest. Professional management ensures that the cycle can begin again with a clean slate next spring.