Establishing a new colony of these bulbs requires precision and an appreciation for their specific ecological needs. Planting should always be done in the autumn months when the soil temperature has begun to drop but before the ground freezes. You must select a site that provides excellent drainage and maximum sun exposure to ensure the bulbs don’t rot during the winter. A professional approach to planting sets the stage for years of reliable spring color and naturalized growth.
The depth at which you place the bulbs is a critical factor in their long-term survival and flowering success. You should generally aim for a depth that is about three times the height of the bulb itself, usually around ten centimeters. Placing them too shallowly can expose them to temperature fluctuations and physical damage from garden tools. Conversely, planting them too deeply may prevent the delicate shoots from reaching the surface in the spring.
The orientation of the bulb in the planting hole is also important for efficient growth. You should ensure that the pointed end is facing upwards, as this is where the new leaves and flower stalks will emerge. If you accidentally plant them sideways, they will likely still find their way up, but it will sap their energy. A firm but gentle press into the soil ensures good contact with the substrate for immediate root development.
Spacing between the bulbs depends on the visual effect you want to achieve in your garden. For a natural look, you should avoid rigid lines and instead scatter the bulbs in irregular clusters or drifts. Leaving about five to eight centimeters between each bulb allows enough room for them to expand and form clumps over time. This thoughtful arrangement creates a more professional and aesthetically pleasing display when they eventually bloom.
Ideal planting depth and timing
Timing is everything when it comes to getting your bulbs into the ground for the next season. You should wait until the heat of summer has fully dissipated and the soil has cooled down significantly. Typically, this falls between late September and early November, depending on your local climate zone. Planting too early can encourage premature growth that might be damaged by early frosts.
More articles on this topic
The soil conditions at the time of planting will greatly influence how quickly the bulbs establish their root systems. You should avoid planting in waterlogged or frozen ground, as this makes it difficult to achieve the proper depth and soil contact. If the autumn has been particularly dry, you might want to lightly water the area after planting to settle the soil. This initial moisture helps jumpstart the root growth that continues throughout the winter months.
A professional tip for determining the right depth is to consider the texture of your soil. In lighter, sandier soils, you can plant slightly deeper to provide more stability and moisture retention. In heavier clay soils, planting a bit shallower can help prevent the bulbs from sitting in cold, wet conditions. Always prioritize drainage over depth if you are forced to make a compromise in your garden.
Marking the planting site is a step that many gardeners overlook, often leading to accidental damage later. You should use small stakes or a layer of distinct gravel to indicate where the bulbs are buried. This is especially helpful if you plan to add other perennials or annuals to the same bed later in the season. Knowing exactly where your investment is located allows you to work around them with confidence.
Soil preparation techniques
The success of your planting project begins long before the bulbs ever touch the soil. You should start by thoroughly clearing the area of any perennial weeds or large stones that might interfere with root growth. Digging over the site to a depth of at least twenty centimeters helps to loosen the soil structure and improve aeration. This mechanical preparation is essential for creating an environment where the small bulbs can thrive.
More articles on this topic
If your soil is naturally heavy or prone to compaction, you should incorporate some grit or sharp sand. You should avoid using heavy manure or fresh compost, as these can be too rich and may harbor pathogens that cause bulb rot. Instead, a small amount of well-rotted leaf mold can improve the soil’s organic content without overwhelming the bulbs. The goal is to create a lean, free-draining medium that mimics a rocky hillside.
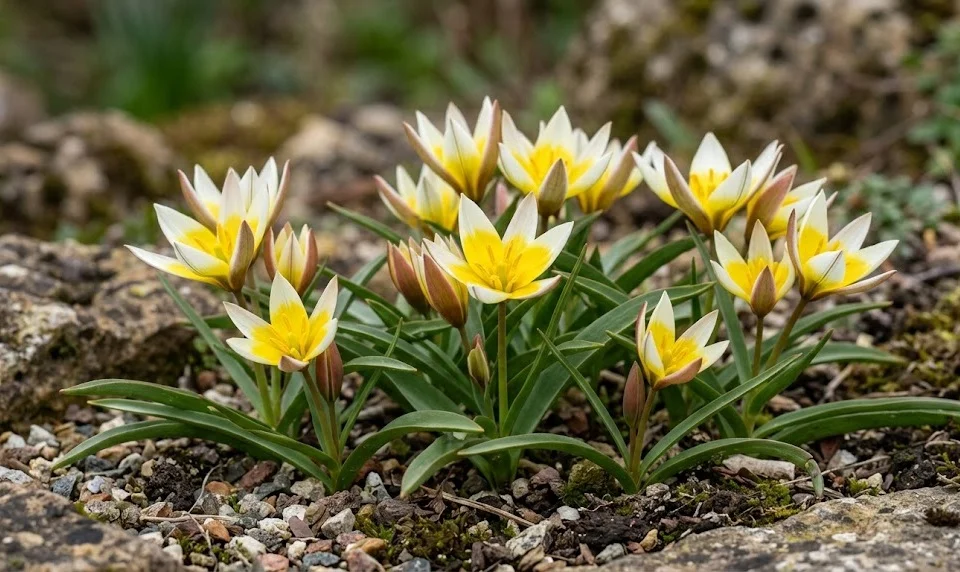
Testing the pH of your soil can provide valuable insights into its suitability for these specific tulips. They generally prefer a neutral to slightly alkaline environment, which is typical of many garden settings. If your soil is very acidic, you might consider adding a light dusting of garden lime to balance the chemistry. Professionals know that getting the soil chemistry right is just as important as the physical structure.
Raking the surface smooth after preparation ensures that you have a level canvas for your planting design. You should ensure that the soil is crumbly and easy to work with, which makes the actual planting process much faster. Avoid stepping on the prepared soil as you work to prevent re-compacting the area you just loosened. A well-prepared bed is the hallmark of an expert gardener who values long-term results.
Propagation via bulb offsets
The most common and easiest way to increase your stock of these tulips is through the natural division of bulbs. You will find that after a few years, a single bulb will have produced several smaller “daughter” bulbs around its base. You should lift these clumps during the dormant summer period when the foliage has completely died back. This process of division not only gives you more plants but also rejuvenates the original colony.
Carefully separating the offsets from the parent bulb requires a gentle touch to avoid bruising the delicate tissues. You should only keep the offsets that are firm and appear healthy, discarding any that are shriveled or discolored. The larger offsets may flower within a year, while the very small ones might take two or three seasons to reach blooming size. This gradual progression is a natural part of the plant’s life cycle.
Replanting the offsets should follow the same principles as planting mature bulbs, although you can place the smaller ones slightly shallower. You should find a new spot in the garden or expand the existing drift to accommodate the new additions. Proper labeling is important if you want to keep track of the different generations of your tulip population. Propagation through offsets is a rewarding way to see your garden evolve and grow over time.
You should avoid over-fertilizing these young bulbs, as they need to develop a strong root system first. Patience is required, as the smaller offsets focus their energy on vegetative growth rather than floral production initially. Providing them with the same high-quality soil and drainage as the adults will ensure their eventual success. This traditional method of propagation is how many historic gardens have maintained their bulb collections for centuries.
Growing from seeds
Propagating these tulips from seed is a task for the patient gardener, as it can take several years to see the first flower. You should collect the seeds from the dried pods in early summer once they have turned brown and started to split. The seeds are flat and papery, and they should be sown as soon as possible after collection. Sowing them in a dedicated seed bed or in deep pots allows you to monitor their progress more closely.
The compost for seed sowing should be very well-draining, typically a mix of seed compost and perlite or grit. You should sow the seeds thinly on the surface and cover them with a light layer of fine grit. Placing the pots in a cold frame or a sheltered spot outdoors allows them to experience the natural temperature fluctuations of winter. This cold period is often necessary to break the dormancy of the seeds and trigger germination in the spring.
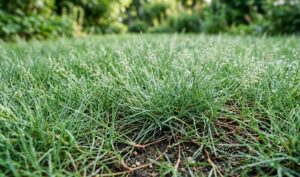
During the first year, the seedlings will look like tiny blades of grass and will only produce a single small leaf. You should be extremely careful not to weed them out by mistake, as they are very inconspicuous at this stage. It is best to leave the young bulbs in their pots for at least two years before attempting to move them to their final positions. This allows them to build up enough mass to survive the transition to the open garden.
Flowering from seed usually occurs between the fourth and sixth year of growth, depending on the conditions. While this is a slow process, it is the only way to potentially discover new variations in flower color or form. You should enjoy the scientific aspect of this method and the satisfaction of growing a plant from its very beginning. For the professional enthusiast, seed propagation is the ultimate way to understand the full biology of the species.