Establishing a vibrant stand of these perennials begins with a thorough understanding of the planting and propagation processes. While the species is known for its rugged nature and ability to grow in varied conditions, initial success depends on proper timing and technique. Whether you are starting from seed or dividing established clumps, the goal is to create a strong root system that can withstand the elements. This guide provides the professional insights needed to expand your garden through effective multiplication and careful planting strategies.
Selecting the perfect planting site
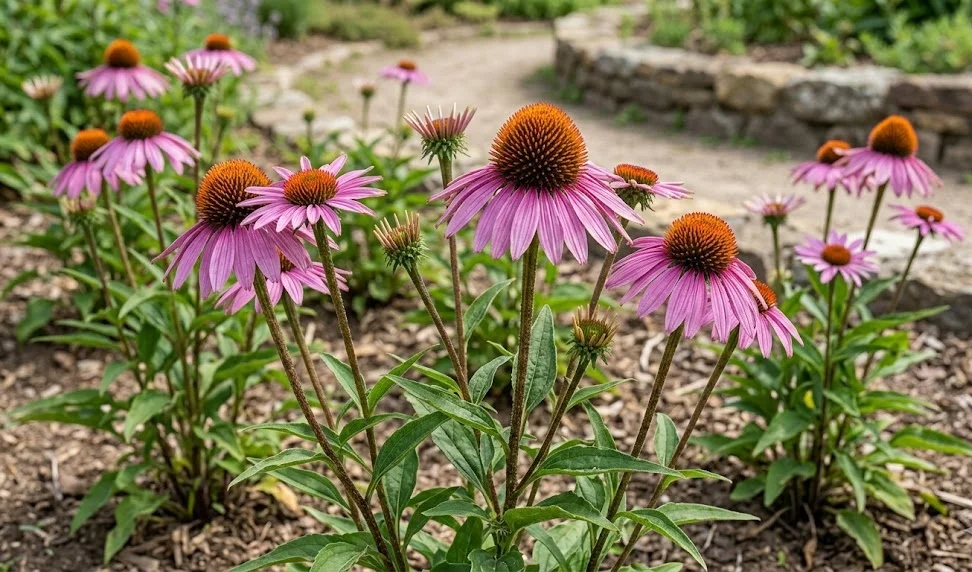
The success of a new planting depends heavily on finding a location that mimics the natural prairie environment. These plants require a spot that receives a significant amount of direct sunlight to develop strong stems and vibrant flowers. While they can tolerate a small amount of afternoon shade, a lack of light often results in weak growth and fewer blooms. Observing the sun patterns in your garden throughout the day will help you identify the most productive area for your new additions.
Soil drainage is the second most important factor to consider when choosing where to place your young coneflowers. They will not survive in locations where water collects after a rainstorm or where the soil remains perpetually soggy. If your garden has heavy clay, consider planting on a slight mound or in a raised bed to facilitate better water movement. Testing the drainage by digging a small hole and filling it with water can provide a quick assessment of the site’s suitability.
Consider the ultimate size of the mature plant when spacing your new specimens in the garden border. These perennials can grow quite large and will eventually form a substantial clump that needs room to breathe. Providing at least eighteen inches of space between each plant ensures adequate air circulation and reduces the risk of foliar diseases. Planning for the future spread of the plant prevents the need for transplanting or thinning just a few years after the initial installation.
More articles on this topic
Accessibility for maintenance and watering is a final consideration that often gets overlooked during the initial planting phase. You will need to reach the plants easily for tasks such as deadheading, weeding, and supplemental watering during dry spells. Placing them near a water source or within reach of a garden hose makes these routine chores much more manageable. A well-placed plant is much easier to care for, leading to a healthier and more beautiful garden over the long term.
Seed sowing and germination techniques
Starting these perennials from seed is an economical way to produce a large number of plants for an expansive landscape. The seeds require a period of cold, moist stratification to break their natural dormancy and trigger the germination process. This can be achieved naturally by sowing the seeds directly in the garden during the late autumn or early winter months. Alternatively, you can place the seeds in a damp paper towel inside a refrigerator for several weeks before planting them indoors.
When sowing seeds indoors, use a high-quality seed-starting mix that is light, sterile, and well-draining to prevent damping-off. Press the seeds lightly into the surface of the soil, as they require a bit of light to germinate effectively. Keep the containers in a warm, bright location and maintain consistent moisture without making the soil overly wet. Under ideal conditions, you should see the first green shoots emerging within two to three weeks of the initial planting.
More articles on this topic
Once the seedlings have developed their first set of true leaves, they will need a regular supply of light to prevent them from becoming leggy. Using supplemental grow lights can provide the intensity required for strong, compact growth if natural sunlight is insufficient. It is also beneficial to provide a gentle breeze from a small fan to strengthen the stems of the young plants. This controlled environment allows the seedlings to build the necessary strength before they are introduced to the outdoor elements.
Hardening off the young plants is a crucial step that must be performed gradually before they are permanently moved into the garden. Start by placing them in a sheltered, shaded area outdoors for a few hours each day, slowly increasing their exposure to sun and wind. This process allows the plant tissues to toughen up and adapt to the fluctuating temperatures of the outside world. Skipping this step often results in transplant shock, which can severely stunt the growth of the young coneflowers.
Propagation through root division
Division is the most reliable method for multiplying specific cultivars while maintaining the exact characteristics of the parent plant. This process is best performed every three to four years when the center of the clump begins to die out or growth becomes too dense. Early spring, just as the new growth starts to emerge from the ground, is the optimal time for this surgical procedure. Dividing at this stage allows the new sections to establish themselves before the heat of summer arrives.
To begin the division, carefully dig around the perimeter of the plant with a sharp spade to lift the entire root ball out of the earth. Shake off the excess soil so you can clearly see the structure of the roots and the individual growth points or crowns. Use a sharp, clean knife or a garden fork to separate the clump into smaller sections, ensuring each piece has several healthy buds and a good portion of the root system. Discard the woody or unproductive center of the original plant to focus on the most vigorous outer sections.
Replant the newly separated divisions as soon as possible to prevent the sensitive roots from drying out in the air. Dig a hole that is large enough to accommodate the roots without crowding or bending them into a tight space. Place the division at the same depth it was growing previously, as planting too deep can cause the crown to rot. Firm the soil gently around the roots to eliminate any large air pockets that might hinder the plant’s ability to absorb water.
After replanting, provide a deep watering to help settle the soil and reduce the stress of the division process. It is helpful to keep the newly divided plants well-watered for several weeks until you see signs of new leaf development. While the plants may look a bit wilted for the first few days, they usually recover quickly and will often bloom later in the same season. This method of propagation is an excellent way to rejuvenate your garden and share plants with fellow enthusiasts.
Establishing young transplants in the garden
The final stage of planting involves the careful transition of your homegrown or nursery-bought plants into their permanent garden home. Choose a cloudy day or plant in the late afternoon to minimize the stress caused by the direct sun on the new foliage. Prepare the planting hole by loosening the soil and adding a small amount of organic compost to provide a nutrient boost. This preparation creates an inviting environment that encourages the roots to expand quickly into the surrounding earth.
When removing the plant from its temporary container, be gentle to avoid breaking the stems or damaging the delicate root hairs. If the roots are circling tightly around the inside of the pot, lightly tease them outward to encourage a more natural growth pattern. Place the plant in the hole and fill in the gaps with the original garden soil, making sure the crown is level with the ground. Proper depth is essential for the long-term stability and health of the perennial as it grows and matures.
Mulching around the base of the new transplants provides several benefits that are critical during the establishment phase. A two-inch layer of wood chips or straw helps retain soil moisture, which is vital for young plants with limited root systems. It also serves as a barrier against weeds and helps maintain a more consistent soil temperature throughout the day and night. Be sure to keep the mulch a few inches away from the stems to prevent moisture buildup against the plant’s base.
Monitor the new additions closely during their first full growing season in the garden to ensure they are adapting well. Supplemental watering may be necessary during dry spells, even if the plant is known for its drought tolerance once established. Watch for any signs of pests or diseases that might take advantage of a young plant’s temporary vulnerability. With careful attention during these first few months, your coneflowers will develop the strength needed to thrive for many years to come.

