Successfully establishing a Himalayan white pine begins with a precise planting strategy and an understanding of its reproductive potential. This species requires a thoughtful start to ensure it develops the deep root system and sturdy trunk necessary for its impressive mature height. Professional planters know that the first few months in the ground are the most critical period for any young conifer. This article details the essential steps for planting and the technical methods for propagating this elegant tree to expand your collection.
Preparing the site and selecting the right time
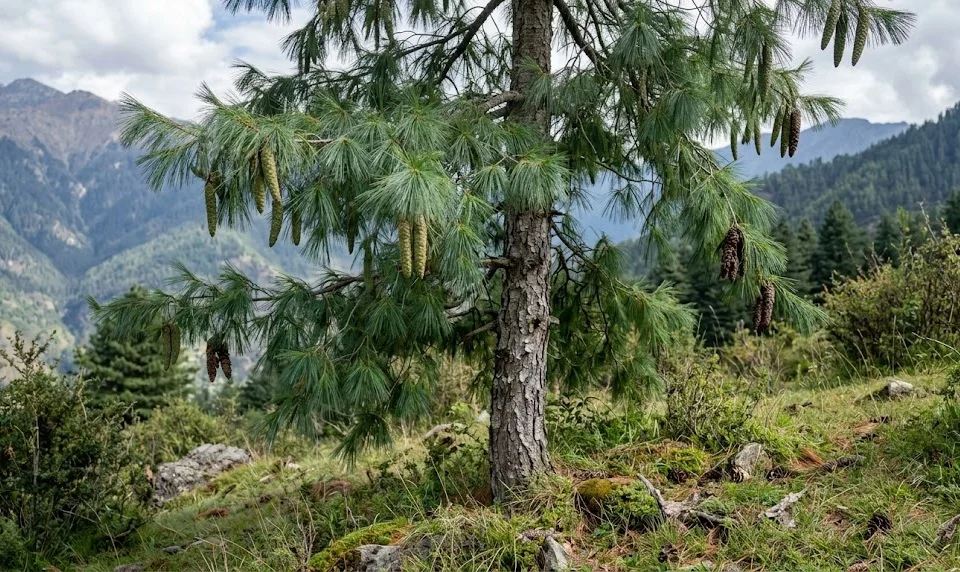
Before you even dig a hole, you must carefully evaluate the site to ensure it meets the long-term needs of the tree. You should look for a location with full sun and deep, well-draining soil that allows for extensive root development. Avoid low-lying areas where cold air or water might settle, as these can stress a young sapling during its first winter. Proper site selection is the first and most important step in the planting process to avoid future complications.
The timing of your planting operation can significantly influence the survival rate of the young tree. You should ideally plant during the early spring before the new growth starts or in the late autumn when the tree is entering dormancy. Planting during these cooler periods allows the roots to establish themselves without the added stress of summer heat. If you must plant in summer, be prepared to provide extra shade and a rigorous watering schedule to keep the plant stable.
Soil preparation involves more than just digging a hole; it requires improving the surrounding earth to welcome the new roots. You should excavate an area three times wider than the root ball but no deeper than the container the tree came in. Loosening the soil in this wide circle encourages the roots to spread horizontally, which provides better stability against the wind. Mixing a small amount of organic matter into the backfill soil can help with moisture retention while the tree is young.
Checking for underground utilities and local zoning regulations is a practical step that you should never skip. You should ensure that the mature canopy will not interfere with power lines or block important views for neighbors. Remember that this pine can reach substantial heights, so vertical clearance is just as important as horizontal space. Taking the time to plan the location properly will save you from the heartbreak of having to move or remove the tree later.
More articles on this topic
Execution of the planting process
When you are ready to plant, handle the root ball with extreme care to avoid breaking the delicate fine roots. You should place the tree in the center of the hole, ensuring that the root flare—where the trunk meets the roots—is level with or slightly above the soil surface. Planting too deep is a common mistake that leads to trunk rot and eventual death of the specimen. Use a straight edge or a shovel handle across the hole to verify the depth before you start backfilling.
Backfilling should be done in stages to eliminate large air pockets that can cause the roots to dry out. You should gently firm the soil with your hands as you fill the hole, but avoid packing it so hard that you crush the soil structure. Once the hole is half-filled, you can water it thoroughly to help the soil settle naturally around the roots. Finish filling the hole and create a small soil berm around the edge to direct water toward the root zone during the first year.
Initial watering is crucial for settling the tree and providing the hydration needed to recover from transplant shock. You should give the tree a deep soaking immediately after planting, ensuring the entire root zone is saturated. This initial moisture helps the soil make direct contact with the roots, facilitating the immediate uptake of water and nutrients. Continue to monitor the moisture levels daily for the first few weeks, especially if the weather is dry or windy.
Applying a layer of mulch after planting is the final touch that protects your investment from the elements. You should spread a ten-centimeter layer of organic mulch around the base, keeping it away from the trunk itself. This mulch helps to suppress weeds that would otherwise compete with the young tree for resources. It also maintains a consistent soil temperature, which is essential for the rapid development of new root tissue in the early stages.
More articles on this topic
Propagation through seed collection and sowing
Growing this pine from seed is a rewarding process that allows you to produce many plants from a single parent tree. You should collect mature cones in the late autumn when they turn brown and the scales begin to open. Place the cones in a warm, dry area where they can release their winged seeds naturally over several days. Once the seeds are released, you should remove the wings and store the seeds in a cool, dry place until you are ready to sow.
Cold stratification is a necessary step to mimic the natural winter cycle and break the seed’s dormancy. You should place the seeds in a bag with moist sand or peat moss and store them in the refrigerator for about six to eight weeks. This process signals to the seed that winter has passed and it is time to germinate once it is exposed to warmth. Skipping this step often results in very low or inconsistent germination rates for this species.
Sowing the seeds should take place in the spring using a well-draining seed-starting mix in deep containers. You should plant the seeds about one centimeter deep and keep the soil consistently moist but not waterlogged. Place the containers in a bright location but out of direct, scorching sunlight to prevent the delicate seedlings from burning. Germination typically occurs within a few weeks, and you will see the tiny whorl of needles emerging from the soil.
Caring for the young seedlings requires patience and a gentle hand as they are quite vulnerable in their first year. You should protect them from extreme temperatures and ensure they have adequate ventilation to prevent damping-off disease. As they grow, you can gradually move them to larger pots and introduce them to more sunlight to harden them off. After two or three years of growth in a controlled environment, they will be sturdy enough to be planted in their permanent positions.
Vegetative propagation and grafting techniques
While seeds are the most common method, vegetative propagation can be used to replicate specific characteristics of a chosen specimen. You should take semi-hardwood cuttings in the late summer or early autumn when the current year’s growth has begun to firm up. Dip the base of the cuttings in a rooting hormone to encourage cell differentiation and root development. Place them in a high-humidity environment with bottom heat to give them the best chance of successful rooting.
Grafting is a more advanced technique often used by professional nurseries to produce consistent results with specific cultivars. You should use a vigorous rootstock of a compatible pine species, such as a young Eastern white pine or another Himalayan pine seedling. The scion, or the piece of the desired tree, is joined to the rootstock during the late winter or early spring. This method requires precise cuts and a high level of hygiene to ensure the vascular tissues align and bond properly.
Maintaining a clean environment and using sharp tools are essential for any successful propagation attempt. You should sterilize your grafting knives and pruning shears between every use to prevent the spread of pathogens. Successful grafts must be kept in a sheltered “sweatbox” or high-humidity chamber until the union is strong and growth resumes. This process can take several months, during which time you must monitor the moisture and light levels very closely.
Vegetative propagation allows you to maintain the unique needle length or color of a particularly beautiful individual tree. You should understand that these methods are generally more difficult and have a lower success rate than growing from seed. However, for the dedicated horticulturist, the ability to clone a superior specimen is worth the extra effort and technical challenge. Experimenting with these methods will deepen your understanding of the tree’s biology and growth potential.

