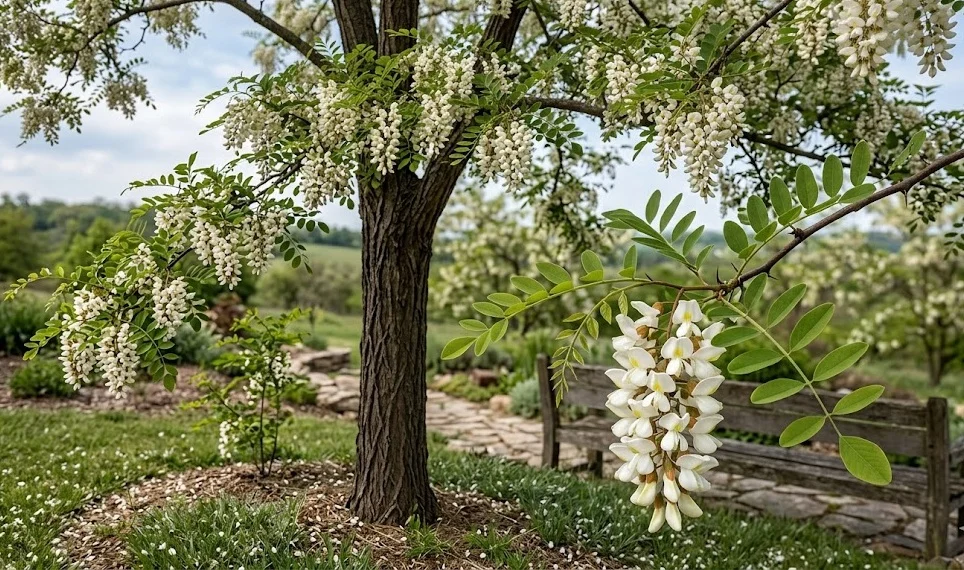
Propagating the black locust from seeds is a rewarding process that begins with careful collection in late autumn. The dark brown pods hang from the branches long after the leaves have fallen, making them easy to identify. You should wait until the pods are completely dry and brittle before harvesting them for the best results. Each pod typically contains several hard, kidney-shaped seeds that are designed to survive for years.
The seeds have an extremely tough outer coat that prevents water from entering and starting germination. In nature, this coat is worn down by soil abrasion or the digestive systems of animals. To replicate this at home, you must perform a process known as scarification to break the dormancy. Sanding the seed coat lightly or using hot water treatment are common and effective methods.
Once the seed coat is breached, the seeds should be soaked in room temperature water for about twenty-four hours. You will notice that the viable seeds swell up significantly as they absorb the necessary moisture. Any seeds that remain small and hard after soaking are unlikely to germinate and should be discarded. This simple sorting process saves time and space in your planting trays or nursery beds.
Direct sowing is possible, but starting them in a controlled environment offers a much higher success rate. Use a light, well-draining seed starting mix and place the seeds about one centimeter deep. Keeping the soil consistently moist and warm will encourage sprouts to appear within a week or two. Providing plenty of light from the very beginning is essential for developing strong, healthy seedlings.
Planting procedures
Choosing the right location is the most important decision you will make when planting a new tree. The black locust needs a spot with full sun exposure and enough room to accommodate its mature size. It is not picky about soil type, but it absolutely requires good drainage to avoid root rot. Avoid low-lying areas where water tends to collect after heavy rains or snowmelt.
More articles on this topic
The planting hole should be twice as wide as the root ball but no deeper than the container it came in. This allows the roots to expand easily into the surrounding soil while keeping the trunk at the correct level. Breaking up the soil at the bottom of the hole helps the taproot establish itself more quickly. Always handle the young tree by the root ball to avoid damaging the sensitive bark.
Once the tree is in place, fill the hole with the original soil rather than adding too many amendments. This encourages the roots to grow out into the native ground instead of staying within a small pocket of rich soil. Tamp the soil down gently with your hands to remove any large air pockets that could dry out the roots. Watering the tree immediately after planting settles the soil and provides essential hydration.
Staking is usually not necessary for this species unless the site is exceptionally windy. If you do use stakes, ensure they are loose enough to allow the trunk to move slightly in the breeze. This movement actually stimulates the tree to grow a stronger, more resilient trunk over time. Remove any supports after the first growing season once the roots have firmly anchored the tree.
Vegetative propagation
Growing new trees from root cuttings is an excellent way to produce clones of a particularly desirable specimen. This method is often faster than starting from seed and ensures that the new tree has the same traits as the parent. Late winter or early spring is the best time to take these cuttings while the tree is still dormant. Look for healthy roots about the thickness of a pencil for the highest success rate.
More articles on this topic
Cut the root pieces into segments about ten to fifteen centimeters long, making sure to keep track of which end was closest to the trunk. Plant them vertically in a sandy potting mix with the top of the cutting just below the surface. Keep the pots in a warm, sheltered area and ensure the medium remains moist but not saturated. Within a few weeks, new shoots should begin to emerge from the top of the cuttings.
Stem cuttings are another option, although they can be slightly more difficult to root than root segments. Use semi-hardwood cuttings taken in mid-summer from the current year’s growth for the best results. Treating the base of the cutting with a rooting hormone can significantly increase the chances of root development. Place them in a humid environment, such as a small greenhouse or under a plastic dome, to prevent wilting.
Propagation through grafting is sometimes used by professionals to combine hardy rootstocks with ornamental varieties. This advanced technique requires precision and a good understanding of plant anatomy to be successful. For most home gardeners and small-scale farmers, root cuttings remain the most practical vegetative method. It allows for rapid expansion of a grove without the variability found in seed-grown plants.
Post-planting nursery care
The first two years of a young tree’s life are critical for its long-term survival and structural development. You must ensure that it receives regular water, especially during its first summer in the ground. While the species is drought-tolerant when mature, young saplings have limited root systems that dry out quickly. A deep soaking once a week is usually sufficient for most soil types and climates.
Weed control around the base of the tree reduces competition for water and vital nutrients. A thick layer of organic mulch is the best tool for this, as it also improves the soil structure over time. Keep the mulch a few centimeters away from the trunk to prevent moisture from building up against the bark. This simple step prevents rot and discourages rodents from nesting too close to the tree.
Protecting the young bark from wildlife damage is often necessary in rural or suburban areas. Rabbits and deer are fond of the tender bark and can girdle a small tree in a single night. Using a plastic or wire mesh tree guard provides a physical barrier that keeps the trunk safe. These guards should be checked periodically to ensure they are not restricting the tree’s growth.
Monitoring for growth patterns allows you to make minor structural corrections early in the tree’s life. If multiple leaders begin to compete for dominance, select the strongest one and prune back the others. This early intervention ensures the tree develops a single, strong trunk and a well-balanced canopy. Investing time in care during these early stages results in a much more valuable and beautiful tree in the future.