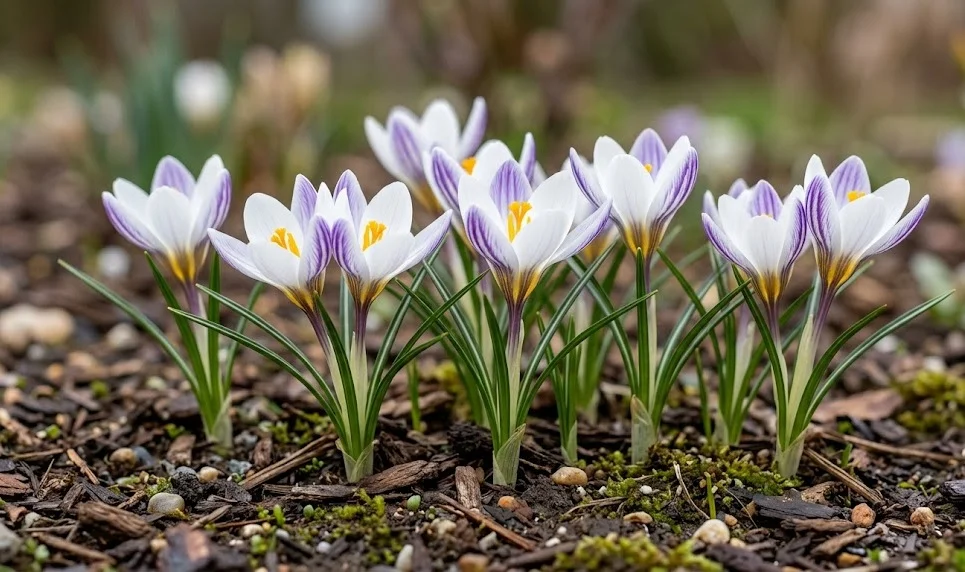
Successful planting of the silvery crocus begins with a clear understanding of the environmental triggers that govern its development. These bulbs are best introduced to the garden in the early to mid-autumn, allowing them enough time to establish a root system before the ground freezes. Selecting the right location is the most important decision a gardener makes, as it determines the health of the plant for years to come. A well-planned planting session ensures that these delicate flowers will emerge reliably at the first sign of spring.
The physical act of planting requires a delicate touch and attention to detail to ensure the best possible results. Each bulb should be placed at a depth that is roughly three times its own height to protect it from temperature fluctuations. The soil at the bottom of the planting hole should be loosened slightly to encourage rapid root penetration. Space the bulbs approximately two to three inches apart to allow for natural clump expansion over the following seasons.
Preparing the soil before the bulbs arrive is a hallmark of professional gardening practice. The area should be cleared of all perennial weeds and enriched with a modest amount of well-rotted compost. Avoid using fresh manure or high-nitrogen fertilizers, as these can promote soft growth that is more susceptible to disease. A balanced soil structure with good drainage will provide the perfect foundation for the bulbs to thrive and multiply over time.
Once the bulbs are in the ground, the surface should be firmed gently to eliminate any large air pockets. This ensures good soil-to-bulb contact, which is essential for moisture absorption and root growth. Applying a light layer of water immediately after planting helps settle the soil and initiates the biological processes within the bulb. After this initial watering, the natural autumn rains are usually sufficient to carry the plants through to their winter dormancy.
Soil preparation and site selection
Identifying the most suitable site for your crocus bulbs involves analyzing both light patterns and soil characteristics. These plants prefer a location that receives full sun or very light dappled shade during the early months of the year. Because they bloom so early, they can often be planted under the canopy of large deciduous trees that are still dormant. This strategic placement maximizes the use of garden space and provides the bulbs with the energy they need.
More articles on this topic
The drainage capacity of the soil is the single most critical factor in preventing bulb failure in the garden. Silvery crocus bulbs are particularly sensitive to “wet feet,” which can cause the corms to rot during the winter months. If your soil is naturally heavy, consider creating a slightly raised mound or a dedicated rock garden to improve the water runoff. Adding coarse sand or perlite to the planting holes can also create the necessary macropores for better drainage.
A professional soil test can reveal the nutrient levels and pH balance of your chosen planting site. These bulbs generally prefer a neutral to slightly alkaline environment, which supports the efficient uptake of minerals. If the soil is too acidic, a light application of dolomitic lime can be worked into the upper layers of the soil. Understanding the chemical makeup of your garden allows you to make precise adjustments that lead to more vibrant and healthy flowers.
The historical use of the land should also be considered when choosing a site for new bulb plantings. Areas that have previously suffered from bulb-specific diseases or heavy pest infestations should be avoided or treated accordingly. It is also wise to avoid sites where heavy construction or soil compaction has recently occurred. Starting with a clean, healthy, and structurally sound piece of earth is the best way to ensure the long-term success of your crocus.
Methods of vegetative propagation
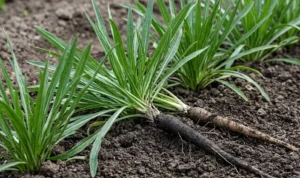
Over time, a single silvery crocus bulb will naturally produce several smaller offsets known as cormlets. This vegetative reproduction is the most common way these plants spread and fill in gaps in the garden landscape. When the parent clump becomes too crowded, the competition for nutrients and space will eventually lead to smaller and fewer flowers. Lifting and dividing these clumps every few years is a professional technique used to maintain the vigor of the colony.
More articles on this topic
The best time to divide your crocus is in the late spring, just as the foliage has turned yellow and started to wither. Carefully lift the entire clump with a garden fork, being cautious not to slice through the bulbs themselves. Gently pull the small cormlets away from the main bulb, keeping only those that feel firm and appear healthy. Discard any bulbs that show signs of damage, soft spots, or unusual discoloration to prevent the spread of pathogens.
Replanting the divided bulbs immediately is generally recommended to prevent them from drying out excessively. If you must store them, keep them in a cool, dark, and well-ventilated place until the autumn planting season arrives. Labeling each batch of bulbs is essential if you are working with multiple varieties or specific garden zones. Professional propagation requires a systematic approach to ensure that each new plant has the best possible start in its new location.
When replanting the offsets, remember that smaller cormlets may take a year or two of growth before they are large enough to bloom. Give them plenty of space and ensure they are planted at a depth appropriate for their smaller size. Consistent care during their first season in a new spot will help them establish quickly and begin their own cycle of reproduction. This method of propagation is an economical and rewarding way to expand your garden’s floral display.
Propagation from seed
While vegetative division is faster, growing silvery crocus from seed is a fascinating way to produce a large number of plants. This method requires a significant amount of patience, as it can take several years for a seedling to reach flowering size. Professional growers often use seeds to maintain the genetic diversity of their collections or to discover new color variations. The process begins with the careful collection of seeds from the mature seed pods in late spring.
The seeds should be sown as soon as they are ripe, as their viability can decrease quickly if they are stored improperly. Use a well-draining seed-starting mix in shallow trays or pots and cover the seeds with a thin layer of fine grit. The pots should be placed outdoors in a sheltered spot where they can experience the natural temperature fluctuations of the seasons. These cold cycles are often necessary to break the seed’s dormancy and trigger germination in the following spring.
During the first year of growth, the seedlings will produce a single, grass-like leaf that looks very different from mature foliage. It is vital to keep the seedlings moist but not wet and to protect them from extreme weather conditions. Avoid the temptation to transplant them too early, as the tiny corms are very fragile and easily damaged. Providing a liquid seaweed fertilizer at half strength can help support their early development without causing nutrient burn.
After two or three years of growth in the seed trays, the young corms can be carefully moved to their permanent home in the garden. By this time, they should be large enough to handle the competition and environmental stress of the open ground. While this method takes longer, the resulting plants are often very robust and well-adapted to the local conditions. Growing from seed is the ultimate test of a gardener’s patience and long-term commitment to their craft.
Ensuring long-term success
The success of your planting and propagation efforts depends on consistent follow-up care and monitoring. Even with perfect planting techniques, young bulbs and seedlings need protection from the elements and from garden pests. Regularly checking the area for signs of disturbance or disease will allow you to intervene before a major loss occurs. A professional gardener is always observant and ready to adjust their strategy based on the needs of the plants.
Maintaining accurate records of where and when you planted each group of bulbs is an invaluable management tool. This prevents the accidental over-planting of an area or the disturbance of dormant bulbs during summer garden work. Mapping your garden also helps you track the rate of spread and identify which areas are most productive. Over time, these records become a roadmap for the future development and expansion of your horticultural projects.
The use of organic mulches can help protect newly planted areas by regulating soil temperature and moisture. However, the mulch must be of a fine texture so that it does not impede the emergence of the small crocus shoots. As the mulch breaks down, it also contributes to the organic matter in the soil, improving its structure and fertility. Choosing the right mulch is a subtle but important part of professional garden maintenance and bulb protection.
Ultimately, the goal of planting and propagation is to create a self-sustaining and beautiful garden feature. The silvery crocus is a perfect candidate for this because of its natural resilience and willingness to multiply. By following professional standards and paying attention to the details, you can create a spring display that gets better with every passing year. Horticulture is a journey of discovery, and every successful planting is a step toward a more vibrant and diverse garden.