Creating a successful garden display starts with the careful installation and reproduction of your favorite perennial species. Narrow-leaf tickseed is an excellent candidate for both beginners and experienced gardeners due to its straightforward planting requirements and reliable propagation methods. When you take the time to understand the specific needs of this plant during its early stages, you set the foundation for years of beauty and resilience. Whether you are starting with nursery-bought containers or trying to increase your existing stock, the process is both rewarding and professionally satisfying.
Selecting the ideal planting site
Before you even dig a hole, it is crucial to spend time observing your garden to find the perfect location for this perennial. The plant thrives in areas that receive full sun, which typically means at least six hours of direct light each day. If the site is too shady, you may find that the stems become weak and the number of flowers significantly decreases. Choosing a spot with the right exposure ensures the plant has the energy it needs to produce its dense, airy foliage.
Soil drainage is another non-negotiable factor when selecting a site for your new planting project. This species does not tolerate “wet feet,” which occurs when water sits around the roots for extended periods. You should look for areas where the water drains away quickly after a rainstorm, or consider creating a raised bed to improve the situation. A professional approach involves testing the drainage by digging a small hole and filling it with water to see how fast it disappears.
Competition from other plants should also be considered when you are deciding where to place your narrow-leaf tickseed. Because of its fine texture, it can sometimes be overwhelmed by larger, more aggressive neighbors if it is not given enough space to establish its root system. Providing a clear area for the plant to grow will help it reach its full potential without being crowded out. A well-chosen site allows the plant to breathe and expand naturally over the coming years.
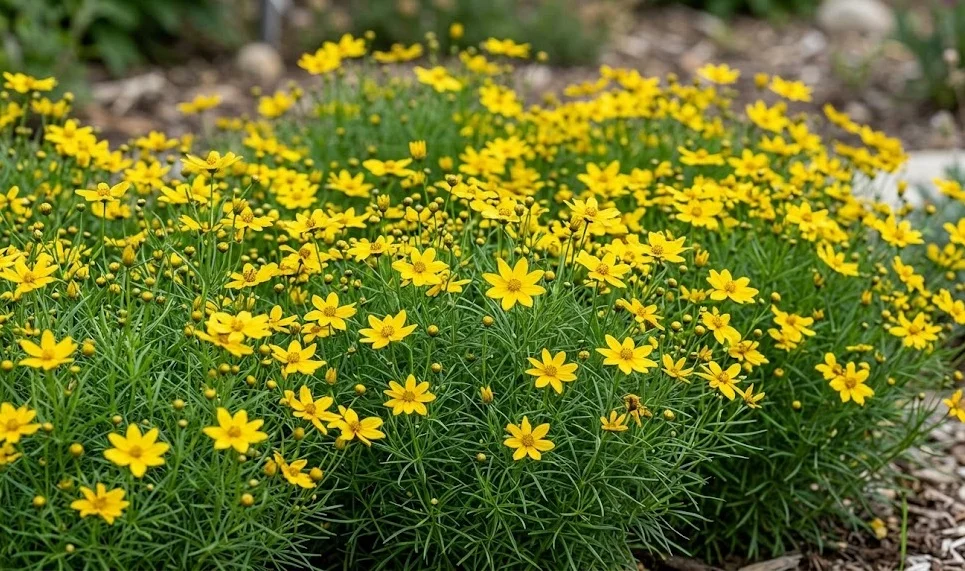
Finally, think about the visual impact of the plant within your overall landscape design and how it will interact with its surroundings. This perennial looks particularly stunning when planted in drifts or groups, creating a sea of yellow blooms in the height of summer. Consider the height and color of nearby plants to ensure a harmonious color palette and a balanced garden structure. Taking these aesthetic factors into account will help you create a professional-looking garden that delights the eye.
More articles on this topic
The process of planting out
Once you have selected the perfect site, the actual planting process should be handled with care to minimize transplant shock. It is best to plant during the cooler parts of the day, such as early morning or late afternoon, to keep the roots from drying out. Dig a hole that is slightly wider than the root ball but no deeper than the container the plant came in. This ensures that the crown of the plant remains at the soil surface, preventing potential rot issues.
Carefully remove the plant from its pot and gently loosen any roots that may have started to circle around the inside of the container. If the root system is very tight, you might need to make a few small vertical cuts to encourage new roots to grow outward into the surrounding soil. Place the plant in the center of the hole and fill in the space with the original soil you removed. Firm the soil down gently with your hands to remove any large air pockets that could dry out the roots.
Immediately after planting, give the new addition a thorough watering to help settle the soil and provide much-needed hydration. You want the water to reach deep into the root zone, encouraging the plant to establish itself quickly in its new home. Adding a light layer of organic mulch around the base of the plant can help retain moisture and keep the soil temperature stable. Be sure to keep the mulch a few inches away from the main stems to allow for proper air circulation.
Monitoring the new plant over the first few weeks is essential as it adapts to its environment and begins to grow. You may need to water more frequently during this establishment phase, especially if the weather is particularly warm or windy. Look for new growth as a sign that the plant has successfully transitioned and is starting to feel at home. With a little initial care, your narrow-leaf tickseed will soon be a thriving and beautiful part of your garden.
More articles on this topic
Propagation through clump division
Division is one of the easiest and most effective ways to multiply your existing stock of this hardy perennial. This task is best performed in the early spring just as the new growth begins to emerge, or in the early autumn after the main flowering season. Dividing the plants every three to four years helps rejuvenate older clumps that may have become less vigorous in the center. It is a professional technique that keeps your garden looking fresh and healthy without the need to buy new plants.
To begin the division process, use a sharp spade to dig around the entire circumference of the plant, staying several inches away from the stems. Once you have loosened the soil, carefully lift the entire clump out of the ground, trying to keep as much of the root system intact as possible. You may need to shake off some of the excess soil so you can clearly see where the individual crowns and roots are connected. This visual clarity makes the actual division much easier and more precise.
Using a sharp knife or the edge of your spade, gently separate the clump into smaller sections, ensuring that each new piece has a healthy set of roots and several growing shoots. If the center of the original plant has become woody or dead, you should discard those parts and focus on the vigorous outer sections. The resulting divisions should be planted immediately into their new locations or into pots if you are not ready to put them in the ground. Treat these new plants with the same care as a nursery-bought specimen to ensure they take hold.
The beauty of division is that it not only gives you more plants but also improves the health of the original parent plant. By giving the roots more space and removing older material, you are essentially giving the plant a new lease on life. You will likely find that the divided plants bloom more profusely in the following season than they would have if left alone. It is a rewarding cycle of growth and renewal that is a fundamental part of sustainable gardening practices.
Growing from seeds and cuttings
If you are looking for a more patient approach, growing this perennial from seed can be a fascinating and cost-effective method. You can collect seeds from your own plants once the flower heads have dried and turned brown on the stems. These seeds can be sown directly into the garden in the autumn or started indoors in late winter to get a head start on the season. Starting them in trays allows you to monitor the germination process and protect the young seedlings from pests.
When sowing seeds, it is important to provide a light covering of soil, as they often require some light to germinate effectively. Keep the soil consistently moist but not soaking wet, and you should see the first tiny sprouts within a few weeks. Once the seedlings have developed a few sets of true leaves, they can be transplanted into larger pots or their permanent garden home. Keep in mind that plants grown from seed may take a year or two to reach their full flowering potential.
Softwood cuttings are another propagation option that can be performed during the active growing season in early summer. Take a few inches of healthy stem that does not have a flower bud on it, and remove the lower leaves before inserting it into a pot of moist potting mix. Keeping the cuttings in a humid environment and out of direct sunlight will help them develop roots more quickly. This method allows you to create exact clones of your favorite plants, ensuring consistent color and growth habits.
Regardless of the method you choose, propagating your own plants is a wonderful way to deepen your connection to your garden. There is a special kind of pride that comes from seeing a plant you started yourself thriving and blooming in the landscape. It also allows you to share your garden with friends and family by giving away the extra plants you have created. Propagation is a skill that grows with experience, turning a simple hobby into a truly professional pursuit.