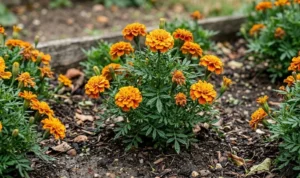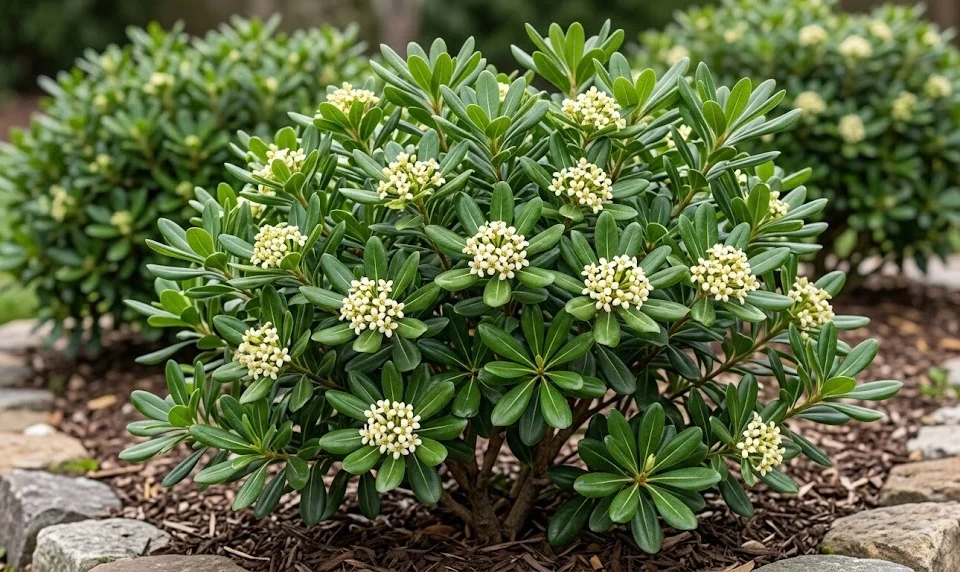
Success with Japanese cheesewood begins the moment you decide where and when to place it in your garden. The best time to plant this evergreen is during the mild days of early spring or autumn, when the soil is warm but the sun is not too intense. Planting during these transitional seasons allows the root system to establish itself without the stress of extreme heat or freezing temperatures. A well-timed start ensures that the shrub can dedicate its energy to underground growth before it needs to support a flush of new leaves.
When choosing a site, look for a location that offers well-draining soil to prevent the dreaded “wet feet” that can kill young plants. While it can tolerate a variety of soil types, a loamy mix enriched with organic matter provides the perfect balance of moisture and air. You should also consider the wind patterns in your yard, as young specimens can be buffeted by strong gusts. A spot that receives at least six hours of sunlight is ideal, although partial shade is perfectly acceptable in hotter climates.
Preparing the planting hole is a task that deserves careful attention to detail for the best long-term results. Dig a hole that is at least twice as wide as the root ball but no deeper than the container the plant arrived in. Loosening the soil on the sides of the hole helps the young roots penetrate the surrounding earth more easily. If your soil is particularly heavy or poor, this is the perfect opportunity to mix in some high-quality compost or aged manure.
Proper placement of the plant in the hole is the final critical step of the initial planting process. Ensure that the top of the root ball is level with or slightly above the surrounding soil surface to avoid stem rot. Once the plant is positioned, backfill the hole with the amended soil, firming it gently with your hands to remove any large air pockets. Water the area thoroughly immediately after planting to settle the soil and provide the roots with much-needed hydration.
Methods of vegetative propagation
Propagating Japanese cheesewood is a rewarding way to expand your garden collection or share plants with friends and neighbors. The most common and successful method is taking semi-ripe cuttings during the late summer or early autumn months. These cuttings are taken from the current year’s growth when the wood is starting to firm up but is still somewhat flexible. Using sharp, sterilized shears is essential to ensure a clean cut that heals quickly and minimizes the risk of infection.
More articles on this topic
To prepare a cutting, select a healthy shoot and cut a section about four to six inches long, just below a leaf node. Remove the leaves from the bottom half of the cutting to reduce moisture loss and expose the area where roots will form. Many gardeners find that dipping the base of the cutting into a rooting hormone powder significantly increases the success rate. Plant the prepared cutting into a pot filled with a well-draining mix of peat and perlite, ensuring it is held firmly in place.
Maintaining the right environment is crucial for the cuttings to develop a healthy root system over the winter months. Place the pots in a bright spot out of direct sunlight and cover them with a clear plastic bag or a propagator lid to maintain high humidity. It is important to ventilate the area occasionally to prevent mold growth while keeping the soil consistently moist but not soggy. Within a few months, you should see signs of new growth, indicating that the roots have successfully taken hold.
Another interesting method of propagation is air layering, which can be done on larger branches that are still attached to the parent plant. This technique involves wounding a small section of a branch and wrapping it in damp sphagnum moss and plastic wrap. Over time, roots will grow into the moss, and once they are well-developed, the branch can be severed and planted as a new individual. While this method takes longer and requires more patience, it often results in a larger and more robust new plant.
Growing from seed
While vegetative methods are often faster, growing Japanese cheesewood from seed is a fascinating process for patient gardeners. The seeds are found within the small, woody capsules that ripen in late autumn, turning from green to a brownish-tan color. Once the capsules split open to reveal the sticky red seeds, they are ready for harvest and immediate processing. It is best to use fresh seeds, as their viability tends to decrease the longer they are stored in dry conditions.
More articles on this topic
Before sowing, the sticky coating on the seeds must be removed, as it contains natural inhibitors that prevent germination. You can do this by soaking the seeds in warm water for 24 hours and then gently rubbing them with a paper towel. Once cleaned, the seeds can be sown into trays filled with a standard seed-starting mix, covering them with just a thin layer of soil. Keep the trays in a warm, sheltered spot where temperatures remain consistent to encourage the germination process.
Germination can be somewhat erratic and may take several weeks or even months, so don’t be discouraged if nothing happens right away. It is vital to keep the soil surface moist but never saturated, as the tiny seedlings are susceptible to damping-off fungi. Once the seedlings have developed two or three sets of true leaves, they can be carefully transplanted into individual small pots. This stage requires a gentle touch to avoid damaging the delicate young root systems that are just beginning to expand.
The young plants will need to spend at least a year in their pots, being moved to larger containers as they grow, before they are ready for the garden. During this nursery phase, provide them with plenty of light and protection from extreme weather to build up their strength. This slow start allows the plants to develop a sturdy structure and a resilient root system that will serve them well once they are finally planted in their permanent locations. Growing from seed is a slow but deeply satisfying way to witness the entire lifecycle of this beautiful shrub.
Establishing young plants in the landscape
The transition from a pot to the open ground is a significant milestone in the life of a young Japanese cheesewood. To ensure success, it is helpful to “harden off” the plants by gradually exposing them to outdoor conditions over a period of a week or two. This prevents the shock that can occur when moving from a sheltered nursery environment to the unpredictable variables of the garden. Start with a few hours in a shaded spot and slowly increase the time and sun exposure each day.
When you are ready to plant, follow the same site preparation steps used for mature specimens, focusing on drainage and soil quality. It is often beneficial to apply a balanced, slow-release fertilizer at the base of the planting hole to provide a steady supply of nutrients. Be careful not to let the fertilizer come into direct contact with the roots, as this can cause chemical burns. Firm the soil around the base of the plant to provide the stability it needs to resist being moved by the wind.
Watering is the most critical aspect of care during the first year after the young shrub has been planted in the garden. You should aim to keep the root zone consistently moist but not underwater, especially during the hot summer months. Applying a thick layer of organic mulch will help retain this moisture and keep the soil temperature stable for the developing roots. Check the plant frequently for any signs of stress, such as drooping leaves or a change in color, and adjust your watering schedule accordingly.
As the plant begins to establish itself, you can start to think about its future shape and role in your garden design. Resist the urge to do any heavy pruning in the first year, as the plant needs all its leaves to produce the energy required for root growth. You can, however, remove any dead or broken branches to keep the specimen looking tidy and healthy. With a little patience and consistent care during this establishment phase, your Japanese cheesewood will quickly grow into a stunning and reliable garden feature.