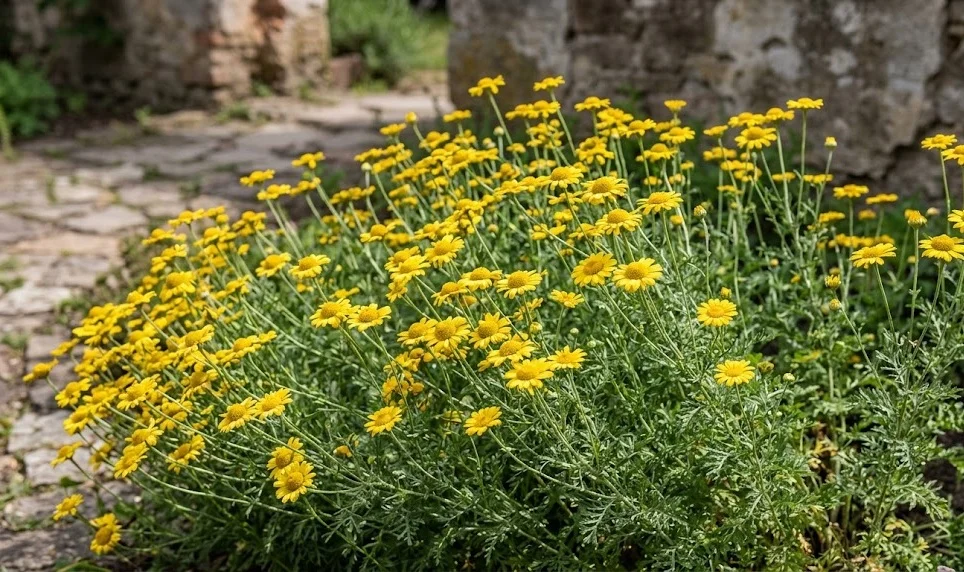
Successful planting of golden marguerite begins with selecting a site that receives a minimum of six to eight hours of direct sunlight each day. This perennial thrives in environments that mimic the open, sunny meadows where it originated in Europe and Western Asia. You must ensure that the chosen location has excellent drainage to prevent the roots from rotting during wet periods. Proper preparation of the planting site is the first step toward a vibrant and long-lasting garden display.
When you are ready to plant, you should dig a hole that is twice as wide as the current root ball but no deeper. This allows the roots to spread out easily into the surrounding soil without being buried too far down. It is often helpful to loosen the soil at the bottom of the hole to facilitate downward root growth. If your soil is particularly heavy, adding a handful of gravel to the base can provide extra drainage.
Place the plant in the hole so that the top of the root ball is level with the surrounding soil surface. Burying the crown too deep can lead to rot, while planting it too high can cause the roots to dry out. You should backfill the hole with the native soil, tamping it down gently with your hands to remove any large air pockets. A thorough watering immediately after planting will help settle the soil and reduce transplant shock.
Spacing is another crucial factor to consider when you are designing your garden layout. Each golden marguerite should be spaced about eighteen to twenty-four inches apart from its neighbors. This allows for adequate air circulation, which is vital for preventing the spread of fungal diseases. Overcrowding can lead to stunted growth and a lack of flowers as the plants compete for resources.
Propagation from seeds
Growing golden marguerite from seeds is a cost-effective way to produce a large number of plants for your landscape. You can start the seeds indoors about six to eight weeks before the last expected frost in your area. Use a high-quality seed-starting mix and barely cover the tiny seeds with a thin layer of fine soil. They require light to germinate, so placing them in a bright spot or under grow lights is essential.
More articles on this topic
Maintain a consistent temperature of around sixty-five to seventy degrees Fahrenheit for the best germination results. You should keep the soil moist but not waterlogged to prevent the seeds from rotting before they can sprout. Most seeds will germinate within two to three weeks if the conditions are favorable and the seeds are fresh. Once the seedlings have developed two sets of true leaves, they are ready for their first transplant.
Hardening off the young plants is a vital step before moving them permanently into the outdoor garden. You should gradually expose the seedlings to outdoor conditions over a period of seven to ten days. Start by placing them in a sheltered spot for a few hours and slowly increase their time in the sun. This process toughens the plant tissues and prepares them for the realities of the garden environment.
Alternatively, you can sow the seeds directly into the garden in late spring once the soil has warmed up significantly. Prepare the seedbed by removing weeds and raking the soil to a fine, crumbly texture. Scatter the seeds thinly and press them lightly into the soil surface without covering them deeply. Direct-sown plants may not flower in their first year, but they often develop stronger root systems than those started indoors.
Propagation by division
Division is the preferred method for many gardeners because it guarantees that the new plants will be identical to the parent. You should aim to divide your golden marguerite every two to three years to maintain its health and vigor. This process is best performed in early spring as new growth begins or in the autumn after flowering has finished. Dividing in the heat of summer is generally not recommended due to the high stress it causes.
More articles on this topic
To begin the process, use a sharp spade to lift the entire clump out of the ground carefully. You will notice that the outer parts of the root system are usually the most vigorous and healthy. Use your hands or a garden knife to separate the clump into smaller sections, ensuring each piece has roots and shoots. The old, woody center of the plant should be discarded as it will not perform well if replanted.
Replant the new divisions immediately to prevent the delicate root hairs from drying out in the air. Treat these new plants as you would a newly purchased specimen, providing adequate water until they are established. You can use these divisions to fill gaps in your borders or share them with fellow gardening enthusiasts. This method is the quickest way to expand your collection of these beautiful golden flowers.
The success rate of division is very high if you pay attention to the moisture levels of the soil after replanting. You should check the new plants daily for the first week to ensure they are not wilting under the sun. If the weather is particularly hot, providing some temporary shade can help the divisions recover more quickly. Within a few weeks, you will see new growth as the plants begin to settle into their new homes.
Taking stem cuttings
Softwood cuttings are another effective way to propagate golden marguerite during the active growing season. You should take cuttings in late spring or early summer from healthy, non-flowering shoots of the current year’s growth. Use a clean, sharp knife to cut a three to four-inch section of the stem just below a leaf node. Removing the lower leaves will reduce moisture loss and provide a clear area for new roots to form.
Dip the cut end into a rooting hormone powder to increase the chances of successful root development. While this step is not strictly necessary, it often speeds up the process and results in a stronger root system. Insert the cutting into a pot filled with a mix of peat and perlite or another well-draining medium. Firm the soil around the stem to ensure good contact and prevent the cutting from falling over.
Place the pot in a warm, bright location but away from direct sunlight, which can scorch the tender stems. You can cover the pot with a plastic bag or a clear dome to maintain high humidity around the cutting. It is important to ventilate the cover daily to prevent the buildup of mold or rot on the leaves. Roots should begin to form within three to four weeks if the environment remains consistently moist and warm.
Once you feel resistance when gently tugging on the cutting, it is a sign that roots have successfully established. You can then transplant the young plant into a larger container or a nursery bed to grow on for a few months. Moving the new plants to their final garden position is best done in the following spring. This method allows you to clone your favorite specimens with high precision and relatively little effort.