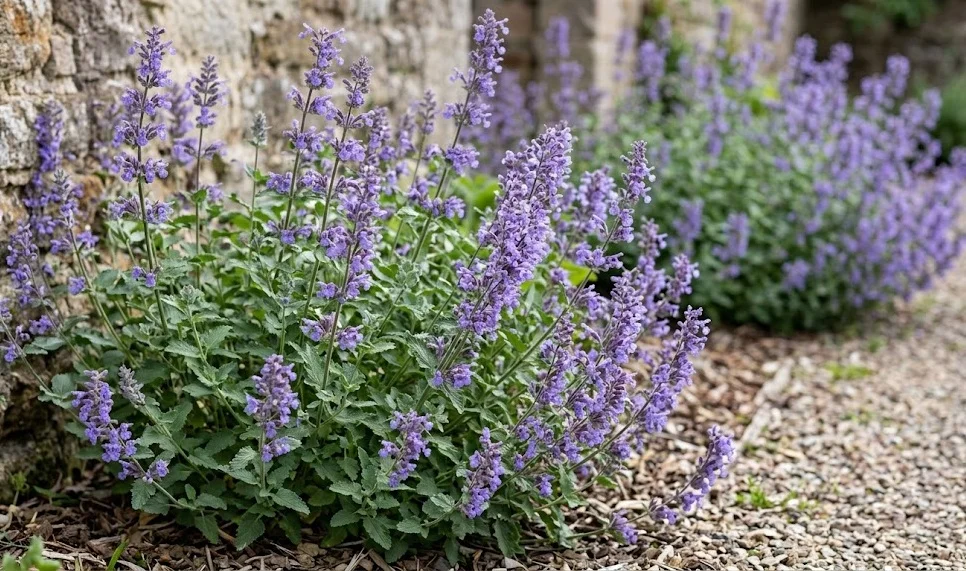
Successful cultivation starts with a deep understanding of the specific planting requirements that allow catmint to thrive. Choosing the right moment and the right method for establishing these perennials is the key to a flourishing garden. Whether you are starting with nursery-bought containers or trying to multiply your existing stock, the process is straightforward when handled correctly. This guide provides professional insights into the best practices for planting and propagating this beloved garden staple.
Optimal planting conditions and timing
The best time to plant your new catmint is during the cooler windows of the growing season, such as early spring or early autumn. Planting in the spring allows the root system to establish itself before the intense heat of the summer sun arrives. If you choose to plant in the fall, ensure it is done early enough so the roots can anchor before the first hard frost. These periods of moderate temperature and natural rainfall provide the lowest stress for the young plants.
Selecting the right location is the most important decision you will make during the entire planting process. These plants require a spot that receives at least six hours of direct sunlight every day to produce the best flowers. While they can survive in partial shade, the growth will likely be less dense and the stems may become quite leggy. Proper site selection ensures that the plant can perform to its full genetic potential without constant intervention.
Soil preparation should focus on drainage rather than high fertility, as catmint is adapted to lean environments. You should avoid areas where water tends to collect after a heavy rain, as constant moisture will lead to root rot. If your soil is heavy clay, you can improve the site by incorporating some organic compost or fine gravel into the planting hole. This creates a more hospitable environment for the fine roots to expand and seek out moisture and nutrients.
When you are ready to put the plant in the ground, dig a hole that is roughly twice the width of the container it came in. The depth should be exactly the same as the root ball so that the crown of the plant sits level with the soil surface. Planting too deep can bury the crown and lead to fungal issues, while planting too shallow can expose the roots to drying air. Once placed, backfill the hole with the original soil and firm it down gently with your hands.
More articles on this topic
Division as a propagation method
Division is perhaps the most reliable and common method for professional gardeners to increase their stock of catmint. This process is best performed in the early spring just as the new growth begins to emerge from the dormant crown. By dividing the plant at this stage, you take advantage of its natural surge of energy as it enters the new growing season. It also helps to rejuvenate older plants that may have become too large or thin in the center.
To begin the process, use a sharp spade to lift the entire root ball out of the ground carefully. Once the plant is out, you can see the different sections of the crown where new shoots are starting to form. Depending on the size of the original plant, you can divide it into two, three, or even four smaller sections. Ensure that each new piece has a healthy set of roots and several visible growing points or stems.
You can often pull the sections apart by hand, but for older, tougher plants, a sharp garden knife may be necessary. Work cleanly and try to minimize damage to the delicate root structures as you separate the pieces. It is vital to keep these new divisions moist and shaded while you prepare their new planting locations. This reduces transplant shock and gives the young plants the best chance of successful establishment in their new homes.
Once the divisions are replanted, they should be watered thoroughly to settle the soil around the roots. You will find that these new plants often grow with remarkable speed, sometimes reaching a significant size within the very first season. This is an excellent way to maintain a consistent look across different parts of your garden without spending extra money. Regular division every few years keeps your catmint population healthy, vigorous, and blooming profusely.
More articles on this topic
Softwood cuttings for expansion
Taking softwood cuttings is another effective way to propagate catmint, especially if you want to create many new plants from a single parent. This method is usually performed in late spring or early summer when the stems are actively growing but not yet woody. Look for healthy, non-flowering shoots that are firm but still flexible enough to bend slightly. Using sharp, sterilized snips will help prevent the spread of any potential diseases during the cutting process.
Each cutting should be approximately four to six inches long, taken just below a leaf node where growth hormones are concentrated. You must remove the lower leaves to expose the nodes, as this is where the new roots will eventually form. Leaving a few leaves at the top is necessary for photosynthesis, but too many will cause the cutting to lose moisture too quickly. Professional growers often dip the ends in a rooting hormone to speed up the process, although catmint often roots well without it.
Place the prepared cuttings into a container filled with a light, well-draining potting mix or a combination of perlite and peat. You should keep the medium consistently moist but never soggy, as excess water can cause the cuttings to rot before they root. Placing the container in a bright spot out of direct sunlight helps to maintain a stable environment for the young stems. High humidity can be maintained by covering the pot with a clear plastic dome or a simple plastic bag.
Within a few weeks, you can check for root development by giving the cuttings a very gentle tug. If you feel resistance, it means the roots have started to take hold in the potting medium. Once a strong root system has formed, the new plants can be hardened off and moved to their permanent locations in the garden. This method is particularly rewarding for gardeners who enjoy the process of nurturing a plant from a small stem to a full-grown perennial.
Long-term establishment and care
After planting or propagating, the first few months are critical for the long-term success of your garden catmint. During this time, the plant is focusing its energy on building a deep root system that will eventually make it drought-tolerant. You should provide regular water during dry spells, but always allow the soil surface to dry out between applications. This encourages the roots to grow deeper into the earth in search of moisture, making the plant more resilient.
Mulching around the base of the new plants can help retain soil moisture and suppress competing weeds during the establishment phase. Use a light, inorganic mulch like pea gravel or a thin layer of shredded bark to avoid trapping too much moisture. Make sure to keep the mulch a few inches away from the stems to ensure proper air circulation at the crown. This simple step can significantly improve the survival rate of young transplants and divisions.
Observation is a key part of the professional gardener’s toolkit during the first growing season. Watch for any signs of stress, such as wilting or yellowing leaves, which could indicate a problem with the planting site or watering routine. Most issues are easily corrected if caught early, allowing the plant to recover and continue its growth. As the plant becomes established, you will notice it becoming increasingly self-sufficient and requiring less frequent attention.
By the end of the first year, your catmint should be well-integrated into the landscape and ready for the future. You will have a better understanding of how the plant responds to your specific garden conditions and microclimate. With the foundational work of planting and propagation complete, you can look forward to years of beautiful color and fragrance. The effort put into these early stages pays dividends in the form of a healthy, low-maintenance garden feature.