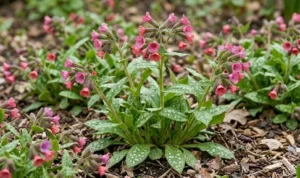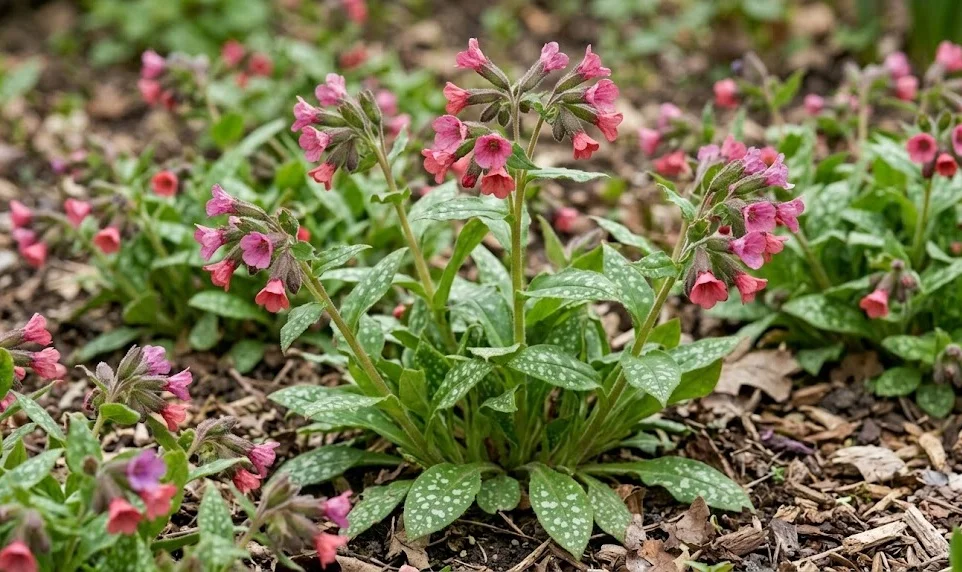

Planting red lungwort successfully begins with choosing a cool, moisture-retentive position that resembles the edge of a deciduous woodland. The plant establishes most reliably in humus-rich soil protected from harsh afternoon sun. Careful preparation helps its shallow roots spread quickly and reduces stress during the first growing season. Once settled, the clump can be propagated through division, seed or carefully handled basal sections.
Red lungwort can be planted as a container-grown perennial during much of the frost-free season. Spring and early autumn are usually the safest periods because soil temperatures are moderate and natural rainfall supports establishment. Summer planting is possible only when regular watering and adequate shade can be guaranteed. Planting into frozen, waterlogged or extremely dry ground should be postponed.
The mature size of the plant must be considered before the hole is prepared. Although individual crowns appear compact, established plants gradually spread and produce a broad leaf canopy. Crowding restricts air movement and makes future division more difficult. A realistic spacing plan also allows the flowers to be seen clearly in spring.
Propagation by division is the quickest way to produce mature, true-to-type plants. Seed propagation is slower and may result in variation, especially when several lungwort species or cultivars grow nearby. Both methods have value, depending on whether uniformity or genetic diversity is the priority. Healthy, disease-free parent plants should always be selected.
Preparing the planting site
The planting area should be cleared of perennial weeds before red lungwort is introduced. Bindweed, couch grass and other persistent weeds are difficult to remove once their roots become tangled with the clump. Hand removal is preferable near tree roots or established woodland plants. A clean planting zone gives the new perennial a much stronger start.
More articles on this topic
Organic matter should be incorporated across a broad area rather than placed only inside the planting hole. Mature compost or leaf mould improves moisture retention and encourages a stable soil structure. Fresh manure should not touch the roots because it may be too concentrated and can promote soft growth. Well-decomposed material is safer and more predictable.
The planting hole should be wider than the root ball but no deeper than necessary. The top of the root ball should finish level with the surrounding soil. Planting too deeply may bury the crown and increase the risk of rotting. Planting too high exposes the roots and causes rapid drying.
Before planting, a dry root ball should be soaked until it is evenly moist. Circling roots can be teased apart gently so that they grow outward into the prepared soil. Severely compacted roots may need several shallow vertical cuts around the root ball. Rough handling should be avoided because lungwort roots can be fleshy and easily bruised.
Planting and early establishment
The plant should be positioned with its crown level and its roots spread naturally. Soil is then returned around the root ball in stages and firmed lightly by hand. Excessive compression removes useful air spaces and slows root development. The aim is close soil contact without creating a hard, sealed surface.
More articles on this topic
Watering immediately after planting settles fine soil particles around the roots. Enough water should be applied to moisten both the original root ball and the surrounding ground. A second watering may be required if the soil sinks significantly. Any exposed roots should be covered with additional soil.
A thin organic mulch can be applied after watering. The mulch reduces evaporation, limits weed germination and softens temperature changes around the crown. It should remain a few centimeters away from the center of the plant. Thick material packed over the crown can hold too much moisture.
During the first season, the plant should be checked regularly rather than watered automatically. The root ball can dry out faster than the surrounding soil because commercial potting compost behaves differently from garden earth. Feeling the soil at root depth gives a more accurate indication than looking at the surface. Consistent moisture during establishment encourages deeper, wider rooting.
Propagating by division
Division is best carried out when the plant is not under heat or drought stress. Early autumn allows new roots to develop before winter, while early spring division takes advantage of increasing growth. Flowering plants can technically be divided, but the process usually reduces the display and increases water loss. A cloudy, mild day provides the most favorable conditions.
The entire clump should be lifted with a fork inserted beyond the main crown. Working around the plant from several directions minimizes broken roots. Once loose, the clump can be raised with as much surrounding soil as practical. Soil may be shaken or washed away only enough to reveal the natural divisions.
Healthy outer sections usually make the strongest new plants. Each division needs a firm crown, viable roots and visible buds or shoots. Soft, blackened or hollow tissue should be removed and discarded. Very small pieces can survive, but larger divisions establish faster and flower sooner.
The divisions should be replanted at their original depth without delay. Roots exposed to wind or sun can dry within a surprisingly short time. Watering is essential even when the soil already feels damp because it eliminates air pockets around the cut roots. Temporary shading may help if bright weather follows immediately after planting.
Propagating from seed and young shoots
Seed capsules develop after pollination and should be monitored as they mature. The seeds are best collected when the capsules begin to dry but before they release their contents. A paper bag placed beneath the stem can catch seed that falls during handling. The material should be cleaned and sown while still fresh whenever possible.
Fresh seed often benefits from exposure to a cool period before germination. Outdoor sowing in autumn allows winter weather to provide natural stratification. Seed trays should be filled with a free-draining, moisture-retentive compost and kept in a shaded cold frame. The medium must not be allowed to dry completely.
Seedlings may emerge irregularly over an extended period. They should be grown on until they are large enough to handle without damaging their roots. Individual seedlings can then be transferred to small pots containing a suitable perennial compost. They may require one or two growing seasons before producing a substantial flower display.
Small rooted offsets can sometimes be removed from the edge of an established colony. These sections should already have their own roots and a visible growing point. They can be separated with a narrow knife or hand fork while leaving the main clump largely undisturbed. After potting or replanting, they need shade and steady moisture until active growth resumes.