The process of establishing garden balsam in your landscape begins with a clear understanding of its unique propagation requirements and planting preferences. This plant is famously easy to grow from seed, making it a perfect candidate for gardeners who enjoy the satisfaction of starting their own displays from scratch. Whether you choose to sow seeds directly in the ground or start them indoors, the key to success lies in the timing and the quality of the starting medium. Proper technique during these early stages will ensure that your plants develop the strong root systems necessary for a long and healthy life.
Starting balsam seeds indoors gives you a significant head start on the growing season, especially in regions with shorter summers. You should begin this process about six to eight weeks before the last expected frost date in your local area. Use a high-quality seed-starting mix that is light, sterile, and designed to retain moisture without becoming compacted over time. Sowing the seeds thinly and covering them with a very light layer of soil will provide the darkness they need to trigger germination.
Once the seeds are sown, maintaining a consistent temperature and moisture level is the primary task for the indoor gardener. A heat mat can be used to keep the soil at a steady warmth, which significantly speeds up the germination process for these tropical natives. You should see the first sprouts appearing within ten to fourteen days if the conditions are ideal and the seeds are fresh. Keep the soil surface moist using a fine misting bottle to avoid disturbing the tiny developing roots during this critical phase.
As the seedlings emerge and develop their first set of true leaves, they will require a significant amount of bright, indirect light. A sunny windowsill or a dedicated grow light will prevent the young plants from becoming leggy and weak as they reach for the sun. It is important to thin the seedlings at this stage to ensure that the strongest individuals have enough space to grow. Providing adequate ventilation with a small fan will also help to strengthen the stems and prevent the development of damping-off disease.
Preparing the garden for successful planting
Before moving your balsam into the garden, the soil must be prepared to receive the new residents and provide them with a healthy home. Clearing the area of weeds and debris is the first step in reducing competition for nutrients and water in the coming weeks. Incorporating a generous amount of well-rotted compost into the top few inches of soil will improve the texture and fertility of the bed. This organic matter also helps to foster a healthy population of soil microbes that are essential for plant health.
More articles on this topic
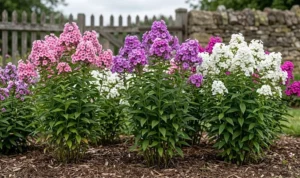
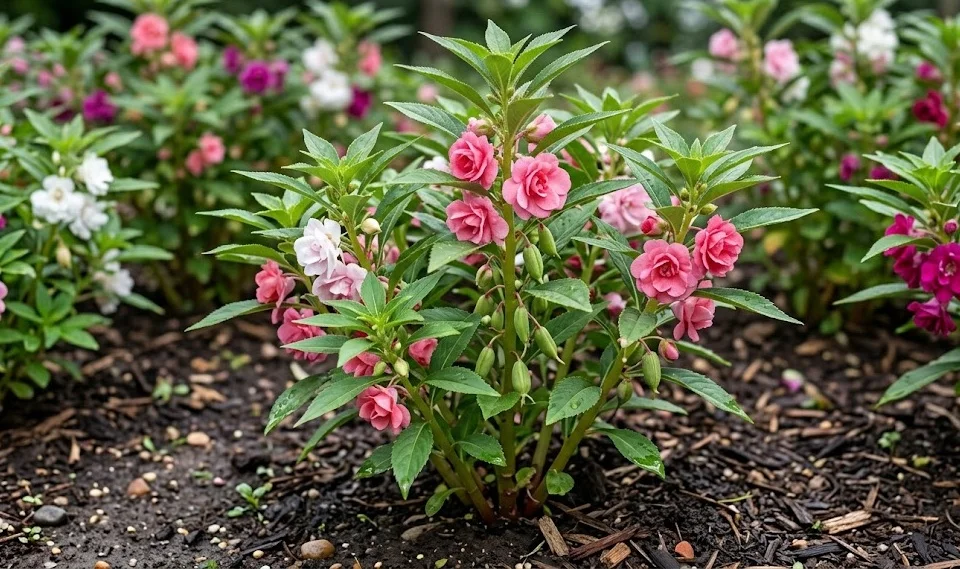
The physical layout of your planting site should take into account the mature size of the balsam varieties you have chosen to grow. Most garden balsams will reach a height of one to two feet and spread about twelve to eighteen inches wide. Spacing the plants appropriately ensures that they have enough room to expand without crowding each other out or blocking airflow. A staggered planting pattern can create a more natural look while maximizing the visual impact of the colorful flowers.
Hardening off your indoor-grown seedlings is a vital step that should never be skipped if you want to avoid transplant shock. This process involves gradually exposing the young plants to outdoor conditions over a period of seven to ten days. Start by placing them in a sheltered, shady spot for a few hours each day and slowly increase their time and exposure to the sun and wind. This gradual transition allows the plant’s tissues to toughen up and prepare for the realities of the outdoor environment.
The actual act of transplanting should ideally take place on a cloudy day or in the late afternoon to minimize stress on the plants. Dig a hole that is slightly larger than the root ball and place the seedling at the same depth it was growing in its container. Gently firm the soil around the base of the plant to remove any large air pockets that could dry out the roots. Watering the new transplants immediately with a liquid seaweed solution can help them settle in and begin new growth more quickly.
Techniques for direct sowing in the landscape
For those who prefer a more hands-off approach, direct sowing seeds into the garden bed is a perfectly viable and often very successful method. This should only be done once the soil has warmed to at least sixty-five degrees Fahrenheit and the threat of frost is entirely gone. Rake the soil surface until it is fine and level, removing any large stones or clumps that might hinder the small seeds. Scattering the seeds evenly over the prepared area will result in a lush, meadow-like appearance once the plants mature.
More articles on this topic
After sowing the seeds, it is important to press them gently into the soil to ensure good seed-to-soil contact, which is necessary for moisture absorption. You do not need to cover them deeply, as a light dusting of fine soil or vermiculite is more than enough to protect them. Keeping the area consistently moist is the biggest challenge when direct sowing, as the top layer of soil can dry out quickly in the sun. Using a light mulch or a row cover can help retain moisture and protect the seeds from being eaten by birds.
Thinning the seedlings is an essential part of the direct sowing process that many gardeners find difficult to perform. It is tempting to leave all the sprouts in place, but this will inevitably lead to stunted growth and poor flowering due to overcrowding. Once the seedlings are about two inches tall, remove the smaller or less vigorous ones until you achieve the desired spacing. This allows the remaining plants to access the full resources of the soil and develop into impressive, healthy specimens.
The advantage of direct sowing is that the plants develop in place and never have to suffer through the stress of being moved. They often develop deeper and more resilient root systems than those grown in small plastic pots or trays. While they may start a bit later than indoor-grown plants, they usually catch up quickly once the summer heat arrives. This method is also the most cost-effective way to fill large garden beds with a massive amount of color and texture.
Propagating balsam through stem cuttings
While seeds are the most common way to grow balsam, propagation through stem cuttings is an excellent way to multiply a specific favorite plant. This asexual method ensures that the new plants will be identical to the parent, which is great for preserving unique flower colors or patterns. Choose a healthy, non-flowering shoot that is about four to six inches long for the best results. Using a sharp, sterile knife or scissors will make a clean cut that heals quickly and reduces the risk of infection.
Remove the lower leaves from the cutting, leaving only a few at the very top to provide energy through photosynthesis. You can dip the cut end into a rooting hormone powder to speed up the process, though balsam roots quite easily even without it. Place the cutting into a moist medium, such as a mix of perlite and peat moss or even a simple glass of clean water. If using water, be sure to change it every few days to keep it oxygenated and free from bacteria or algae growth.
If you are rooting the cuttings in a solid medium, placing a clear plastic bag over the container can create a mini-greenhouse effect. This maintains high humidity around the cutting and prevents it from wilting before it has a chance to develop its own roots. Keep the cuttings in a warm spot with bright but indirect light, avoiding direct sun which could overheat the small environment. You should notice new root growth within two weeks, at which point the plant can be transitioned to regular potting soil.
Once the cuttings have established a strong root system, they can be treated just like any other young balsam plant. They can be moved into larger pots or directly into the garden beds if the weather is appropriate for their growth. This technique is particularly useful for saving a piece of your garden at the end of the season to grow as a houseplant over the winter. Propagating from cuttings is a rewarding skill that allows you to share your favorite plants with friends and neighbors.