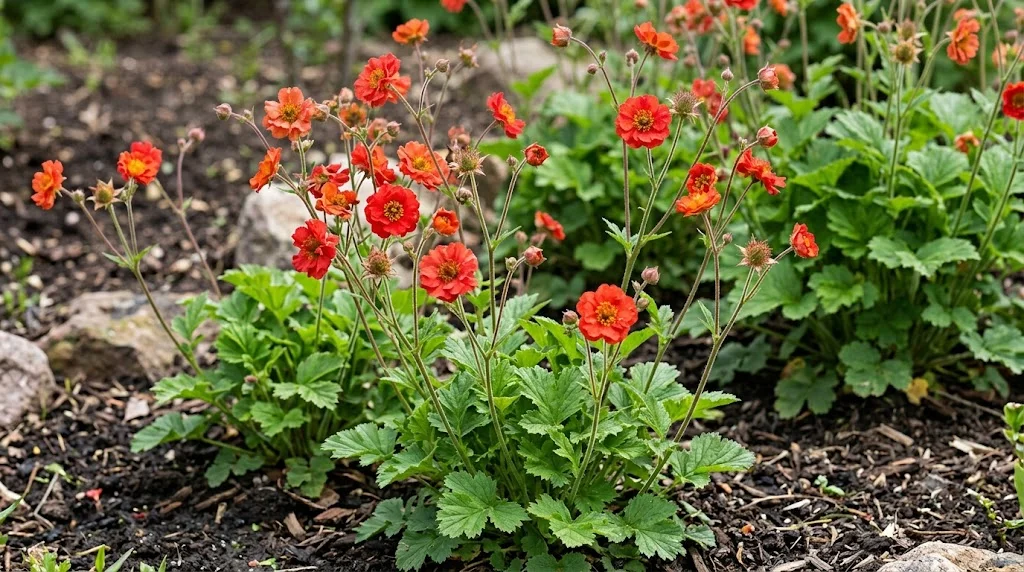

Successful establishment begins with choosing a position that matches the plant’s need for light, moderate moisture, and free drainage. Chilean avens can adapt to many temperate gardens, but it performs poorly in sites that remain waterlogged or become intensely dry for long periods. Careful planting reduces the time needed for the roots to settle and encourages earlier flowering. Propagation by division or seed then makes it possible to renew old clumps and produce additional plants.
Choosing the planting time and preparing the site
Container-grown plants can be installed in spring or autumn while the soil is workable and naturally moist. Spring planting is often preferable in cold regions because the plant has an entire growing season to develop roots. Autumn planting works well in mild climates where the ground remains relatively warm after rainfall increases. Avoid planting during frozen, saturated, or extremely hot conditions.
Choose a site that receives good light but is protected from the harshest afternoon sun in hot climates. The soil should be fertile enough to support flowering while allowing rainfall and irrigation to drain away. Remove perennial weeds thoroughly before planting because they are difficult to extract from the crown later. Loosen a wider area than the planting hole so new roots can move easily into the surrounding soil.
Incorporate mature compost into poor soil, but do not create a small pocket of excessively rich material. Roots establish more evenly when the improved zone blends gradually into the native soil. Heavy ground may require the bed to be raised slightly above the surrounding level. Adding organic matter alone cannot correct severe drainage problems if water has nowhere to escape.
Plan spacing according to the expected mature width of the chosen cultivar. Many Chilean avens varieties need approximately 30 to 45 centimeters of space, while vigorous forms may require more. Adequate spacing reduces competition and allows air to move between clumps. A newly planted border may look open at first, but overcrowding soon causes weaker growth and more disease.
More articles on this topic
Planting potted and bare-root plants
Water a container-grown plant before removing it from its pot. A moist root ball holds together more effectively and reduces damage to fine roots. If the roots are tightly circling, loosen them gently with your fingers or make a few shallow vertical cuts. This encourages outward growth instead of continued circling within the planting hole.
Dig a hole slightly wider than the root mass but no deeper than the original container. Position the crown at soil level because burying it too deeply increases the risk of decay. Backfill with the loosened soil, firming gently to remove large air pockets. Water thoroughly after planting, even when the surrounding soil already seems damp.
Bare-root divisions should be planted as soon as possible after arrival. Soak dry-looking roots briefly in clean water, but do not leave them submerged for many hours. Spread the roots naturally over a small mound of soil and keep the crown at the correct depth. Fill the hole carefully so soil settles between the roots without bending them sharply upward.
After planting, apply a light mulch around the root zone while leaving the crown exposed. Continue watering during dry weather until fresh growth confirms that the root system is functioning. A newly planted specimen may produce fewer flowers during its first season because energy is being directed below ground. Strong establishment is more valuable than forcing immediate heavy flowering.
More articles on this topic
Propagating established plants by division
Division is the fastest and most dependable method of producing plants identical to a named cultivar. It is best carried out in spring as growth begins or in early autumn where winters are mild. Choose a healthy, mature clump that has several distinct growing points. Avoid dividing plants during active flowering, severe drought, or extreme heat.
Water the plant the day before lifting if the soil is dry. Dig around the crown with a garden fork, keeping enough distance to preserve as many roots as possible. Lift the entire clump and shake or wash away some soil so the crown structure becomes visible. Old woody material, rotted roots, and weak sections should be removed.
Separate the clump using your hands, two forks placed back to back, or a clean sharp knife. Each division should contain healthy roots and at least one strong growing point, although sections with several shoots establish more rapidly. Trim excessively long damaged roots and remove old flower stems. Keep the divisions shaded and moist until they are replanted.
Replant the strongest sections immediately into prepared soil at their original depth. Water thoroughly and maintain even moisture while new roots develop. Newly divided plants may wilt slightly during the first few days, especially in bright weather. Temporary shading and careful watering can reduce stress without creating waterlogged conditions.
Raising new plants from seed
Seed propagation is useful for producing larger numbers of plants, but seedlings may not remain identical to highly bred parent cultivars. Variation can appear in flower color, height, petal form, and flowering time. This genetic diversity may be desirable in informal or naturalistic planting schemes. For exact copies of a selected cultivar, division remains the better method.
Sow seed in trays or pots filled with fine, free-draining seed compost. Press the seed lightly onto the surface and cover it with only a thin layer of compost or fine grit. Keep the medium evenly moist by watering gently from below or using a fine spray. Strong jets of water can displace the seed and compact the growing surface.
Germination may be irregular, and some seed benefits from a period of cool conditions. Autumn sowing outdoors in a protected cold frame can provide natural temperature changes. Alternatively, spring-sown trays may be kept cool according to the seed supplier’s guidance. Patience is important because seedlings do not always emerge at the same time.
Transplant young seedlings when they have developed several true leaves and are large enough to handle safely. Lift them by a leaf rather than pulling on the delicate stem. Grow them individually in small pots until their root systems hold the compost together. Harden them gradually before planting outdoors, and expect flowering to begin after the plants have reached sufficient maturity.