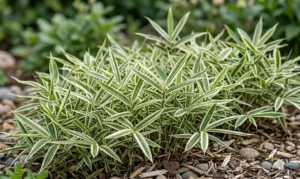
Preparing your wormwood for the cold months is a vital task that ensures the plant returns with vigor in the following spring. While this herb is known for its impressive cold hardiness, extreme winter conditions can still pose a challenge to its survival. You will find that a few simple protective measures can make a significant difference in the health of your garden during the frost. Understanding the natural dormant cycle of the plant allows you to provide the right support without interfering too much.
Assessing cold hardiness and dormancy
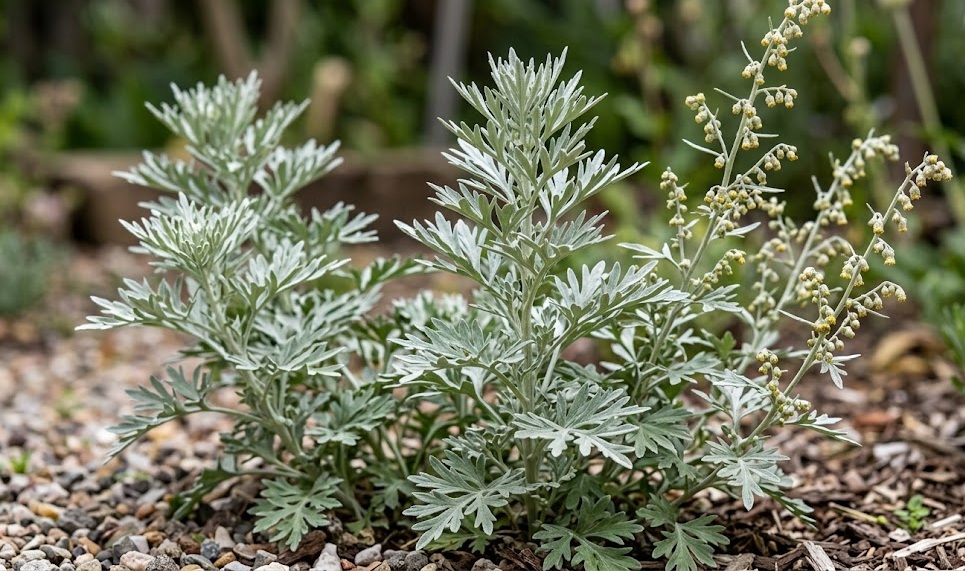
Wormwood is naturally adapted to survive in temperate climates where freezing temperatures are a regular part of the winter cycle. You will see the plant begin to change its appearance as the days grow shorter and the first frosts arrive in late autumn. The vibrant silvery leaves may dull or even fall off as the plant pulls its energy down into the root system for protection. This transition is a normal and healthy part of the plant’s life cycle that you should observe with interest.
In most regions, this herb can handle temperatures well below freezing without requiring any elaborate indoor storage. You should check the specific climate zone of your garden to see how it compares to the natural tolerance of the species. If you live in an area with exceptionally harsh winters, you might need to take a few extra steps to insulate the roots. Knowing the limits of your plants helps you plan your autumn chores with confidence and professional accuracy.
The onset of dormancy is the signal for you to step back and reduce your active interventions in the herb garden. You should stop any fertilization several weeks before the first frost to prevent the growth of tender new shoots that would be killed by the cold. This allows the existing wood and roots to harden off and prepare for the long period of rest ahead. Your patience during this time is essential for the long-term structural integrity of the plant.
Monitoring the moisture levels in the soil during the early winter is also part of assessing the plant’s readiness for the cold. You want the ground to be hydrated but not saturated when the first deep freeze occurs in your area. Moist soil actually holds heat better than bone-dry earth, providing a small but important buffer for the delicate root tips. A well-prepared plant enters the winter with all the resources it needs to wait out the snow and ice.
More articles on this topic
Mulching techniques for root protection
Applying a fresh layer of mulch around the base of the plant is one of the most effective ways to provide winter protection. You should use light, airy materials like straw, shredded bark, or dry leaves that allow for some air circulation. A layer about two to three inches thick helps insulate the ground and prevents the “freeze-thaw” cycle that can push roots out of the earth. You will find that this simple addition keeps the soil temperature much more stable throughout the season.
When you apply the mulch, be careful not to pile it directly against the main stems or the crown of the plant. You should leave a small gap of about an inch to prevent moisture from becoming trapped and causing rot during the damp winter days. This “donut” shape ensures the roots are protected while the top of the plant can still breathe properly. Your attention to these small details is what separates a casual hobbyist from a truly professional gardener.
If you live in a particularly windy area, you might need to secure your mulch with a few evergreen branches or a light piece of garden netting. This prevents the protective layer from being blown away during winter storms, leaving the plant exposed to the elements. You should check the status of your mulch after any major weather event to ensure it is still providing the necessary coverage. Keeping the “blanket” in place is vital for the survival of younger or newly transplanted specimens.
As the winter progresses and the mulch begins to break down, it also adds a small amount of organic matter back into the soil. This process enriches the ground just in time for the spring wake-up call that arrives with the warmer sun. You are essentially providing both immediate physical protection and a long-term nutritional boost for your garden. This multi-purpose approach to maintenance is a key part of successful and sustainable plant care.
More articles on this topic
Caring for pot-grown wormwood
Plants that are kept in containers are much more vulnerable to the cold because their roots are not insulated by the mass of the earth. You should consider moving your potted wormwood to a more sheltered location, such as against a south-facing wall or inside a cold frame. If the pots are small, you can even bury them in a pile of mulch or sawdust to provide extra thermal mass. You will find that these small adjustments can save your favorite specimens from even the harshest cold snaps.
Insulating the pots themselves can also be a great way to protect the roots without moving the heavy containers. You can wrap the sides of the pots in bubble wrap, burlap, or old blankets to create a barrier against the freezing air. Make sure the drainage holes remain clear so that any winter rain or melting snow can still escape freely. A well-insulated pot keeps the delicate root system from experiencing the extreme temperature drops that occur at night.
Watering your potted plants during the winter requires a very careful and measured approach from your side. You should only give them a small drink if the soil feels completely dry and the weather is expected to stay above freezing for a few days. Dormant plants in pots need very little moisture, and overwatering is a quick way to cause fatal root rot in the cold. Monitoring the weight of the pot can be a simple way to tell if it still has enough moisture inside.
If you decide to bring your potted wormwood into a garage or shed, make sure the space remains cool but not freezing. You don’t want to trigger the plant into thinking it is spring too early by placing it in a heated room. A period of genuine cold is actually beneficial for many perennial herbs as it helps regulate their natural growth hormones. Your goal is to provide a safe “sleeping” environment rather than a warm growing one during the winter months.
Spring revival and recovery
The arrival of the first warm days of spring is an exciting time for any gardener watching their plants wake up. You will see tiny green buds starting to appear on the woody stems of the wormwood as the soil temperature rises. This is the moment to gradually remove any heavy winter mulch and allow the sun to warm the earth around the roots. You should do this carefully to avoid damaging the tender new growth that is just starting to emerge.
Once the danger of a hard frost has passed, you can assess the plant for any winter damage that might have occurred. You might find some dead tips or broken branches that need to be trimmed away to tidy up the appearance. Use sharp, clean shears to make your cuts and encourage the plant to focus its energy on fresh, healthy shoots. This early spring cleaning is a great way to start the new gardening season on a positive and productive note.
If the winter was particularly dry, you should provide a gentle watering to help the plant rehydrate as it begins its active growth. You will notice the silvery color returning to the leaves as they expand in the increasing daylight. This is also a good time to apply a very light layer of organic compost to provide a steady supply of nutrients for the coming months. Your consistent care throughout the transition period ensures a smooth and successful start for the year.
Reflecting on how your wormwood handled the winter helps you prepare even better for the following year. You might realize that certain spots in your garden were more protected than others or that your mulching technique worked perfectly. Every season provides a new opportunity to learn and grow as a professional who truly understands the needs of their plants. Your garden is a living laboratory where your observation and care lead to beautiful and lasting results.