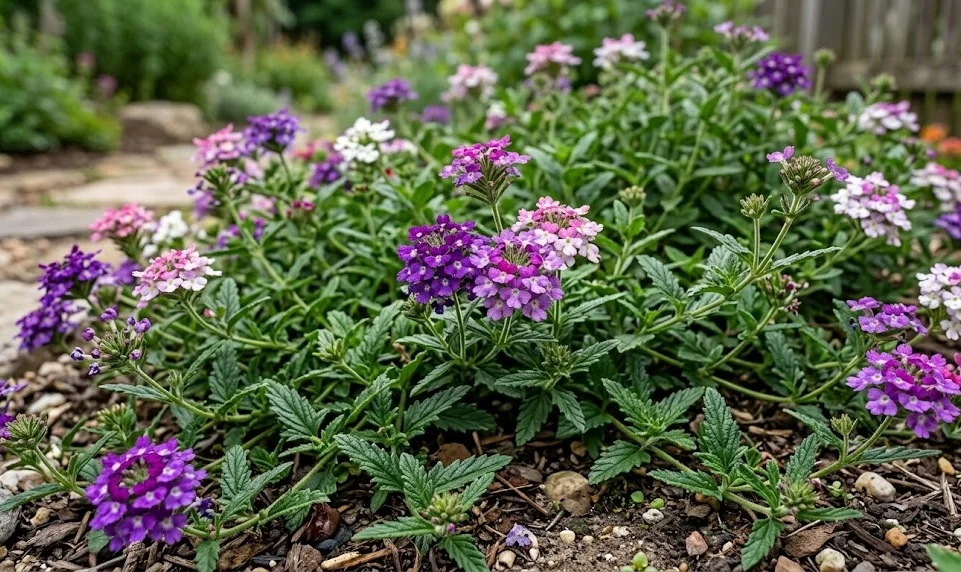
Successfully overwintering garden verbena allows a dedicated gardener to preserve prized cultivars and gain a significant head start on the following growing season. While these plants are often treated as annuals in cooler climates, many varieties are actually tender perennials that can survive the winter with the right professional intervention. The process requires a transition from the active growth phase to a period of controlled dormancy or slowed metabolism in a protected environment. By following a structured plan, you can ensure that your plants return with even greater vigor when the warmth of spring finally arrives.
The decision to overwinter should be based on a clear understanding of your local climate zone and the specific hardiness of the verbena variety you are growing. Some hybrids are more cold-tolerant than others, but most will require significant protection once temperatures consistently drop below freezing. You should begin your preparations well before the first hard frost, as a sudden extreme temperature drop can cause irreversible cellular damage to the plant’s vascular system. Monitoring the long-range weather forecast is a critical professional habit during the late autumn months to time your actions perfectly.
For plants that are staying in the ground, the focus is on protecting the root crown and the lower stems from the desiccating effects of cold winds and frozen soil. You can use a combination of heavy mulching and physical barriers to create a more stable microclimate around the base of the plant. It is important to remember that it is often the repeated freezing and thawing cycles of early spring, rather than the cold of winter itself, that causes the most damage. Professional overwintering techniques aim to maintain a constant, cold temperature that keeps the plant in a safe state of dormancy.
Bringing plants indoors is the most reliable method for ensuring survival in regions with harsh winters, but it introduces its own set of horticultural challenges. These plants must be carefully prepared for the move to avoid bringing pests and diseases into the controlled environment of a home or greenhouse. You will need to provide adequate light and manage moisture levels precisely to prevent the plants from rotting or becoming overly stressed during their indoor stay. A successful indoor transition requires a deep understanding of the plant’s reduced metabolic needs during the darkest months of the year.
Preparing the plants for indoor transition
The first step in moving garden verbena indoors is a thorough inspection and cleaning of the entire plant to ensure it is free from any unwanted hitchhikers. You should look closely for aphids, spider mites, or fungal spores that might quickly multiply in the warm, stagnant air of an indoor space. Pruning the plant back by about one-third to one-half of its original size reduces the total leaf area and makes the plant much easier to manage in a pot. This also stimulates the plant to focus its remaining energy on root maintenance rather than supporting a large canopy of foliage.
More articles on this topic
Selecting the right container and substrate is vital for a successful indoor overwintering period where drainage is even more critical than during the summer. You should use a high-quality, sterile potting mix that provides excellent aeration to prevent the roots from becoming waterlogged in the lower light conditions. Ensure that the pots have ample drainage holes and avoid using saucers that allow the plants to sit in standing water for extended periods. This professional attention to the root environment is the key to preventing the “damping off” and root rot that often claim overwintering plants.
Acclimatization is a two-way process that must be respected when moving plants from the garden to an indoor environment. You should gradually reduce the plant’s exposure to direct sunlight and outdoor temperatures over a week or two before the final move inside. This allows the plant’s internal systems to adjust to the lower light levels and more consistent temperatures of a home or greenhouse. Skipping this step can lead to a massive leaf drop as the plant enters a state of shock, which significantly weakens its chances of surviving until spring.
Once inside, the placement of the plants should be chosen to maximize light exposure while avoiding the direct heat of radiators or air vents. A south-facing window or a cool, bright sunroom is often the ideal location for maintaining a healthy level of metabolic activity without encouraging leggy growth. You might also consider using supplemental grow lights to provide a consistent ten to twelve hours of light per day, mimicking a more favorable growing season. A professional setup carefully balances light, temperature, and humidity to keep the plants in a stable, healthy condition.
Maintenance during the dormant phase
Watering during the winter months requires a significantly different approach than the frequent irrigation used during the height of the summer growing season. Because the plant’s growth has slowed and the light levels are lower, the demand for water is greatly reduced, making over-watering a constant danger. You should allow the soil to dry out significantly between watering sessions, often waiting until the top two inches are completely dry to the touch. This professional “dry cycle” is essential for preventing fungal pathogens and ensuring the roots stay oxygenated throughout the winter.
More articles on this topic
Fertilization should be completely suspended during the overwintering period to avoid stimulating new growth that would be weak and susceptible to pests. The goal is to keep the plant in a state of suspended animation, not to encourage expansion or flowering until the days begin to lengthen again. Only when you see the first signs of active new growth in late winter or early spring should you consider a very light, diluted application of a balanced fertilizer. Maintaining this nutritional discipline is what separates a successful overwintering attempt from one that results in a stressed, unhealthy plant.
Pest monitoring must continue even when the plants are indoors, as common greenhouse pests can still emerge and cause problems in the controlled environment. You should regularly check the undersides of the leaves and the tips of the stems for any signs of whiteflies or fungus gnats, which are particularly common in indoor settings. If pests are found, using low-impact treatments like neem oil or insecticidal soap is generally sufficient to keep the population under control. A professional gardener stays vigilant year-round, knowing that a small problem can quickly become a major infestation in the confined space of a home.
Temperature management is the final piece of the indoor overwintering puzzle, as most garden verbena prefer a cool but frost-free environment during their rest period. Ideal temperatures are typically between 10 and 15 degrees Celsius, which is cool enough to discourage rapid growth but warm enough to prevent cold damage. Avoiding drafty windows or areas with extreme temperature fluctuations will help the plant maintain its internal balance and conserve its energy reserves. By creating a stable, predictable environment, you give your verbena the best possible chance of a successful return to the garden.
Protecting plants in the outdoor landscape
For those who choose to leave their garden verbena in the ground, a heavy layer of protective mulch is the most effective tool for winter survival. You should apply at least four to six inches of organic material, such as straw, shredded leaves, or evergreen boughs, after the first light frost has occurred. This layer acts as an insulator, slowing the rate at which the soil freezes and protecting the sensitive root crown from the most extreme cold. It is important to wait until the ground has begun to cool down, as applying mulch too early can trap heat and moisture that encourages rot.
Physical covers, such as frost blankets or upturned pots, can provide an additional layer of protection during particularly severe cold snaps or windstorms. These covers should be placed over the plants in the evening and removed during the day if the sun is out to prevent the buildup of excessive heat underneath. You should ensure that the covers are securely anchored to the ground so they do not blow away and leave the plants exposed to the elements. This proactive approach to weather management is a hallmark of professional garden care in challenging climatic regions.
Drainage becomes even more critical during the winter months when the soil may be saturated with melting snow and winter rains. If the area around the verbena stays wet and frozen for long periods, the roots are likely to suffocate and die before the spring arrives. You should ensure that the planting bed is slightly elevated or that the surrounding soil has been amended to provide the best possible drainage characteristics. A professional design takes these winter conditions into account long before the first snowflake falls, ensuring a year-round healthy environment.
Spring cleanup should be done with care, as removing the protective mulch too early can expose the tender new shoots to late-season frosts. You should gradually pull back the mulch as the weather warms, allowing the soil to heat up and the plants to slowly emerge from their winter sleep. If a late frost is predicted, be prepared to temporarily replace the covers to protect the vulnerable new growth from being burned by the cold. This careful transition from winter protection to spring growth is the final stage of a successful professional overwintering strategy.
Re-introduction to the spring garden
As the days lengthen and the soil temperature begins to rise, your overwintered garden verbena will naturally begin to show signs of renewed life. For plants that were moved indoors, the process of hardening off must be repeated in reverse to prepare them for their return to the outdoor environment. You should start by placing them in a shaded, sheltered spot for a few hours each day and gradually increasing their exposure to sun and wind. This professional transition ensures that the plants are strong enough to handle the intensity of the spring sun without suffering from leaf scorch or dehydration.
Once the plants are back in their permanent garden locations, a light pruning to remove any dead or weak winter growth will help to stimulate vigorous new stems. You should also begin a regular fertilization routine with a balanced, slow-release formula to provide the energy needed for the upcoming blooming season. This “refresh” of the plant’s structure and nutrition sets the stage for a much larger and more impressive display than could be achieved with new transplants. A professional gardener takes pride in the continuity and maturity that overwintered plants bring to the landscape design.
Monitoring the plants closely during the first few weeks back in the garden is essential for identifying any issues that may have arisen during the transition. The young growth is particularly attractive to early-season pests like slugs and aphids, which can quickly set back the plant’s development if not managed. You should also ensure that the irrigation schedule is adjusted to account for the increasing temperatures and the plant’s expanding leaf area. This attentive care during the re-establishment phase is what ensures a seamless transition and a spectacular summer show.
The ultimate reward of a successful overwintering program is a garden that is already filled with established, robust plants while others are still waiting for nursery deliveries. These mature specimens will often bloom earlier and more profusely than young starts, providing an immediate impact in the spring landscape. You can also use these established plants as a source for new cuttings, further expanding your collection of favorite cultivars at no additional cost. This cycle of professional care and propagation is what allows a garden to evolve and flourish over many successful seasons.