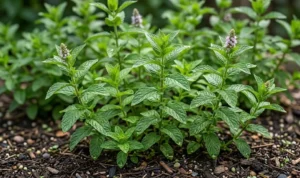
Establishing a successful herb patch requires a deliberate selection of both the physical location and the seasonal timing of planting. Planting during this window allows the herb to utilize the natural abundance of spring moisture and moderate temperatures for root development. The chosen area should also feature reliable moisture levels without being prone to prolonged standing water during heavy spring downpours. Initiating your planting project at the right time of year gives the young roots the best chance to establish.
Choosing the perfect planting site and timing
Spring is universally considered the prime season for planting new herbs out into the open garden soil. Once the danger of severe hard frost has passed and the ground begins to warm, the soil becomes highly receptive. Planting during this window allows the herb to utilize the natural abundance of spring moisture and moderate temperatures for root development. Alternatively, early autumn planting can also be successful in milder climates, giving the plant time to settle before winter dormancy.
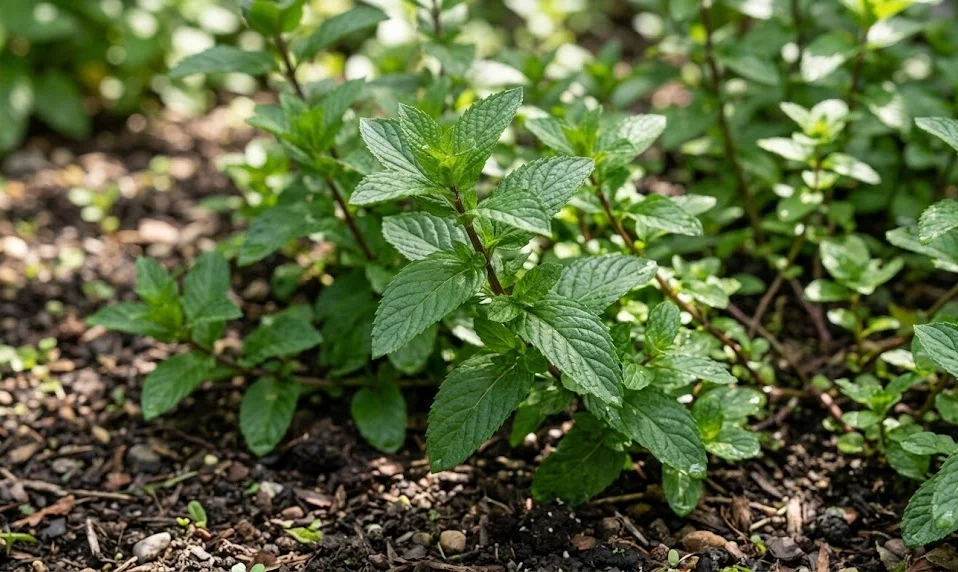
Spatial planning is critical when integrating this plant into a residential landscape or a commercial agricultural plot. Individual specimens should be spaced approximately eighteen to twenty-four inches apart to accommodate their rapid horizontal expansion. This spacing might seem excessive initially, but the empty ground will be completely covered within a single growing season. Providing adequate space from the outset reduces early competition for vital soil nutrients and moisture among the young plants.
Preparing the site involves clearing away existing weeds, turning the soil deeply, and incorporating high-quality organic amendments. Removing perennial weed roots prevents them from re-emerging and competing with your newly installed herbs for light and space. Breaking up compacted soil aggregates ensures that the delicate young roots can easily penetrate the earth and expand outward. A well-prepared bed provides the perfect foundation for long-term health and high productivity in the coming years.
Propagation via root and rhizome divisions
Division is the most reliable, efficient, and popular method for propagating established plants without spending money on new stock. Because this species produces an extensive network of underground runners, finding viable material for division is incredibly simple. This vegetative method ensures that the new plants are exact genetic clones of the healthy, high-yielding parent plant. Performing divisions every few years also helps rejuvenate older, less productive parts of your original herb patch.
More articles on this topic
The ideal time to execute root divisions is early spring when the plant is just waking up from its winter rest. Using a clean, sharp spade, carefully dig up a healthy section of the mature plant from the outer edge. Shake off excess soil to expose the network of thick, white rhizomes running just beneath the surface. Look for sections that possess both visible green shoots or buds and a healthy cluster of fine roots.
Use a sterilized knife or garden shears to slice the rhizome network into smaller, manageable individual sections. Each new piece should have at least one strong growth bud and several attached roots to ensure survival. Keep these bare-root divisions moist and shaded during the process to prevent the delicate root hairs from drying out. Plant the pieces immediately into prepared soil or containers at the same depth they were growing previously.
Water the newly installed divisions thoroughly to settle the soil around the roots and eliminate any disruptive air pockets. Applying a thin layer of organic mulch will help retain essential moisture during this critical initial establishment phase. Within a couple of weeks, you should notice fresh green growth emerging boldly from the soil as roots take hold. This rapid success rate makes rhizome division a favorite technique among professional horticulturists and novice gardeners alike.
Stem cuttings and water rooting methods
Propagating via stem cuttings is an exceptionally rewarding and visually fascinating method that can be performed throughout the active growing season. This technique is particularly useful in late spring or summer when the plant is full of vigorous, non-flowering stems. It allows gardeners to easily multiply their collection using nothing more than a few healthy prunings and some water. Stem cuttings are also an excellent way to start new plants indoors before the outdoor gardening season begins.
More articles on this topic
To begin, select a collection of strong, healthy stems that display vibrant green color and no signs of pest damage. Using a sharp, sterilized blade, cut a three-to-four-inch section from the tip of the chosen stem, making the cut just below a leaf node. Carefully strip away the leaves from the bottom half of the cutting, leaving only a few leaves at the top. This step reduces moisture loss through transpiration and prepares the nodes where new roots will eventually emerge.
Place the prepared cuttings directly into a clean glass or jar filled with fresh, room-temperature water. Ensure that the stripped nodes are fully submerged while the remaining upper leaves rest safely above the waterline. Place the container in a warm, bright location that receives plenty of indirect sunlight but no harsh direct rays. Change the water every two days to maintain high oxygen levels and prevent the buildup of harmful bacteria.
Within a week or two, you will observe delicate white roots beginning to sprout from the submerged nodal points. Once these roots reach approximately one inch in length, the cuttings are ready to be transitioned into soil. Carefully plant them into small pots filled with a lightweight, well-draining potting mix and keep them consistently moist. Gradually acclimate the young plants to outdoor conditions over a week before planting them into their final garden destination.
Underground barrier installation for control
Managing the naturally aggressive growth habit of this herb is an essential aspect of the planting process that cannot be overlooked. Without proper physical restrictions, the underground rhizomes will spread relentlessly in every direction, infiltrating lawns and choking out neighboring flora. Installing an underground barrier during the initial planting phase is the most effective way to maintain order in your garden. This proactive measure saves gardeners countless hours of future weeding and ensures a harmonious landscape design.
The barrier material must be durable, rigid, and completely impervious to penetration by sharp, persistent root tips. Heavy-duty plastic root barriers, metal flashing, or even deeply buried concrete pavers are excellent choices for this specific application. The barrier should extend to a depth of at least twelve to fourteen inches below the surface of the soil. This depth is necessary because while the roots are relatively shallow, runners can occasionally dive deeper to bypass obstacles.
It is equally important to let the top edge of the barrier protrude roughly two inches above the soil surface. This exposed lip prevents the plant from sending surface runners over the top of the barrier without your knowledge. Regularly inspect this perimeter throughout the summer to spot and clip any adventurous stems attempting an overland escape. This simple maintenance habit ensures that the physical barrier remains completely effective over the long term.
Alternatively, you can plant the herb inside a large plastic bucket with the bottom cut out before sinking it. This method provides an instant, self-contained circular barrier that is perfect for incorporating the herb directly into mixed vegetable beds. Ensure the rim of the buried bucket remains slightly elevated above the surrounding earth to prevent overland bridging. By taking these control measures during planting, you can enjoy all the benefits of fresh herbs without the stress of an invasion.