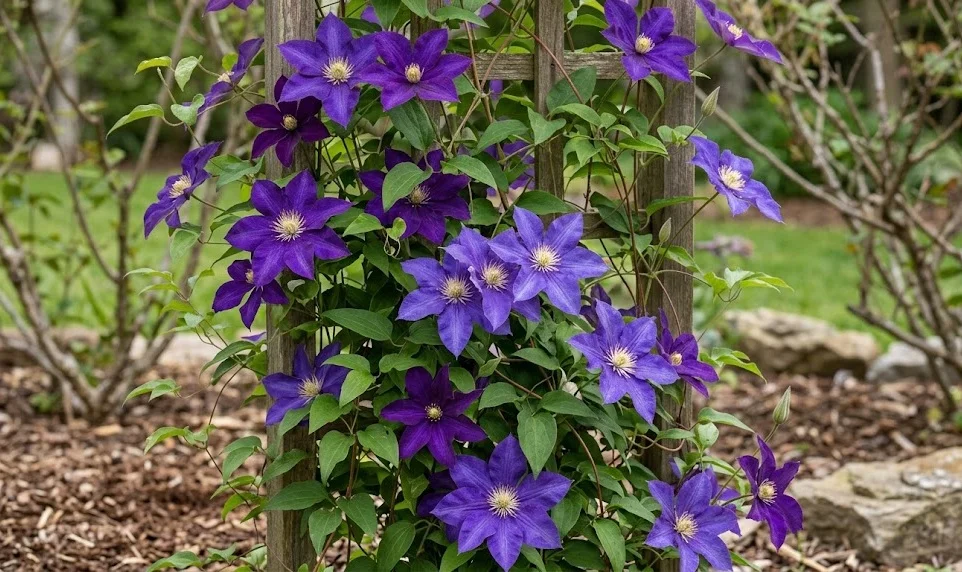
Proper hydration and nutrition are the twin pillars that support the spectacular growth and blooming cycles of the garden clematis. These plants are known for their vigorous appetite and their sensitivity to dry conditions, especially during the height of the summer heat. A well-planned feeding schedule ensures that the plant has the necessary resources to produce its signature large, vibrant flowers. Understanding the specific needs of your soil and the timing of the plant’s growth phases will lead to a much more successful gardening experience.
Water requirements by season
In the early spring, as the first buds begin to swell, the clematis requires a steady supply of moisture to fuel its rapid expansion. You should monitor the rainfall and supplement it if the soil feels dry an inch below the surface during this period. This early hydration is critical for the development of long, healthy stems that will eventually bear the season’s flowers. Avoiding water stress now prevents the plant from becoming stunted or losing its initial vigor before the season even begins.
During the peak of the summer, the demand for water reaches its maximum as the large leaf surface area loses moisture quickly. You should aim to provide a deep soaking at least twice a week, depending on the temperature and the local humidity levels. It is much better to provide a large amount of water less frequently than to give shallow, daily sprinkles that don’t reach the roots. This encourages the root system to grow deeper into the soil, making the plant more resilient to future dry spells.
As the temperatures begin to cool in the autumn, you should gradually reduce the frequency of your watering routine. The plant is preparing to enter dormancy, and overly wet soil can lead to fungal issues or root rot during the winter. However, you should not let the ground become bone-dry, as the roots still need some moisture to survive the cold months. A final deep watering just before the ground freezes can help the plant withstand the drying effects of winter winds.
Winter watering is rarely necessary in many climates, but it can be important in areas with very dry, snowless winters. If the ground is not frozen and there has been no precipitation for several weeks, a light watering may be beneficial. You should focus on keeping the root zone from dehydrating completely without creating a soggy environment that could freeze and damage the plant. Once growth resumes in the spring, you can return to your standard, more intensive irrigation schedule.
More articles on this topic
Correct irrigation techniques
When watering your clematis, always aim the flow at the base of the plant rather than spraying the foliage directly from above. Keeping the leaves dry is one of the most effective ways to prevent the spread of fungal diseases like clematis wilt. You should use a watering can with a long spout or a soaker hose to deliver moisture directly to the soil surface. This targeted approach ensures that the water goes exactly where it is needed most without wasting a drop.
Early morning is the ideal time for irrigation because it allows any accidental moisture on the leaves to evaporate quickly in the rising sun. Watering in the evening can leave the plant damp throughout the night, which creates a perfect environment for mildew and slugs. If you must water during the day, try to do so before the heat becomes too intense to minimize loss through evaporation. Consistency in your timing helps the plant regulate its internal processes more efficiently over the long term.
A soaker hose or a drip irrigation system is often the best investment for a dedicated clematis grower. These systems deliver water slowly and steadily, allowing it to penetrate deep into the heavy soil where the roots reside. You can set these systems on a timer to ensure the plant receives its hydration even when your schedule becomes busy. This method also reduces soil erosion and prevents the compaction that can occur with high-pressure garden hoses.
Checking the soil moisture manually is a simple but vital habit that prevents both overwatering and underwatering. You should push your finger into the mulch and soil to feel for dampness at the root level before adding more water. If the soil feels muddy or smells slightly sour, you are likely watering too much and should allow it to dry out. Conversely, if the earth is hard and cracking, your plant is in desperate need of a long, slow soak.
More articles on this topic
Nutrient needs for blooms
Clematis are often described as “heavy feeders” because of the sheer volume of biomass and flowers they produce in a single season. You should provide a balanced fertilizer in the early spring to kickstart the growth of new foliage and strong stems. A formula with an even ratio of nitrogen, phosphorus, and potassium is generally a safe and effective choice for the initial application. This foundation supports the overall structural health of the plant as it begins its vertical journey.
As the flower buds start to form, the plant’s nutritional requirements shift toward a need for more potassium. You should switch to a fertilizer with a higher middle and last number, similar to what you might use for roses or tomatoes. This specific nutrient balance encourages the development of large, colorful blooms and improves the plant’s overall disease resistance. Applying this specialized feed every four to six weeks during the blooming season will yield the most impressive results.
Micronutrients like magnesium and iron also play a supporting role in maintaining the deep green color of the leaves. You might consider adding a small amount of Epsom salts to your watering routine once or twice a year to boost magnesium levels. If you notice the leaves are turning yellow while the veins remain green, an iron deficiency may be the cause. Using a complete liquid fertilizer that includes these trace elements can prevent these common nutritional imbalances.
It is important to stop all heavy fertilization by the late summer to allow the plant to harden off its growth for the winter. Late-season feeding can stimulate soft, succulent growth that is highly susceptible to frost damage and pest attacks. You want the plant’s energy to go into maturing its existing wood rather than producing new shoots that won’t survive the cold. A final application of organic compost in the autumn can provide a slow release of nutrients for the following spring.
Organic vs mineral fertilizers
Organic fertilizers, such as well-rotted manure, compost, and fish emulsion, offer a long-term approach to plant nutrition. You will find that these materials improve the soil structure and encourage beneficial microbial life while feeding the clematis. They release their nutrients slowly as they break down, providing a steady and predictable supply of food for the roots. Many experts prefer this method because it is more sustainable and less likely to cause nutrient burn.
Mineral or synthetic fertilizers provide a more immediate boost and allow for precise control over the nutrient ratios. You should use these when you need to quickly address a specific deficiency or want to maximize the flower production of a particular variety. These products are often easier to apply and come in various forms, including liquids, granules, and spikes. However, you must be careful not to over-apply them, as the concentrated salts can damage the sensitive root hairs.
A combination of both methods often yields the best results for the average home gardener. You can use organic compost as a base mulch each year and supplement it with liquid mineral feeds during the peak flowering weeks. This dual approach ensures that the soil remains healthy while the plant receives the extra energy it needs for a spectacular display. Finding the right balance between these two types of fertilizers depends on your personal gardening philosophy and the specific needs of your site.
Always read the labels on commercial products to ensure they are appropriate for flowering climbers like the clematis. You should avoid high-nitrogen lawn fertilizers, as these will promote excessive leaf growth at the expense of your beautiful flowers. If you are unsure about your soil’s current nutrient levels, a simple soil test kit can provide valuable insights. Investing a little time in understanding your soil’s chemistry will make your fertilization efforts much more effective and efficient.
Managing deficiency symptoms
Learning to read the signs that your plant is hungry will help you intervene before the damage becomes significant. If the lower leaves are turning yellow and falling off prematurely, the plant may be suffering from a nitrogen deficiency. You should respond by applying a balanced liquid feed that can be quickly absorbed by the root system. Regular observation ensures that you can catch these early warning signs and keep the plant on a healthy track.
Purple or reddish tints on the leaves, especially during the cooler months, can sometimes indicate a lack of phosphorus. This nutrient is essential for energy transfer and root development, so a deficiency can lead to a generally weak and unproductive plant. You can address this by incorporating bone meal into the soil around the base of the climber. Ensure the soil is moist before applying any concentrated nutrients to prevent any potential shock to the roots.
Poor flowering or brittle stems are often linked to a lack of potassium, which is the key nutrient for reproductive health. You will notice that the blooms are smaller than usual or may fail to open fully if this mineral is in short supply. Adding a potash-rich fertilizer or wood ash in small quantities can help restore the balance and improve the quality of the flowers. Consistent feeding throughout the season is the best way to prevent these issues from occurring in the first place.
Environmental factors can sometimes mimic nutrient deficiencies, so it is important to rule out other causes first. Overwatering can lead to yellowing leaves by drowning the roots and preventing them from taking up the nutrients that are already in the soil. Similarly, a soil pH that is too high or too low can “lock up” certain minerals, making them unavailable to the plant. Checking your soil’s acidity and moisture levels before reaching for the fertilizer bag is a sign of a truly expert gardener.