Planting and propagation represent the initial stages of a successful journey with this versatile and hardy Mediterranean herb. You must approach the task with precision to ensure that your new plants have the best possible start in your garden environment. Whether you choose to start from seeds or use vegetative methods, understanding the biological needs of the species is crucial. A well-executed planting strategy lays the groundwork for a resilient herb patch that will provide harvests for many years.
Success in propagation requires a combination of patience and technical knowledge about the growth habits of the plant. You should recognize that while thyme is tough once established, it can be somewhat delicate during its earliest stages of development. Choosing the right time of year to start your project will significantly influence the survival rate of your young plants. By following professional standards, you can transform a single parent plant into a thriving collection of aromatic herbs for your entire landscape.
The transition from a controlled environment to the garden soil is a critical moment for any young seedling or cutting. You must harden off your plants gradually to prevent transplant shock and ensure they can handle the shifts in outdoor conditions. Pay close attention to the moisture levels in the soil during the first few weeks after planting to help the roots take hold. Once the plants show signs of new growth, you can be confident that your propagation efforts have been successful and the herbs are ready to grow.
Integrating propagated plants into your existing garden layout requires careful spatial planning to allow for future expansion. You should consider the final size and spread of the variety you are planting to avoid overcrowding as the herbs mature. Providing adequate space between plants ensures that each one receives enough light and air to stay healthy and productive. This thoughtful approach to planting and propagation is what separates an amateur garden from a professional, high-yielding agricultural space.
Choosing the perfect location
The first step in a successful planting project is identifying a site that meets all the physiological requirements of the herb. You should look for a spot that receives at least six to eight hours of direct sunlight every day without exception. Thyme thrives in high-light environments, which are necessary for the development of its essential oils and compact growth habit. Areas shaded by large trees or buildings are generally unsuitable and will lead to weak, flavorless plants that struggle to survive.
More articles on this topic
Soil drainage is the next most important factor you must evaluate before you even pick up a shovel or a trowel. You should observe the area after a heavy rain to see if water pools on the surface or if it disappears quickly into the ground. Thyme cannot tolerate “wet feet,” so if your soil is heavy and slow to drain, you will need to make significant adjustments. Creating a small mound or planting on a slight slope can help gravity assist in moving excess water away from the root zone.
Accessibility is a practical consideration that you should not overlook when choosing where to place your new herb bed. You will likely want to harvest fresh thyme frequently for cooking, so placing it near the kitchen or a main garden path is ideal. This also makes it easier for you to perform regular maintenance and keep an eye on the health of your plants. A conveniently located herb garden is much more likely to receive the attention it needs to remain in peak condition throughout the year.
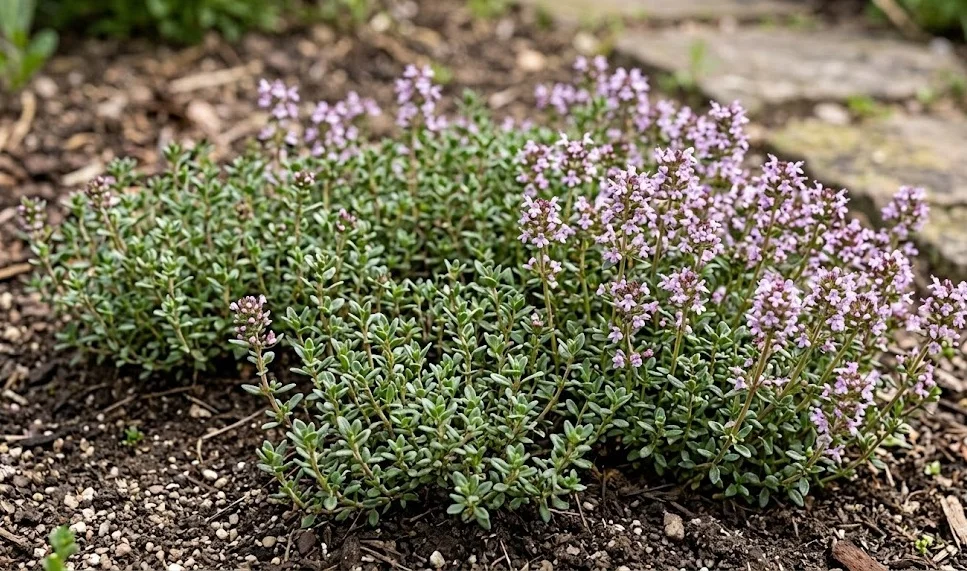
Finally, consider the potential for expansion and how the thyme will interact with the other plants in your garden design. You should ensure that the location provides enough room for the herbs to spread out and form a beautiful, dense groundcover over time. Think about the aesthetic impact of the silver-green foliage and tiny flowers on the overall look of your landscape. Choosing the right location from the beginning saves you the trouble of having to move the plants later, which can be stressful for the herb.
Sowing seeds from scratch
Starting thyme from seeds is an economical way to produce a large number of plants, though it does require a bit of extra time. You should start your seeds indoors about eight to ten weeks before the last expected frost date in your local area. Use a high-quality, fine-textured seed starting mix that provides excellent drainage while still holding onto a tiny bit of moisture. Sowing the seeds on the surface of the soil is important because they need light to trigger the germination process successfully.
More articles on this topic
Maintain a consistent temperature of around 20 degrees Celsius to provide the ideal conditions for the seeds to wake up and sprout. You should use a spray bottle to gently mist the soil surface, ensuring it stays damp but never completely saturated or soggy. It can take anywhere from two to three weeks for the first tiny green shoots to appear, so do not be discouraged if nothing happens immediately. Once the seedlings have emerged, provide them with plenty of light from a sunny window or a dedicated grow light.
Thinning out the seedlings is a necessary task that ensures the strongest plants have enough space and resources to grow. You should select the healthiest-looking individuals and remove the smaller ones to prevent overcrowding in the seed trays. As the young plants develop their first few sets of true leaves, you can begin to introduce them to a very diluted liquid fertilizer. This gentle boost helps build a strong root system and prepares the plants for the eventual move to their permanent outdoor home.
Hardening off your home-grown seedlings is the final and most important step in the indoor growing process. You should begin by placing the trays outside in a sheltered, shady spot for just an hour or two each day. Gradually increase their exposure to direct sunlight and wind over the course of a week or ten days to build up their resilience. This professional approach minimizes the risk of the plants wilting or dying when they are finally tucked into the garden soil.
Vegetative propagation techniques
If you already have a healthy thyme plant, using vegetative methods like stem cuttings is a fast and reliable way to get new plants. You should take cuttings in the late spring or early summer when the stems are flexible but starting to firm up slightly at the base. Choose healthy, non-flowering shoots and cut a piece about five to ten centimeters long using sharp, clean pruning shears. This method ensures that the new plants will be genetically identical to the parent, preserving any specific traits you admire.
Remove the leaves from the bottom half of the cutting to expose the nodes where the new roots will eventually emerge. You can dip the cut end into a rooting hormone powder to speed up the process, although thyme often roots quite well on its own. Insert the cuttings into a pot filled with a mix of sand and peat or a dedicated cutting substrate that drains very quickly. Keeping the cuttings in a warm place out of direct sunlight will help them focus their energy on developing a new root system.
Another effective vegetative method is layering, which involves rooting a stem while it is still attached to the main parent plant. You should identify a long, healthy branch and gently pin it down to the soil surface with a small piece of wire or a stone. If you slightly nick the underside of the stem where it touches the ground, it will encourage the plant to produce roots more quickly. After a few months, you can check for root development and then snip the new plant away from the mother once it is established.
Division is a third option that works best for older, larger clumps of thyme that have become a bit too crowded or woody. You should lift the entire plant out of the ground in early spring and gently pull the root ball apart into several smaller sections. Ensure that each new division has a healthy set of roots and at least a few green stems to support future growth. Replant these divisions immediately into prepared soil and water them well to help them settle into their new locations.
Successful transplanting practices
When it is time to move your propagated plants into the garden, the preparation of the planting hole is your first priority. You should dig a hole that is slightly larger than the root ball of the young plant to allow for easy root expansion. Mixing a small amount of compost into the bottom of the hole can provide a gentle source of nutrients for the initial weeks of growth. However, remember to keep the soil relatively lean to ensure the plant maintains its characteristic aromatic strength and hardy nature.
Carefully remove the plant from its container, taking care not to disturb the delicate roots more than absolutely necessary. You should place the herb in the hole at the same depth it was growing in its previous pot or tray. Burying the stem too deeply can lead to rot, while planting it too shallowly can cause the roots to dry out too quickly. Once the plant is in place, backfill the hole with soil and press down gently with your hands to remove any large air pockets.
Watering immediately after transplanting is essential to help the soil settle around the roots and reduce the initial stress on the plant. You should apply water slowly at the base of the herb, making sure it soaks deep into the ground rather than just running off the surface. For the first week or two, you will need to monitor the moisture levels more closely than you would for an established plant. Once you see new green growth appearing at the tips of the stems, you can gradually reduce the frequency of your watering.
Spacing your transplants correctly is the final step in ensuring a professional and high-yielding herb garden layout. You should leave about thirty to forty centimeters between each plant to allow for their final mature spread and to ensure good airflow. If you are planting a hedge or a solid groundcover, you might place them slightly closer together, but never so close that they are crowded. Following these transplanting practices will give your thyme the best possible chance to thrive and become a permanent fixture in your landscape.