Success with the Japanese dwarf cherry starts long before the first flower appears, beginning with the critical phases of planting and propagation. These initial stages determine the structural integrity and the future health of the shrub as it establishes itself in your garden. Whether you are starting with a nursery-bought specimen or trying to create new plants from existing ones, a professional approach is necessary. Following the correct protocols ensures that your efforts result in vigorous, beautiful plants that will enhance your landscape for years to come.
Optimal site selection and soil preparation
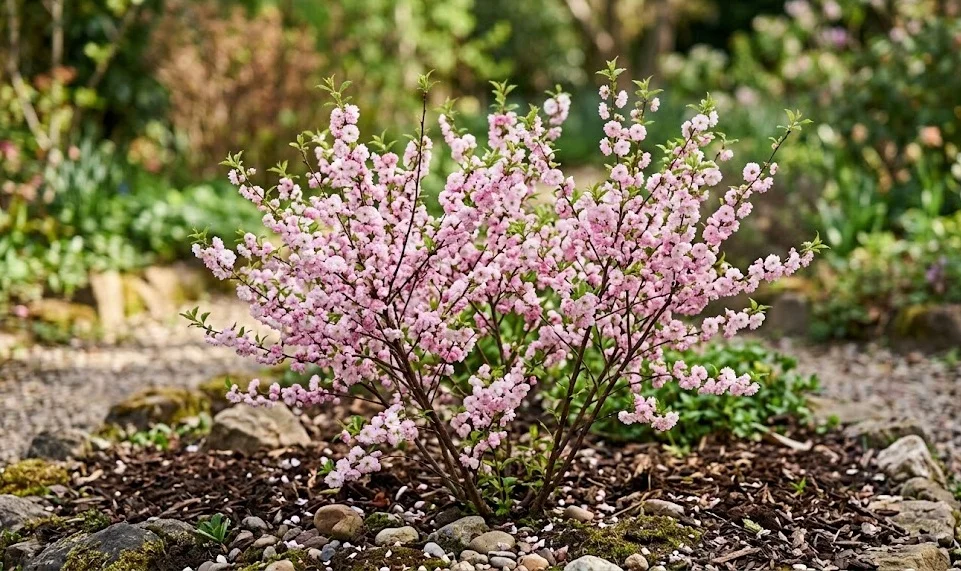
Choosing the right location for your Japanese dwarf cherry is the most important decision you will make in the planting process. This shrub requires a spot that receives ample sunlight to produce its signature profusion of spring blossoms. You should look for a position that offers at least six hours of direct light daily, preferably during the morning and early afternoon. However, in regions with very hot summers, a location with some light afternoon shade can prevent the foliage from becoming stressed.
Soil preparation is the next crucial step in ensuring the plant gets off to a strong start. You must ensure the ground is well-draining, as the Japanese dwarf cherry is highly sensitive to “wet feet,” which can cause root rot. Before planting, it is highly recommended to dig a hole that is twice as wide as the root ball to loosen the surrounding soil. This allows the young roots to expand more easily into their new environment without meeting excessive resistance.
Mixing organic matter into the excavated soil can provide a significant boost to the plant’s initial growth. Compost, leaf mold, or aged manure are excellent choices for improving soil structure and fertility. If the native soil is particularly heavy in clay, you might want to add some coarse sand or grit to improve the drainage further. A well-prepared planting site acts as a reservoir of nutrients and moisture that the young shrub can draw upon as it settles in.
Finally, consider the long-term space requirements of the shrub when selecting your site. While it is a dwarf variety, it still needs enough room for air to circulate freely around its canopy once it reaches its full size. Avoid planting too close to walls or larger trees that might compete for water and nutrients. Proper spacing is essential for maintaining the health of the plant and preventing the spread of diseases that thrive in crowded, stagnant conditions.
More articles on this topic
Professional planting techniques for success
The actual act of planting the Japanese dwarf cherry requires precision and care to avoid damaging the delicate root system. Once you have prepared the hole, place the shrub inside and ensure that it sits at the same depth it was in its previous container. Planting too deep can suffocate the roots and lead to trunk rot, while planting too shallow can cause the roots to dry out. It is often helpful to have a second pair of eyes to check the level from a distance.
As you backfill the hole with the amended soil, do so in layers and firm each layer gently with your hands. This process helps to eliminate large air pockets that could cause the roots to lose contact with the soil. You should avoid tamping the soil down too hard with your feet, as this can lead to compaction and hinder water penetration. The goal is to create a stable environment that still allows for easy movement of air and moisture.
Immediately after planting, the shrub requires a deep and thorough watering to help settle the soil and reduce transplant shock. You should apply the water slowly so that it soaks deep into the ground rather than running off the surface. Creating a small soil basin or “well” around the base of the plant can help direct the water exactly where it is needed. This initial hydration is critical for the plant to begin the process of repairing any root damage sustained during the move.
Applying a layer of mulch around the base of the newly planted shrub provides numerous benefits for establishment. A three-inch layer of wood chips or shredded bark helps to conserve moisture and regulate the temperature of the soil during the first critical weeks. Ensure that the mulch does not touch the trunk of the plant, as this can trap moisture against the bark and encourage decay. With these steps completed, your Japanese dwarf cherry is well-positioned to begin its new life in your garden.
More articles on this topic
Propagation through softwood and hardwood cuttings
Propagating the Japanese dwarf cherry is a rewarding way to expand your garden collection or share plants with fellow gardeners. Softwood cuttings are typically taken in early to mid-summer when the plant is actively growing. You should select healthy, non-flowering shoots that are flexible but firm enough to snap when bent sharply. These cuttings usually root more quickly than hardwood ones, but they require more careful monitoring of humidity levels to prevent wilting.
Hardwood cuttings, on the other hand, are taken during the dormant season in late autumn or early winter. You should choose mature wood from the previous season’s growth, usually about the thickness of a pencil. These cuttings are more resilient and can be started in a sheltered spot outdoors or in a cold frame. While they take longer to develop roots, they often produce very sturdy young plants that are well-adapted to the local climate.
Regardless of the type of cutting you choose, using a rooting hormone can significantly increase your success rate. Dip the cut end into the hormone powder or liquid before inserting it into a well-draining rooting medium, such as a mix of peat and perlite. Keeping the environment consistently moist but not soggy is the key to encouraging the development of new roots. You should also provide indirect light and protect the cuttings from extreme temperature changes during this delicate phase.
Once the cuttings have developed a strong root system, they can be transplanted into individual pots to continue their growth. It is important to “harden off” the young plants by gradually exposing them to outdoor conditions before planting them in their permanent locations. This process prevents shock and ensures that the new Japanese dwarf cherry specimens are strong enough to survive on their own. Propagation requires patience, but the sight of a new plant growing from a simple cutting is incredibly satisfying.
Long-term care for young and propagated plants
The first year of life for a newly planted or propagated Japanese dwarf cherry is the most critical for its long-term health. You must be diligent about watering, especially during dry spells, as the root system is not yet deep enough to find moisture on its own. However, you should still be careful not to overwater, as the young roots are particularly vulnerable to rot. Developing a consistent schedule based on the weather will help the plant thrive through its first full cycle of seasons.
Avoid the temptation to fertilize heavily during the first growing season, as the plant needs to focus on root establishment rather than lush top growth. A small amount of balanced, slow-release fertilizer can be applied in the spring of the second year once the plant shows signs of vigorous new growth. Over-fertilizing young plants can lead to weak, spindly branches that are more susceptible to damage from wind or snow. Building a strong structural foundation is far more important than rapid height gain in the early years.
Pruning should also be kept to a minimum during the establishment phase, focusing only on removing dead or damaged wood. You want the plant to retain as much foliage as possible to maximize photosynthesis and provide energy for root development. As the shrub matures, you can begin to shape it according to your aesthetic preferences. Early intervention should always be light-handed to avoid stressing the young specimen unnecessarily.
Finally, keep a close eye on the health of your young plants and be ready to address any issues immediately. Young Japanese dwarf cherries are often more attractive to pests like aphids or mites than established ones. Regularly checking the new growth will allow you to catch and treat these problems before they can cause significant damage. With proper care and attention during these formative stages, your plants will grow into robust and beautiful features of your garden.