
Successful establishment begins with a suitable planting site and a clear plan for controlling future spread. Japanese blood grass grows best when its roots receive moisture, oxygen and warmth in balanced proportions. Propagation is normally carried out by division because this preserves the red-leaved characteristics more reliably than seed. Every new division should be inspected carefully so that ordinary green cogon grass is not distributed accidentally.
Preparing the planting site
Select a position with strong sunlight, free air movement and soil that does not remain saturated after heavy rain. A sunny site encourages red pigmentation and helps the foliage maintain a firm, vertical habit. In very hot inland climates, some light protection during the most intense afternoon heat may reduce scorching. Deep shade is unsuitable because it produces greener, weaker and less distinctive plants.
Clear perennial weeds before planting because their roots can become tangled with the grass rhizomes. This is especially important with creeping weeds that are difficult to remove once an ornamental clump has formed. Loosen the soil across a broad area rather than digging only a narrow planting hole. Broad preparation allows new roots to move into the surrounding ground without meeting a compacted boundary.
Heavy soil may require organic matter to improve structure, but drainage problems should not be addressed with compost alone. Where water collects naturally, consider a raised bed, a gentle mound or a different planting position. Gravel placed only at the bottom of a planting hole does not reliably solve poor drainage and may create a perched water zone. The entire rooting area must allow surplus water to move away.
Check local regulations before purchasing or dividing Japanese blood grass. The species from which ornamental red forms originate is invasive in several regions and may be prohibited. Even where cultivation is legal, the planting site should allow easy inspection and containment. Avoid placing it beside streams, field margins, woodland edges or other routes into unmanaged land.
More articles on this topic
Planting in the ground
Water the plant in its nursery container before planting so the root ball is evenly moist. Slide it from the pot and inspect the roots, rhizomes and foliage for damage or green reversion. Loosen tightly circling roots carefully without breaking the crown into weak fragments. Remove any suspicious green shoot together with the connected rhizome before the plant enters the garden.
Dig a hole approximately twice the width of the root ball and close to the same depth. The upper surface of the root mass should sit level with the surrounding soil. Planting too deeply can keep the crown wet and reduce oxygen around emerging shoots. Planting too high may expose roots and cause the root ball to dry rapidly.
Backfill with the excavated soil, incorporating only a modest amount of mature compost when the ground is very poor. A strongly enriched planting pocket can produce a sharp contrast between the hole and the surrounding soil, discouraging roots from spreading normally. Firm the soil gently with your hands rather than stamping heavily around the plant. Water slowly and thoroughly to settle the soil around fine roots.
Space plants according to their expected mature width and the level of control required. Close planting creates a faster massed effect but makes individual clumps harder to inspect for reversion. Wider spacing improves airflow and simplifies division or containment. Apply a shallow mulch after planting, leaving a small clear area around the base of the shoots.
More articles on this topic
Propagating by division
Division is best carried out in spring as new growth begins or just before active growth becomes vigorous. At this stage, the soil is workable and the divisions have months to establish before winter. Water the parent plant the previous day if conditions are dry. Moist soil holds the root system together more effectively and reduces stress during lifting.
Dig around the clump with a sharp spade, working far enough from the crown to preserve useful roots. Lift the entire plant when possible, especially if the purpose is to rejuvenate an old or congested specimen. Shake or wash away enough soil to reveal the direction of the rhizomes. This inspection is valuable because reverted green sections can be identified and separated from desirable red growth.
Cut the clump into sections containing several healthy shoots, firm rhizomes and a reasonable mass of fibrous roots. Very small pieces may survive, but they take longer to become ornamental and are more vulnerable to drying. Use clean, sharp tools to make decisive cuts rather than crushing the crown. Discard rotten, hollow, badly damaged or entirely green sections.
Replant the divisions promptly at the same depth at which they were previously growing. If planting is delayed, keep the roots shaded, cool and wrapped in damp material. Water each division thoroughly and maintain consistent soil moisture while new roots develop. Temporary light shade may help divisions made during unexpectedly warm weather, but it should be removed once the plants recover.
Aftercare and responsible establishment
Freshly planted divisions require more attention than established clumps because their reduced roots cannot yet supply a large leaf area efficiently. Keep the soil evenly moist but avoid watering automatically when it is already wet. Test the soil several centimetres below the surface before adding more water. Wilting during hot afternoons may indicate temporary transplant stress rather than permanent drought.
Do not apply strong fertiliser immediately after division. Damaged roots are sensitive to concentrated salts, and forced top growth can exceed the capacity of the recovering root system. A light application of balanced, slow-release fertiliser may be used only if the soil is genuinely poor. In most prepared garden soils, water and warmth are more important than feeding during early establishment.
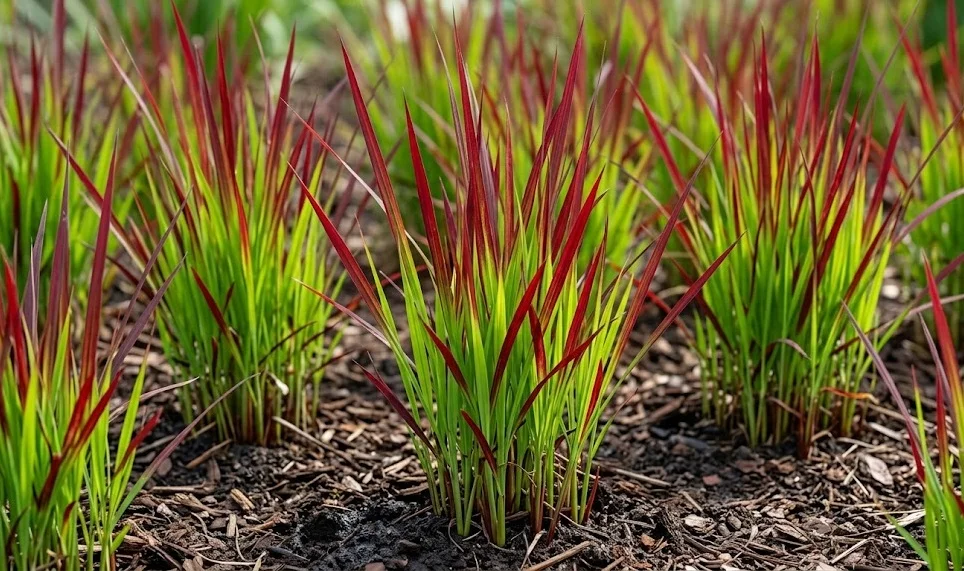
Inspect new growth throughout the first season. Normal ornamental leaves may emerge green at the base and gradually develop red from the tips, particularly in strong light. Shoots that remain completely green and grow more vigorously should be removed below ground. Delaying removal allows the reverted portion to build a larger rhizome network.
Avoid giving divisions to other gardeners unless the plant is legal in their area and every piece has been checked carefully. Soil attached to the roots may conceal small rhizome fragments from ordinary green growth. Plant waste should be contained during transport and disposed of responsibly. Careful propagation protects both the quality of the cultivar and the wider environment.