Planting star jasmine well gives the plant the best possible start and reduces maintenance later. It needs a warm position, prepared soil, reliable drainage, and enough space for mature growth. Propagation is also possible with patience, especially from semi-ripe cuttings. When planting and propagation are timed carefully, the results are stronger, healthier, and more predictable.
Preparing the site before planting
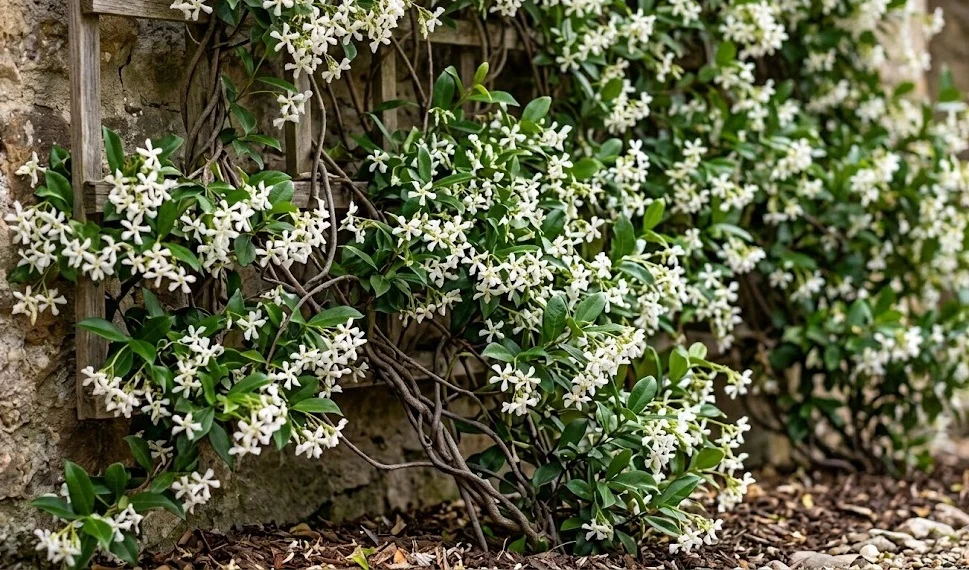
The best planting site is bright, sheltered, and free from persistent waterlogging. Star jasmine grows well against walls, fences, pergolas, and trellises. These structures give support and often create a warmer microclimate. A protected site also helps reduce winter stress and wind scorch.
Before planting, clear weeds from the area thoroughly. Young star jasmine does not compete well with vigorous weeds during establishment. Perennial weeds should be removed with as much root as possible. Clean soil allows the new root system to spread without competition.
Improve the planting area with compost or well-rotted organic matter. This helps the soil hold moisture while still draining properly. Avoid burying large amounts of fresh manure directly against the roots. Fresh, strong organic material can burn young roots or cause unstable nutrient release.
Check the mature size before choosing the spacing. Star jasmine can cover a large area when it is happy. Planting too close to doors, gutters, or delicate shrubs may create problems later. Good spacing makes training and pruning much easier.
More articles on this topic
Planting in the ground and in containers
Plant star jasmine when the soil is workable and temperatures are not extreme. Spring is often ideal because the plant has a full growing season to establish. Early autumn can also work in mild regions. Avoid planting into frozen, saturated, or drought-stressed soil.
Dig a planting hole that is wider than the root ball but not excessively deep. The plant should sit at the same depth as it did in its pot. Planting too deeply can trap moisture around the stem base. Firm the soil gently after backfilling to remove large air pockets.
Water thoroughly after planting. This settles the soil around the roots and starts the establishment process. Add a mulch layer over the root zone to conserve moisture. Keep the mulch a little away from the main stem to reduce the risk of rot.
For containers, choose a sturdy pot that will not tip over once the plant climbs. The pot should have drainage holes and enough volume for root development. Use a free-draining, fertile growing medium. Position the support before or during planting to avoid damaging roots later.
More articles on this topic
Training young plants after planting
Training should begin soon after planting, while shoots are still flexible. Fan the stems out rather than tying them all in one vertical line. This encourages fuller coverage and more balanced growth. A broad framework also improves light distribution across the plant.
Use soft ties that hold the stems gently. Tight wire, narrow string, or rough fasteners can cut into the bark. Check ties several times during the growing season. Young shoots can thicken quickly when conditions are good.
Do not force stems sharply around a support. Although star jasmine is flexible, young shoots can snap if bent too hard. Guide them gradually and secure them at natural angles. Patient training produces a stronger and more attractive plant.
After planting, avoid heavy pruning unless shoots are damaged. The plant needs leaves to produce energy and establish roots. Light trimming can be used to remove broken or crossing stems. Major shaping is better once the plant is actively growing and settled.
Propagating from cuttings
Semi-ripe cuttings are the most practical propagation method for star jasmine. These are taken from shoots that are partly firm but not fully woody. Late summer is often a suitable time. The cutting should be healthy, pest-free, and taken from non-flowering growth where possible.
Cut a short section just below a leaf node. Remove the lower leaves to expose a clean stem section. The upper leaves can be reduced if they are large and losing too much moisture. This helps the cutting balance water loss while roots develop.
Insert the cuttings into a free-draining propagation mix. A blend of compost and perlite or grit can work well. Keep the medium lightly moist but not wet. Excess water can rot the stem before roots form.
Warmth, humidity, and patience are important. A clear cover or propagator can help maintain humidity, but it should be ventilated regularly. Roots may take several weeks or longer to form. Once rooted, young plants should be grown on gently before being planted outside.