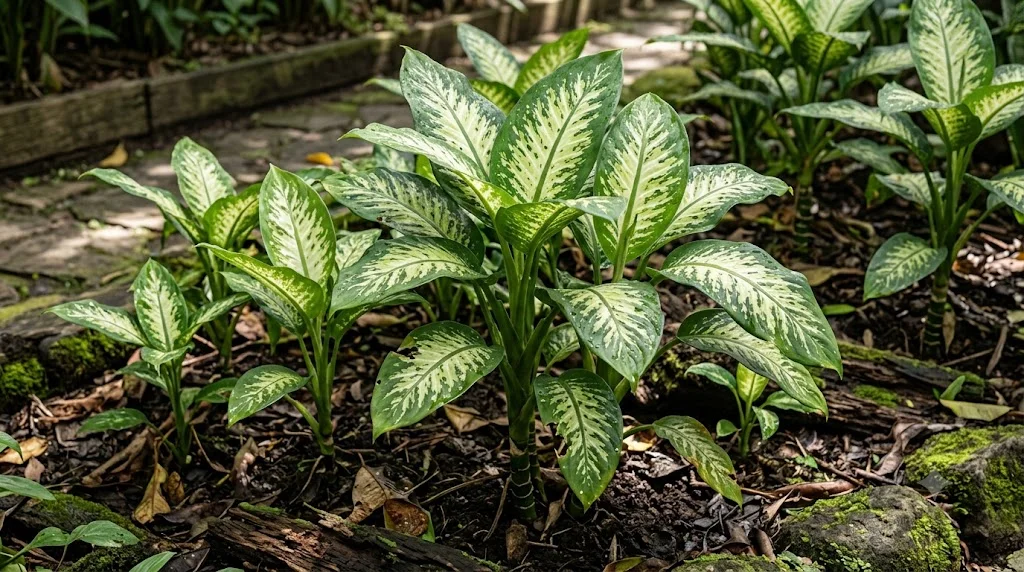

Winter places dumb cane under conditions very different from those of its tropical habitat. Short days, dry heated air, cold windows, and slower compost drying can all create stress. Successful overwintering depends on warmth, careful watering, adequate light, and freedom from sudden temperature changes. The aim is not to force rapid growth, but to keep the plant stable until stronger spring light returns.
Preparing the plant for colder months
Begin adjusting care in early autumn as daylight noticeably decreases. Reduce fertiliser applications because the plant’s nutrient demand falls with slower growth. Extend the interval between waterings while continuing to check the compost rather than following dates. Gradual changes are less stressful than an abrupt shift in routine.
Inspect the plant closely before winter. Remove dead leaves and check the undersides of foliage for pests. Clean dust from broad leaf surfaces so they can capture as much available light as possible. Treat any infestation before dry indoor heating encourages rapid reproduction.
A plant that is severely root-bound may struggle to regulate moisture during winter. However, major repotting is usually better completed in spring unless drainage is failing or rot is present. If the plant is healthy, postpone unnecessary root disturbance. Stable conditions are more valuable than fresh compost during the darkest months.
Move the plant before cold weather becomes established. A position that was safe in summer may become exposed to icy window glass or door drafts. Choose a bright, sheltered location with steady warmth. Avoid repeated moving once the plant has adjusted.
More articles on this topic
Providing light and warmth in winter
Place dumb cane near the brightest suitable window while protecting it from cold glass. A sheer curtain may no longer be necessary on dull winter days, although intense direct sun can still scorch leaves in some climates. Rotate the pot slightly every few weeks to maintain balanced growth. Do not turn it constantly, because leaves need time to reorient toward the light.
If natural light is very limited, a full-spectrum grow light can help maintain leaf quality. Position it according to the manufacturer’s recommended distance to prevent heat damage or inadequate intensity. A daily period of approximately ten to twelve hours is often suitable. The plant should still receive a regular dark period.
Maintain temperatures above roughly 16 degrees Celsius, with warmer conditions preferred. Night-time cooling beside windows can be greater than expected even when the room feels comfortable. A simple thermometer near the plant reveals local fluctuations. Move the pot back from the glass during very cold nights.
Keep the plant away from radiators and forced-air heating vents. Hot, dry airflow can desiccate leaves while the root zone remains cool and wet. This imbalance often causes brown tips and weak growth. A stable position with gentle room circulation is more suitable.
More articles on this topic
Adjusting water and humidity
Winter watering should be less frequent because lower light reduces transpiration. Allow the upper compost layer to dry before watering thoroughly. Never leave residual water in a saucer or decorative pot. Cold saturated compost creates a high risk of root rot.
Do not reduce watering by giving tiny amounts. Small sips may wet only the surface while leaving parts of the root ball dry. Apply enough water to reach all roots, then allow complete drainage. The longer interval between thorough waterings provides the necessary drying period.
Indoor heating can lower humidity dramatically. A humidifier is the most effective way to improve conditions around several tropical plants. Grouping plants can also provide a modest local benefit. Keep foliage away from cold, damp surfaces where condensation may encourage spotting.
Brown leaf margins in winter can have several causes. Dry air is common, but fertiliser salts, hard water, root damage, and cold drafts may create similar symptoms. Check the entire environment before increasing humidity alone. Correcting one factor will not solve a problem caused by another.
Returning to active spring care
As days lengthen, watch for faster drying and fresh leaf growth. Increase watering gradually rather than suddenly keeping the compost constantly moist. The roots need time to resume stronger activity. Continue checking moisture before every watering.
Resume fertiliser only when active growth is clearly visible. Begin with a diluted dose to avoid shocking roots after the winter pause. Regular feeding can then continue at moderate intervals. Plants kept under grow lights may restart earlier than those relying only on natural light.
Spring is a suitable time to prune stretched stems or remove winter-damaged foliage. It is also the preferred season for repotting and propagation. Inspect the roots if the plant remained unusually wet or wilted during winter. Addressing hidden root problems early supports stronger summer growth.
Do not move the plant directly into intense spring sunlight. Leaves formed under weak winter light are especially susceptible to scorch. Increase exposure gradually over one or two weeks. A careful transition preserves existing foliage and encourages compact new growth.