Establishing a new colony of these hardy perennials requires proper timing and a careful choice of location. The ideal period for planting dry tubers is during their late summer dormant phase, just before the autumn growth begins. This allows the root system to establish itself immediately as the cooler autumn rains arrive. Proper initial placement ensures that the colony will thrive and expand for many decades without needing relocation.
When selecting the perfect spot, look for areas under deciduous trees that offer summer shade and winter light. The soil must be exceptionally well-drained, as stagnant water is the absolute greatest enemy of these tubers. A gentle slope or a naturally elevated position within the garden works beautifully to prevent winter waterlogging. Observing the garden’s water patterns after a heavy rain helps identify the safest zones for planting.
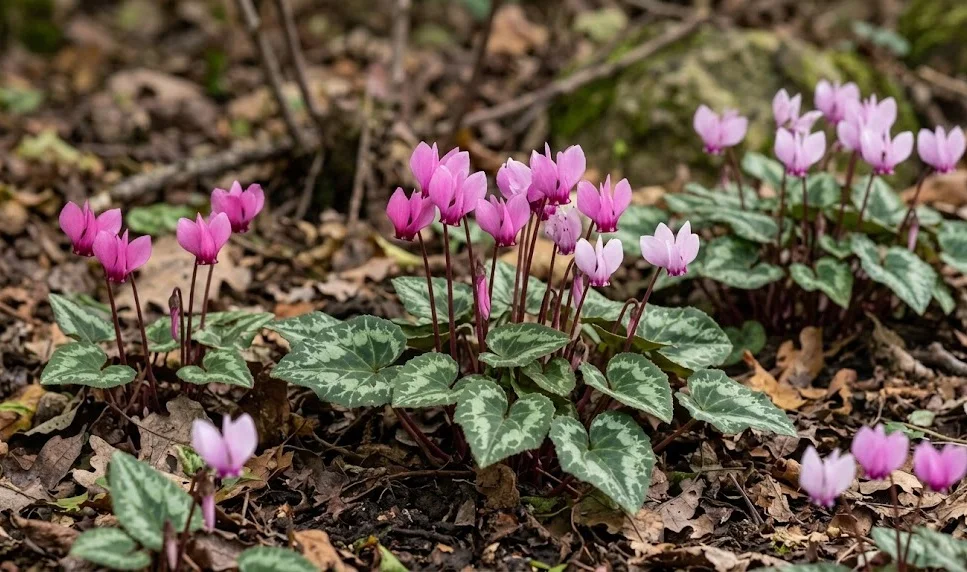
We must also consider the proximity of other plants to ensure our new additions have room to develop. Avoid areas dominated by aggressive ground covers that might smother the delicate cyclamen seedlings and flowers. Delicate woodland companions, such as snowdrops or early crocuses, make excellent partners because they share similar growth cycles. Planning the layout thoughtfully creates a harmonious community that requires minimal future intervention.
Preparation of the planting site should begin a few weeks before the actual installation of the tubers. Clear the area of all perennial weeds, taking care to remove their roots completely from the soil matrix. Incorporate a generous amount of leaf mold or well-composted organic matter to enrich the top few inches of earth. This preparation creates a welcoming, nutrient-rich environment that encourages immediate root development upon planting.
Correct installation techniques
The actual depth at which the tuber is placed plays a critical role in its future growth and survival. Dig a shallow, wide hole that easily accommodates the entire width of the tuber without crowding. Place the tuber so that its top sits roughly one to two inches below the final soil surface level. Planting too deeply can suppress flower production, while planting too shallowly leaves the tuber vulnerable to extreme weather.
More articles on this topic
Identifying the correct orientation of the tuber is essential for preventing structural growth problems later on. The top surface is typically smooth, slightly concave, and occasionally shows old stem scars from previous seasons. The bottom is usually rounded and may feature small, fibrous root remnants from its past growth cycle. If the orientation is ambiguous, planting the tuber on its side is a safe alternative that allows the plant to adjust naturally.
Once the tuber is properly positioned in the hole, gently backfill the area with the prepared soil mixture. Firm the soil lightly with your hands to eliminate large air pockets, taking care not to press too hard against the tuber. Water the area thoroughly immediately after planting to settle the soil and activate the root initials. Finish the process by applying a thin layer of fine gravel mulch to protect the surface from erosion.
Spacing between multiple tubers should be planned according to the desired speed of coverage and long-term design goals. Setting the tubers roughly six to eight inches apart allows ample room for individual expansion over the years. Over time, the gaps will naturally fill in as the tubers grow larger and self-seeding occurs. This initial spacing balances immediate visual appeal with the long-term biological needs of the colony.
Seed harvesting and preparation
Propagation from seed is the most rewarding method for expanding a collection and producing large quantities of plants. After successful pollination in autumn, the flower stems twist into tight, spring-like coils that pull the seed pods close to the ground. These pods develop slowly over the winter and spring months, ripening during the following summer. Monitoring the pods closely in July ensures that the seeds are harvested before the pods burst open naturally.
More articles on this topic
When the pods turn brown and develop a slightly soft texture, they are ready for immediate collection. Inside, you will find relatively large, sticky seeds coated in a sugary substance known as an elaiosome. This sticky coating is designed to attract ants, which naturally disperse the seeds throughout the woodland ecosystem. Harvesting the pods just as they begin to split open allows you to collect the seeds efficiently before they disappear.
Fresh seeds possess a high germination rate and should ideally be sown immediately after harvesting for best results. If immediate sowing is not possible, the seeds must be soaked in warm water for twenty-four hours to remove germination inhibitors. Use a seed tray filled with a gritty, loam-based compost mixed with equal parts sharp sand. Sowing the seeds thinly ensures that the emerging seedlings will have enough space and resources during their first year.
Cover the seeds with a layer of grit that matches the depth of the seeds themselves, then water them gently. The seed trays should be placed in a shaded, cool frame outdoors where they can experience natural temperature fluctuations. Germination typically occurs in late autumn or winter, appearing as single, tiny green leaves pushing through the grit. Patience is required, as these young seedlings will take several years of careful management before producing their first flowers.
Tuber management and division
While self-seeding is the primary natural method of expansion, established tubers can occasionally be divided for propagation. This method is best reserved for older, exceptionally large tubers that have developed multiple growing points over time. The process must be executed during the peak of summer dormancy when the plant is completely inactive. Handling the mature structures with extreme care minimizes the risk of introducing destructive fungal pathogens.
Gently lift the large tuber using a garden fork, taking care to dig wide enough to avoid slicing the flesh. Brush away the loose soil to clearly expose the surface and locate the natural division lines or distinct growth crowns. Using a sterilized, sharp knife, carefully slice the tuber into sections, ensuring each piece retains at least one healthy bud. Clean cuts heal much faster and are less prone to infection than jagged, torn surfaces.
Treat the cut surfaces immediately with sulfur powder or charcoal dust to protect the open wounds from rot. Allow the divided pieces to dry in a shaded, well-ventilated area for a few days so a protective callosity can form. Once the wounds are sealed, the new sections can be replanted immediately into their permanent garden positions. Follow the standard planting guidelines regarding depth, soil composition, and initial watering to support their recovery.
Replanted divisions require close monitoring during their first active season to ensure successful establishment. They may produce fewer flowers in the first autumn as they redirect their energy toward repairing and expanding their root networks. Avoid disturbing the soil around these new plants for at least two years to let them stabilize completely. With proper care, these divisions will quickly recover and develop into independent, floriferous colonies.