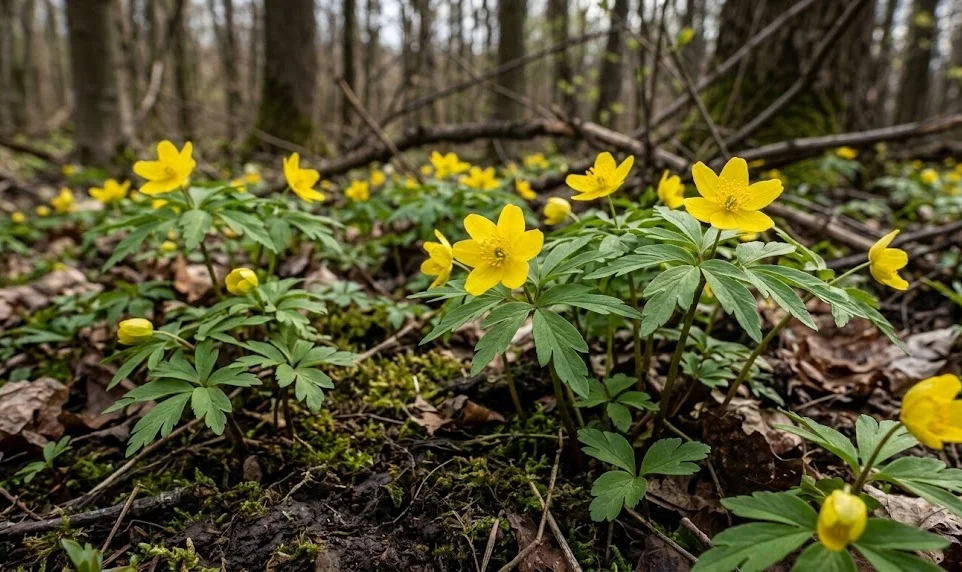
The successful planting and propagation of the yellow wood anemone depend on your ability to replicate its natural woodland lifecycle. This charming spring perennial is characterized by its creeping rhizomes, which allow it to form extensive and colorful colonies over time. Whether you are starting with purchased roots or dividing an existing patch, timing and technique are the most critical factors for success. Professional results require patience and a focus on maintaining the health of the underground structures throughout the entire process.
When planning your planting project, you must first identify a location that offers the correct balance of light and soil structure. The yellow wood anemone is a true forest dweller, thriving in the dappled light found beneath deciduous trees. In these areas, the soil is naturally enriched with decaying organic matter, providing the nutrients necessary for robust growth. Proper preparation of the site will ensure that your new plants settle in quickly and begin to spread in their first few seasons.
The propagation of this species can be achieved through several methods, each with its own set of advantages and challenges. Division of the rhizomes is the most common and reliable way to increase your stock, especially for home gardeners. Growing from seed is also possible, though it requires a longer time commitment and specific environmental cues to trigger germination. Regardless of the method you choose, understanding the biology of the plant will help you avoid common pitfalls and achieve a beautiful, naturalized look.
Finally, the long-term success of your planting efforts relies on post-planting care and monitoring. New plants are more sensitive to environmental stress than established colonies and require consistent moisture to develop strong roots. You should watch for signs of growth in the spring following a fall planting, as this indicates successful establishment. With the right approach, you can transform a shaded corner of your garden into a vibrant sea of yellow blooms that returns year after year.
Site selection and soil preparation
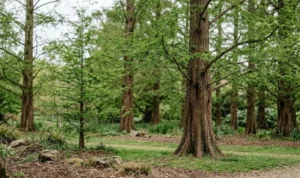
The first step in planting is selecting a site that mimics the natural woodland conditions where these anemones flourish. You should look for a spot that receives plenty of bright light in the early spring but is shaded during the hot summer months. Deciduous trees provide the perfect canopy, as they are leafless when the anemones bloom and provide deep shade once the trees leaf out. This seasonal transition is essential for the plant’s ability to photosynthesize and then safely enter dormancy.
More articles on this topic
Soil preparation is the most labor-intensive part of the planting process but yields the greatest long-term rewards. You must ensure the soil is loose, well-draining, and rich in organic matter to support the spreading rhizomes. Incorporating several inches of compost or well-rotted leaf mold into the top layer of the soil is highly recommended. This improves the soil structure and provides a slow-release source of nutrients that the plants will need as they establish themselves.
Drainage is another non-negotiable factor that you must address during the site preparation phase. While these plants enjoy consistent moisture, they will quickly rot if they are forced to sit in waterlogged soil. If your garden has heavy clay, you may need to create slightly raised beds or add grit to improve the drainage capacity. A professional tip is to observe the site after a heavy rain to ensure there is no standing water in the intended planting area.
Before you begin planting, it is also wise to clear the area of any perennial weeds or aggressive grasses. These competitors can easily overwhelm the slow-growing anemones before they have a chance to fill in. Hand-weeding is the safest method, as it allows you to remove the entire root system of the weeds without disrupting the surrounding soil structure. Once the ground is clear and amended, you are ready to introduce the anemone rhizomes to their new home.
Planting techniques for rhizomes
The best time to plant yellow wood anemone rhizomes is in the late summer or early autumn when the plants are dormant. At this stage, the rhizomes are essentially “sleeping” and can be handled with minimal stress to the plant. You should look for rhizomes that are firm, plump, and free from any signs of mold or soft spots. Healthy rhizomes usually look like small, brownish sticks and may have tiny buds already forming along their length.
More articles on this topic
When planting, you should place the rhizomes horizontally in a shallow trench about two to three inches deep. Space them approximately four to six inches apart to allow room for the colony to expand naturally over the next few years. It is important not to plant them too deeply, as this can delay their emergence in the spring or even cause them to fail. Gently cover the rhizomes with the prepared soil and firm it down lightly to remove any large air pockets.
After the rhizomes are in the ground, you should water the area thoroughly to help settle the soil around the roots. This initial watering is crucial for ensuring good soil-to-rhizome contact, which triggers the development of fine feeder roots. Even though the plant is dormant, it will begin to establish its root system before the ground freezes for the winter. Maintaining a baseline level of moisture throughout the autumn will give your new plants the best possible start.
A finishing touch for any professional planting job is the application of a thin layer of organic mulch. This helps to regulate soil temperature, retain moisture, and protect the shallow rhizomes from the “heaving” caused by freeze-thaw cycles. You can use shredded leaves or fine bark mulch, making sure the layer is no more than an inch thick. This protective barrier will keep the rhizomes safe until they are ready to push through the soil in the coming spring.
Propagation by division
Division is the most effective way to multiply your yellow wood anemone collection once you have an established patch. You should perform this task in the late summer or early autumn, just like initial planting, once the foliage has completely died back. By lifting and dividing the colony every few years, you prevent overcrowding and keep the plants vigorous. This process also allows you to share these beautiful woodland flowers with friends or move them to other parts of your garden.
To divide the plants, you should carefully lift a section of the soil containing the rhizomes using a garden fork. Shake off the excess soil to reveal the network of interconnected rhizomes, which can often be quite extensive. You can then gently break or cut the rhizomes into smaller sections, making sure each piece has at least one or two growth buds. It is better to have a few larger, healthy pieces than many tiny fragments that may struggle to survive.
Once you have your divisions, you should replant them as soon as possible to prevent the delicate roots from drying out. If you cannot plant them immediately, keep them in a cool, shaded spot wrapped in damp newspaper or tucked into a bag of moist peat moss. The same planting depth and spacing rules apply to divisions as they do to new rhizomes. Treating the divisions with care ensures they will recover quickly and bloom the following spring.
One of the benefits of division is that it rejuvenates older colonies that may have become less productive over time. You will often find that the center of an old patch becomes sparse while the edges remain vigorous. By lifting the whole group and replanting the healthiest pieces, you can restore the lush, full look of the original planting. Professional gardeners often use this technique to maintain a consistent aesthetic in high-profile woodland borders.
Seed propagation methods
Propagating yellow wood anemones from seed is a more advanced technique that requires an understanding of natural stratification. In the wild, the seeds drop to the forest floor in early summer and must endure a period of warmth followed by cold winter temperatures. To replicate this, you should sow the seeds immediately after they are harvested from the plant while they are still fresh. Dried seeds often enter a deep dormancy that can be very difficult to break without professional equipment.
You should sow the seeds in a seed tray filled with a high-quality, leaf-mold-based compost that is kept consistently moist. Place the tray in a cold frame or a sheltered spot outdoors where it will be exposed to the natural temperature changes of the seasons. It is important to protect the tray from heavy rain and scavenging birds or mice that might eat the seeds. Germination usually occurs the following spring, although some seeds may take two full years to appear.
The seedlings are very small and delicate when they first emerge, requiring careful attention to moisture and light. You should keep them in a shaded spot and ensure the soil never dries out, as even a brief period of drought can be fatal. During their first year, the seedlings will focus on developing a small rhizome and may only produce a single leaf. Avoid the temptation to transplant them too early; they are much more likely to survive if left undisturbed for their first full growing season.
Growing from seed is a slow process, and it may take three to five years before the new plants are large enough to flower. However, this method allows for greater genetic diversity within your garden and can lead to interesting variations in bloom size or color. It is also the most cost-effective way to produce a large number of plants if you are looking to naturalize a large woodland area. For the patient gardener, the reward of seeing a sea of yellow flowers grown from your own seeds is unparalleled.